2004 georgie boy pursuit how to manually retract slide out

The 2004 Georgie Boy Pursuit slide-out system offers convenience, but manual retraction may be needed due to electrical issues or maintenance.

Overview of the Slide-Out Mechanism

The 2004 Georgie Boy Pursuit’s slide-out room extends and retracts using an electric motor connected to a gear and rail system. This mechanism allows for increased living space within the RV while traveling. Typically, operation is controlled via a wall-mounted switch, activating the motor to smoothly move the room in or out. However, the system incorporates a manual override feature, crucial when the electric motor fails or encounters issues.

Understanding this override is vital for regaining control of the slide-out. The system relies on robust rails and locking mechanisms to ensure stability during both travel and use. Regular maintenance, including lubrication of these components, is essential for smooth operation and preventing binding. Knowing the basic function of each part aids in troubleshooting and safe manual retraction procedures.

Common Issues Leading to Manual Retraction

Several factors can necessitate manual retraction of the 2004 Georgie Boy Pursuit’s slide-out. A frequently encountered problem is a blown fuse or tripped circuit breaker within the RV’s electrical system, halting motor function. Low battery voltage can also prevent sufficient power from reaching the slide-out motor. Mechanical binding, caused by debris or misalignment of the slide-out rails, creates resistance, potentially damaging the motor if forced.

Furthermore, motor failure itself is a possibility over time. Occasionally, the control switch malfunctions, preventing signals from reaching the motor. Identifying the root cause is crucial before attempting manual retraction, ensuring you don’t exacerbate the underlying issue and potentially causing further damage to the system.

Tools and Safety Precautions

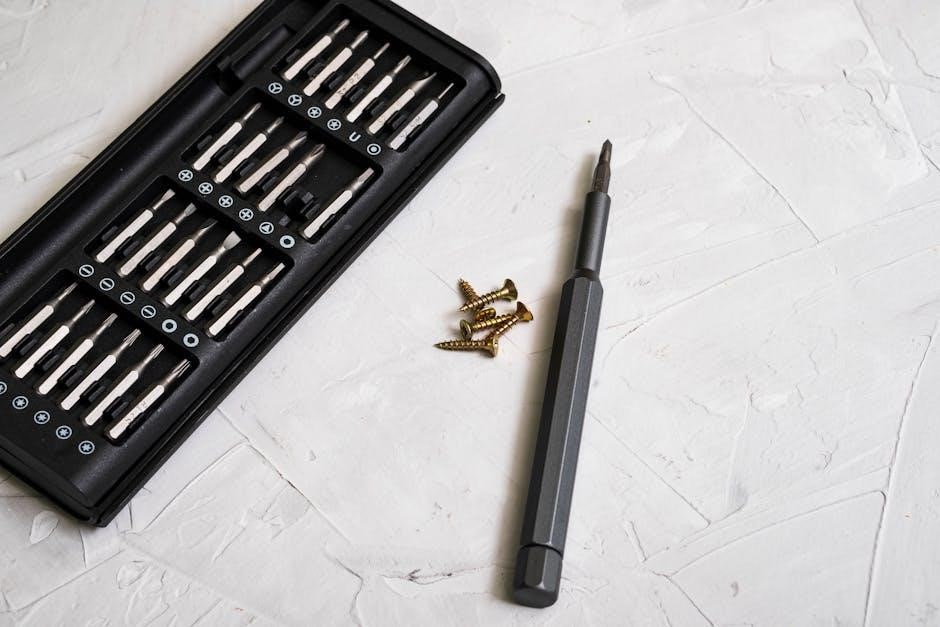
Prioritize safety! Necessary tools include a slide-out crank handle, gloves, and potentially penetrating oil; always disconnect power before starting the process.

Required Tools for Manual Retraction

Successfully manually retracting the 2004 Georgie Boy Pursuit slide-out requires a specific set of tools to ensure a safe and efficient process. First and foremost, you’ll need the dedicated slide-out crank handle, often stored within the RV’s utility compartment. Gloves are essential for grip and hand protection during the physical exertion of manual operation.

Penetrating oil, like WD-40, can be invaluable if you encounter resistance or binding in the slide-out mechanism. A flashlight is crucial for visibility, especially when locating the manual override and inspecting the slide-out rails. Additionally, wheel chocks are vital for securing the RV and preventing movement during the retraction process. Finally, a helper can provide assistance and an extra set of eyes, enhancing safety and simplifying the task.

Essential Safety Measures Before Starting

Prioritizing safety is paramount before attempting to manually retract the 2004 Georgie Boy Pursuit slide-out. Always ensure the RV is parked on a level surface and firmly secured with wheel chocks to prevent any unexpected movement. Disconnect the RV from any external power sources, including shore power, to minimize electrical risks.

Clear the area around the slide-out, removing any obstacles or potential tripping hazards. Inform all occupants of your intention to retract the slide-out and ensure they remain clear of the operating area. Wear appropriate safety gear, including gloves and closed-toe shoes. Finally, carefully review the RV’s owner’s manual for specific safety guidelines related to the slide-out system.

Step-by-Step Manual Retraction Guide

Locate the manual override, disengage the motor, and use a wrench to slowly and steadily retract the slide-out room inward.

Identifying the Manual Override Mechanism

On the 2004 Georgie Boy Pursuit, the manual override for the slide-out is typically found near the slide-out motor itself. This motor is usually located underneath the slide-out room, accessible from either inside a storage compartment or from beneath the RV. Look for a square opening or a capped access point. Removing this cap reveals a driveshaft or gear.

The override mechanism often involves a specific size socket or wrench flat – commonly ½ inch – that fits onto this driveshaft. It’s crucial to consult your owner’s manual or diagrams, if available, to confirm the exact location and required tool size. Identifying this mechanism before an emergency ensures a smoother, less stressful retraction process when electrical power isn’t available.

Disengaging the Electric Slide-Out Motor

Before manually retracting the 2004 Georgie Boy Pursuit slide-out, disengaging the electric motor is paramount. Locate the slide-out motor, typically under the room, and identify the electrical disconnect switch. This switch, often a simple toggle or breaker, cuts power to the motor, preventing damage during manual operation.

Ensure the RV is completely level and the area around the slide-out is clear. Turn off the main power to the slide-out system at the breaker panel as an added safety precaution. Confirm the motor is disengaged by attempting to operate the slide-out switch – it should not respond. Only proceed once you’re certain the motor is fully disconnected.

Manually Retracting the Slide-Out Room

With the electric motor disengaged on your 2004 Georgie Boy Pursuit, locate the manual override mechanism – often a crank or gear system near the motor. Insert the appropriate tool (usually a socket wrench) into the override; Apply steady, even pressure to the crank, retracting the slide-out slowly and deliberately.

Avoid forcing the mechanism; resistance indicates a potential obstruction. Continuously check alignment to ensure the slide-out retracts evenly on both sides. Once fully retracted, secure it with the designated support braces to prevent movement during travel. Double-check all connections before proceeding.

Troubleshooting Common Problems

If manual retraction fails, check for obstructions, uneven ground, or a disconnected override. Binding often indicates a mechanical issue needing professional attention.

Slide-Out Won’t Budge: Potential Causes

When a 2004 Georgie Boy Pursuit slide-out refuses to move during manual retraction, several factors could be at play. A completely discharged RV house battery is a primary suspect, preventing sufficient power to the motor, even during override. Examine the slide-out’s travel path for any obstructions – debris, forgotten items, or even settled objects can create significant resistance.

Furthermore, a faulty slide-out motor, despite attempts at manual override, might be internally seized. Check for a blown fuse or tripped circuit breaker dedicated to the slide-out system; a simple reset could resolve the issue. Uneven ground can also bind the mechanism, so ensure the RV is properly leveled before attempting retraction. Finally, consider the possibility of a damaged or disconnected linkage within the slide-out assembly itself, requiring a professional inspection.

Dealing with Binding or Resistance

If encountering binding or resistance during manual retraction of a 2004 Georgie Boy Pursuit slide-out, avoid forcing the mechanism. Gentle, consistent pressure is key. First, double-check the slide-out’s exterior for any obstructions – awning arms, branches, or anything making contact. Apply a silicone-based lubricant to the slide-out rails and seals; this can significantly reduce friction.

Rock the slide-out gently back and forth while applying steady retraction force. This can help dislodge minor binding points. If resistance persists, carefully inspect the slide-out’s bottom edge for any signs of dragging or uneven contact with the ground. Ensure the RV is level, as an unlevel surface exacerbates binding. If issues continue, professional assistance is recommended to prevent damage.

Addressing Uneven Slide-Out Movement

Uneven movement during manual retraction of a 2004 Georgie Boy Pursuit slide-out indicates a potential issue with the synchronization of the mechanism. Stop immediately and assess the situation. Do not force the slide-out, as this can cause significant damage to the rails or seals. Carefully observe which side is moving faster or slower.

Check for obstructions on one side that might be causing resistance. Lubricating the rails on both sides can sometimes resolve minor synchronization problems. If the issue persists, gently apply more pressure to the slower-moving side while retracting. Professional inspection is crucial if uneven movement continues, as it could signal a bent rail or a failing motor component.

Post-Retraction Checks and Maintenance

After manual retraction, inspect seals for damage, lubricate slide-out components, and verify proper operation to prevent future issues and maintain system integrity.

Inspecting for Damage After Retraction

Following a manual retraction of the 2004 Georgie Boy Pursuit slide-out, a thorough inspection is crucial. Begin by visually examining the slide-out room itself for any new dents, cracks, or distortions in the exterior walls. Pay close attention to the corners, as these are often the first areas to show signs of stress.

Next, carefully inspect the slide-out seals – both the top, bottom, and side seals – for tears, gaps, or misalignment. Damaged seals can lead to water intrusion and further complications. Check the slide-out mechanism itself, looking for bent or broken arms, loose bolts, or any signs of mechanical failure. Finally, examine the floor inside the slide-out for any signs of warping or damage that may have occurred during the retraction process. Addressing any issues promptly will prevent more significant problems down the road.

Lubrication and Slide-Out Seal Maintenance

Proper lubrication is vital for smooth slide-out operation on your 2004 Georgie Boy Pursuit. After manual retraction, apply a silicone-based lubricant to all moving parts of the slide-out mechanism, including the rails, gears, and arms. Avoid grease, as it attracts dirt and debris.

Regular seal maintenance prevents leaks and extends the life of your slide-out. Clean the seals with a mild soap and water solution, then apply a rubber protectant specifically designed for RV seals. This helps prevent drying, cracking, and UV damage. Inspect seals frequently for tears or gaps, and replace them as needed. Consistent lubrication and seal care contribute significantly to preventing future manual retraction scenarios.

Preventative Measures to Avoid Future Issues

To minimize the need for manual retraction on your 2004 Georgie Boy Pursuit, regular preventative maintenance is key. Always ensure the slide-out is fully retracted before traveling, and avoid operating it in windy conditions. Periodically inspect the electrical connections and wiring for any signs of corrosion or damage.

Consider installing a slide-out monitoring system to alert you to potential problems before they escalate. Regularly check and clean the slide-out rails, and lubricate them as described previously. By proactively addressing potential issues, you can significantly reduce the risk of encountering another manual retraction situation and enjoy trouble-free slide-out operation.

Resources and Further Assistance

Consult your Georgie Boy owner’s manual for diagrams and seek help from online RV forums and repair communities for support.

Georgie Boy Owner’s Manual and Diagrams

Your 2004 Georgie Boy Pursuit owner’s manual is the primary resource for understanding your specific slide-out system. Locate the section detailing the slide-out mechanism; it should include diagrams illustrating the components and operation. Pay close attention to any information regarding manual override procedures, as this is crucial when the electric motor fails.

The diagrams will help you identify the manual override mechanism’s location – often a designated access point near the slide-out motor. These manuals frequently contain troubleshooting guides that address common slide-out issues. If you’ve misplaced your original manual, explore online resources; many RV parts suppliers or enthusiast websites offer downloadable versions of older manuals. Having the correct documentation will significantly simplify the manual retraction process and ensure you’re following the manufacturer’s recommended procedures.

Online Forums and RV Repair Communities

Numerous online forums and RV repair communities are invaluable resources for 2004 Georgie Boy Pursuit owners facing slide-out challenges. These platforms connect you with fellow RVers who have likely encountered and resolved similar issues. Search for threads specifically addressing manual slide-out retraction on Georgie Boy models; detailed, step-by-step instructions and helpful photos are often shared.

RV-focused Facebook groups and dedicated forums like iRV2.com provide a space to ask questions and receive advice from experienced RV technicians and enthusiasts. Be prepared to provide specific details about your slide-out system and the problem you’re experiencing. Remember to verify information from multiple sources before attempting any repairs, and prioritize safety throughout the process.

Understanding the Electrical System

Before manual retraction, inspect fuses and circuit breakers related to the slide-out motor for potential failures causing power loss.

Checking Fuses and Circuit Breakers

Begin troubleshooting the electrical system by locating the fuse box, typically found near the RV’s entry or in a utility compartment. Consult your 2004 Georgie Boy Pursuit owner’s manual for the precise location and a diagram of the fuse panel. Identify the fuses specifically designated for the slide-out room’s motor and control system – these are often labeled.

Visually inspect each fuse for a broken filament. If a fuse appears intact, use a multimeter to test for continuity, confirming it’s functioning correctly. Also, check the circuit breakers, which may be located alongside the fuses or in a separate panel. Reset any tripped breakers. If fuses repeatedly blow or breakers trip, it indicates a short circuit or overload requiring professional attention.

Testing the Slide-Out Motor for Functionality

After verifying the fuses and circuit breakers are sound, directly test the slide-out motor. Access the motor, usually located within the slide-out mechanism itself, requiring some disassembly. With the power disconnected (and ensuring safety!), use a multimeter to check for voltage at the motor terminals when the slide-out switch is activated.

If voltage is present but the motor doesn’t run, the motor is likely faulty and needs replacement. If no voltage reaches the motor, trace the wiring back towards the switch, looking for breaks or corrosion. A qualified RV technician should handle complex electrical testing and repairs to avoid further damage or safety hazards.

my days the notebook sheet music pdf

My Days (The Notebook) Sheet Music PDF: A Comprehensive Guide

Discover readily available PDF versions of “My Days” from “The Notebook,” offering options for piano, guitar, and flute arrangements. Download and print
sheet music easily,
catering to various skill levels and musical preferences, as of today, December 9th, 2025.

Understanding the Song’s Popularity

“My Days” gained significant traction following its inclusion in the emotionally resonant film, The Notebook, released in 2004. Ingrid Michaelson’s original composition, though initially a modest success, experienced a resurgence in popularity due to the film’s enduring appeal and its pivotal placement during a particularly poignant scene. The song’s lyrical content, exploring themes of longing, remembrance, and the passage of time, deeply resonated with audiences, mirroring the film’s central narrative;

Furthermore, Joy Woods’ captivating cover version, released in August 2024, has propelled the song to renewed heights of recognition, particularly on platforms like YouTube and TikTok. This cover’s viral spread has introduced “My Days” to a new generation of listeners, driving increased demand for sheet music. The song’s accessibility, coupled with its emotional depth, contributes to its widespread appeal. The availability of free and paid sheet music options further fuels its popularity among musicians seeking to learn and perform this beloved piece.

Consequently, searches for “My Days” sheet music, particularly in PDF format, have surged, reflecting the song’s continued cultural relevance and its status as a modern classic.

The Notebook’s Impact on the Song

The Notebook served as a crucial catalyst for “My Days,” transforming Ingrid Michaelson’s initially understated track into a widely recognized and emotionally charged ballad. Its inclusion during a pivotal scene – showcasing Noah and Allie’s enduring love – inextricably linked the song with the film’s themes of timeless romance and heartfelt devotion. This association dramatically increased the song’s visibility and emotional resonance with audiences worldwide.

Prior to its feature in the film, “My Days” enjoyed limited commercial success. However, the film’s enduring popularity and repeated viewings exposed the song to a vast audience, fostering a deep emotional connection. This exposure directly translated into increased searches for the song and, subsequently, for sheet music arrangements.

The demand for “My Days” sheet music, particularly in easily accessible PDF format, surged following the film’s release and has experienced a recent revival with Joy Woods’ cover. The Notebook’s impact is undeniable, solidifying the song’s place in popular culture and driving continued interest in learning and performing it.

Ingrid Michaelson’s Original Version

Ingrid Michaelson’s original rendition of “My Days,” released in 2007 on her album Girls and Boys, possesses a delicate, piano-driven quality that differs significantly from the more emotionally expansive arrangements popularized by its use in The Notebook. The song, initially a relatively obscure track, showcases Michaelson’s signature indie-pop style, characterized by intimate vocals and thoughtful lyrics.

Sheet music for Michaelson’s original version, often available as piano vocal arrangements in PDF format, typically reflects this understated aesthetic. These arrangements prioritize vocal melody and simple piano accompaniment, making them accessible to intermediate piano players. Finding accurate transcriptions of the original can be slightly more challenging than locating arrangements based on the film version.

Despite its initial lack of mainstream recognition, the song’s inherent beauty and emotional depth laid the groundwork for its later success. The availability of sheet music allows musicians to faithfully recreate Michaelson’s original vision, appreciating the song’s subtle nuances and intimate character before its association with the film’s dramatic context.

Joy Woods’ Cover and its Rise

Joy Woods’ 2024 cover of “My Days” experienced a meteoric rise in popularity, largely fueled by its prominent placement in TikTok videos and its association with emotionally resonant content. This version, released on August 2nd, 2024, quickly became the definitive arrangement for many listeners, eclipsing even Ingrid Michaelson’s original in terms of contemporary recognition.

Consequently, the demand for sheet music specifically tailored to Woods’ arrangement surged. Numerous online resources now offer PDF transcriptions of her version, often featuring a fuller, more dramatic piano accompaniment and vocal arrangements that emphasize the song’s emotional weight. These arrangements cater to a wider range of skill levels, from intermediate to advanced.

The availability of downloadable sheet music, including full scores for voice and piano, has allowed musicians to replicate Woods’ impactful interpretation. This cover’s success demonstrates the power of social media in revitalizing older songs and creating new demand for musical arrangements, solidifying its place in modern musical culture.

Where to Find “My Days” Sheet Music Online

Numerous online platforms host sheet music for “My Days” from “The Notebook,” catering to diverse needs and budgets. Websites specializing in sheet music distribution, like Musicnotes.com and SheetMusicPlus, offer officially licensed arrangements in PDF format, often with varying levels of accuracy and arrangement complexity.

Furthermore, several websites provide free sheet music options, though the quality and legality can vary. Platforms like Musescore.com and various online forums host user-submitted transcriptions, including arrangements for piano, guitar, and other instruments. Caution is advised when utilizing these sources, ensuring copyright compliance.

Dedicated fan communities and online music education resources also frequently share sheet music arrangements. A simple web search for “My Days sheet music PDF” yields a plethora of results, including links to downloadable files and online viewing options. Remember to verify the source and legality before downloading or using any sheet music found online.

Free Sheet Music Options

Accessing “My Days” sheet music without cost is achievable through several online avenues, though users should exercise caution regarding copyright and accuracy. Musescore.com stands out as a prominent platform, hosting a substantial collection of user-submitted transcriptions for piano, guitar, flute, and other instruments. These arrangements vary in quality, reflecting the skill and experience of the contributors.

Additionally, various online forums and music-sharing websites often feature free sheet music downloads. However, verifying the legality and accuracy of these sources is crucial. Websites offering “free sheet music PDF” downloads should be approached with discernment, ensuring they comply with copyright regulations.

It’s important to note that free options may not always include complete or professionally arranged scores. Often, these are simplified versions or transcriptions created by amateur musicians. While suitable for beginners or casual players, they may lack the nuance and detail of paid arrangements. Always cross-reference with audio recordings to ensure accuracy.

Paid Sheet Music Resources

For musicians seeking high-quality, accurate, and legally compliant sheet music for “My Days” from “The Notebook,” several reputable paid resources are available. Musicnotes.com is a leading digital sheet music retailer, offering officially licensed arrangements for various instruments and vocal ranges. They provide instant access to downloadable PDF files, often with interactive features like playback and transposition.

SheetMusicPlus is another prominent platform, boasting an extensive catalog of sheet music, including arrangements specifically for Ingrid Michaelson’s original version and Joy Woods’ popular cover. These resources typically offer multiple arrangements – piano vocal, solo piano, guitar tablature – catering to diverse skill levels.

Purchasing sheet music from these platforms ensures you receive professionally transcribed scores, free from errors and adhering to copyright laws. While requiring a financial investment, the benefits of accuracy, completeness, and legal compliance often outweigh the cost, especially for serious musicians and educators. These sites frequently offer previews, allowing you to assess the arrangement before purchasing.

Sheet Music Formats: PDF vs. MIDI

When searching for “My Days” sheet music, you’ll encounter two primary formats: PDF and MIDI. PDF (Portable Document Format) delivers a visually accurate representation of the sheet music, mirroring traditional printed scores. This format is ideal for musicians who prefer reading standard notation and requires no specialized software for viewing – only a PDF reader.

MIDI (Musical Instrument Digital Interface) files, conversely, contain data representing the notes, timing, and dynamics of the music. They don’t display traditional notation but can be imported into music software (DAWs) for playback, editing, and arrangement. MIDI files are useful for learning the melody or harmony, experimenting with different tempos, or creating custom arrangements.

PDFs are generally preferred for performance and study, while MIDI files excel in digital music production. Many resources offer both formats, allowing musicians to choose the one best suited to their needs. Consider your workflow and musical goals when selecting between these formats for “My Days” sheet music.

Piano Vocal Arrangements

Piano vocal arrangements of “My Days” from “The Notebook” are exceptionally popular, catering to singers accompanied by piano. These arrangements typically include the melody line with lyrics, piano accompaniment, and chord symbols. Resources offer varying levels of complexity, from simplified versions for beginners to more elaborate arrangements for advanced pianists.

Many downloadable PDFs feature both the vocal line and piano part on two staves, providing a complete musical picture. Some arrangements include an introduction, interludes, and a coda, mirroring the song’s structure. Ingrid Michaelson’s original version and Joy Woods’ cover both inspire these arrangements, offering distinct interpretations.

These arrangements often include suggested vocal ranges and dynamics, aiding in expressive performance. Whether you’re a seasoned pianist or a beginner, a piano vocal arrangement allows you to experience the emotional depth of “My Days” firsthand. Free and paid options are readily available online, offering diverse choices for musicians.

Guitar Tablature and Chords

Guitar tablature and chord charts for “My Days” provide guitarists with a convenient way to learn and play the song. Tablature visually represents the fretboard, indicating which frets and strings to play, while chord charts display the finger positions for each chord progression. These resources cater to various skill levels, from beginner-friendly simplified chords to more complex fingerstyle arrangements.

Many online platforms offer both free and paid guitar arrangements, often including strumming patterns and picking techniques. Chord diagrams typically include common voicings and variations, allowing guitarists to personalize their performance. The song’s emotional quality translates beautifully to the guitar, offering a heartfelt rendition.

Guitarists can find arrangements based on both Ingrid Michaelson’s original and Joy Woods’ cover, each offering a unique interpretation. PDF downloads are common, providing a portable and accessible format for practice and performance. Learning “My Days” on guitar allows musicians to connect with the song’s poignant melody in a new way.

Flute and Other Instrument Arrangements

Beyond piano and guitar, “My Days” lends itself beautifully to arrangements for flute and a variety of other instruments. Sheet music specifically tailored for flute often features simplified melodies and harmonies, making it accessible to players of varying skill levels. These arrangements capture the song’s delicate and emotive qualities, showcasing the flute’s lyrical tone.

Instrumentalists can also find arrangements for violin, cello, clarinet, and even saxophone, expanding the song’s sonic palette. PDF downloads are readily available online, offering convenient access to sheet music for diverse instruments. These arrangements often include expressive markings and dynamic variations, enhancing the musical interpretation.

The song’s chord progression and melodic structure are adaptable to numerous instrumental settings, allowing musicians to create unique and personalized performances. Exploring arrangements beyond the typical vocal and piano format reveals the song’s versatility and enduring appeal. Finding sheet music allows musicians to share the emotional depth of “My Days” through their chosen instrument.

Difficulty Level: Beginner, Intermediate, Advanced

“My Days” sheet music caters to a broad spectrum of musical abilities, ranging from beginner to advanced players. Beginner arrangements typically simplify the piano accompaniment, focusing on basic chords and melodies, often omitting complex harmonies or embellishments. These versions prioritize accessibility, allowing novice musicians to learn the song’s core structure.

Intermediate arrangements introduce more intricate chord voicings, rhythmic patterns, and potentially some basic ornamentation. These versions challenge players to develop their technique and musicality, while remaining manageable for those with some experience. Intermediate sheet music often includes more detailed dynamic markings and phrasing suggestions.

Advanced arrangements present the song in its full complexity, featuring elaborate piano parts, nuanced harmonies, and potentially vocal harmonies. These versions demand a high level of technical proficiency and musical interpretation, suitable for experienced musicians seeking a challenging and rewarding experience. Finding the right level ensures a fulfilling learning process.

Key Signatures and Transposition

“My Days” is commonly found in sheet music arrangements utilizing the key of F major. However, recognizing the importance of vocal range and instrumental comfort, transposition is frequently employed. Sheet music PDFs often allow for easy key changes using digital music software, accommodating diverse vocalists and instrumentalists.

Transposition involves shifting the entire song to a different key, maintaining the same intervals and harmonic relationships. This is particularly useful for singers who find the original key too high or too low. Understanding key signatures – the sharps or flats at the beginning of a staff – is crucial for successful transposition.

Musicians can utilize online tools or their knowledge of music theory to transpose the sheet music to a more suitable key. Common transpositions include shifting to G major or Eb major. Always ensure the transposed key remains comfortable and musically appropriate for performance, enhancing the overall musical experience.

Understanding Vocal Ranges

“My Days”, as performed by Ingrid Michaelson and Joy Woods, presents a moderate vocal range, generally spanning from approximately G3 to C5. However, individual vocal ranges vary significantly, making it crucial to assess suitability before selecting a sheet music arrangement.

Sheet music PDFs often don’t explicitly state vocal range, requiring singers to review the melody line. Sopranos and altos typically find the song comfortable, while tenors and basses may need to transpose the key downwards to fit their range effectively.

Consider the highest and lowest notes within the arrangement and compare them to your comfortable singing range. Utilizing transposition tools available with many PDF editors allows for adjustments. Prioritizing vocal health and avoiding strain is paramount. Choosing an arrangement that respects your vocal limits ensures a more enjoyable and sustainable performance of this beautiful song.

Tips for Learning the Piano Arrangement

Mastering the piano arrangement of “My Days” begins with a slow tempo. Focus on accurate note reading and finger placement before increasing speed. PDF sheet music often includes chord symbols; understanding basic piano chords is beneficial for accompaniment.

Break down the song into smaller sections – intro, verse, chorus, bridge – and practice each independently. Pay close attention to dynamics and phrasing indicated on the sheet music. Utilize a metronome to develop consistent rhythm.

Consider practicing hands separately initially, then combining them gradually. Don’t hesitate to simplify the arrangement if needed, focusing on the core melody and chords. Online tutorials and YouTube videos can provide visual guidance. Remember consistent, focused practice yields the best results, allowing you to beautifully interpret this emotionally resonant piece.

Tips for Learning the Guitar Arrangement

Embarking on “My Days” on guitar starts with familiarizing yourself with the chord progression. PDF sheet music or guitar tablature will display these chords; practice smooth transitions between them. Begin at a slower tempo, ensuring clean chord changes before building speed.

Focus on strumming patterns that complement the song’s emotional tone. Experiment with different rhythms and dynamics to add nuance. If using tablature, pay attention to finger positioning for accurate fretting. Consider breaking down challenging sections into smaller phrases.

Utilize online resources like YouTube tutorials for visual guidance on fingerpicking or strumming techniques. Don’t be afraid to simplify the arrangement initially, focusing on the essential chords and melody. Consistent practice, coupled with careful attention to detail, will unlock a heartfelt performance of this beautiful song.

Downloading and Printing Sheet Music

Securing your “My Days” sheet music PDF is straightforward. Numerous online platforms offer both free and paid options. When downloading, verify the file’s legitimacy to avoid malware. Ensure the PDF is high-resolution for clear readability when printing.

Prior to printing, preview the sheet music to confirm proper formatting and page breaks. Adjust printer settings for optimal quality – select ‘fit to page’ if necessary. Standard A4 or Letter size paper works best. Consider printing on slightly heavier paper stock for durability.

Always respect copyright regulations; only download from legal sources. Many sites offer previews, allowing you to assess the arrangement before committing to a download. Once printed, consider binding the pages for convenient practice and performance. Remember today’s date is December 9th, 2025.

Copyright Considerations and Legal Downloads

Understanding copyright is crucial when accessing “My Days” sheet music. Ingrid Michaelson and associated publishers hold the copyright to the song. Downloading from unauthorized sources constitutes copyright infringement, carrying potential legal consequences.

Opt for legal download options from reputable music retailers or sheet music websites. These platforms secure licenses, ensuring fair compensation to the copyright holders. While free sheet music exists, verify its legitimacy – often, it’s unauthorized or incomplete.

Prioritize sites offering clearly stated licensing terms. Look for options that allow personal use but restrict commercial distribution or performance. Supporting legal downloads sustains the music industry and encourages continued creation. As of December 9th, 2025, always check for updated copyright information before downloading or distributing any sheet music.

Related Sheet Music: Songs from The Notebook

Fans of “My Days” and the film “The Notebook” may also enjoy exploring sheet music for other songs featured in the movie. While “My Days” is a central piece, the soundtrack includes several emotionally resonant tracks perfect for piano or guitar.

Consider searching for sheet music arrangements of pieces that complement the film’s romantic and melancholic themes. Explore options for vocal and piano arrangements, allowing you to recreate the soundtrack’s atmosphere. Websites specializing in movie soundtracks often curate collections of related sheet music.

Discover arrangements for instrumental versions, suitable for solo performance or ensemble playing. As of December 9th, 2025, many online retailers offer bundled sheet music packs featuring songs from “The Notebook,” providing a convenient and cost-effective way to expand your repertoire. Remember to check copyright and licensing before use.

The History of Whoo: A Tangential Connection (Brand Mention in Search Results)

Interestingly, search results related to “My Days” sheet music also frequently mention “The History of Whoo,” a luxury Korean beauty brand established in 2003 by LG Household & Health Care. This connection appears to stem from online search algorithms associating keywords and trending topics.

The History of Whoo focuses on reinterpreting royal court beauty secrets, emphasizing extensive research and innovative cosmetic treatments. While seemingly unrelated to piano sheet music or “The Notebook,” the brand’s prominence in search results highlights the complex nature of online information retrieval.

This demonstrates how unrelated brands can surface when searching for specific content, driven by keyword density and user search patterns as of December 9th, 2025. It’s a reminder to critically evaluate search results and focus on the intended topic – in this case, accessing “My Days” sheet music in PDF format.

Orient Express Lamp: A Tangential Connection (Brand Mention in Search Results)

Curiously, alongside searches for “My Days” sheet music, results frequently display information about the “Orient Express Lamp.” This unexpected association arises from the broad scope of online searches and algorithmic connections between seemingly disparate terms.

The Orient Express Lamp is a replica of the gas lamps originally featured on the iconic train, standing approximately 20 inches tall with a brass finish. It represents a piece of reproduced history and evokes a sense of mystery and elegance. Its appearance in sheet music searches is purely coincidental, driven by keyword overlap or related browsing history.

This illustrates how search engines can present tangential results, highlighting the importance of refining search queries to pinpoint specific information – namely, finding downloadable “My Days” sheet music as of December 9th, 2025. It’s a reminder that search results aren’t always directly relevant to the initial intent.

flange binding pdf

What is Flange Binding?

Flange binding is a decorative quilt finishing technique, adding a contrasting fabric strip between the quilt top and the traditional binding.

It offers a unique, sophisticated look, enhancing the quilt’s overall aesthetic appeal with a subtle yet impactful detail.

This method involves sewing a wider strip to the back of the binding, creating a visible “flange” that frames the quilt beautifully.

Many quilters seek flange binding tutorials and PDF guides to master this elegant technique for their quilting projects.

Definition and Purpose

Flange binding, at its core, is a quilt binding technique distinguished by an added strip of fabric – the “flange” – visible on the quilt’s face. This flange sits between the quilt top and the main binding fabric, creating a decorative frame.

Unlike standard binding, which simply finishes the raw edges, flange binding serves both a functional and aesthetic purpose. Functionally, it encases the raw edges securely, preventing fraying and adding durability.

Aesthetically, it introduces a contrasting color or pattern, enhancing the quilt’s visual appeal; Many quilters download a flange binding PDF to understand the precise measurements and steps involved. The purpose is to elevate a quilt from simply finished to beautifully detailed, offering a polished and professional look. It’s a technique favored for showcasing quilt designs and adding a touch of elegance.

History of Flange Binding in Quilting

The origins of flange binding aren’t precisely documented, but it gained significant popularity in the mid-20th century, evolving from traditional quilt finishing methods. While not a centuries-old technique, it quickly became a favored choice for quilters seeking a more refined look.

Early examples often featured contrasting fabrics to highlight quilt blocks and patterns. The rise of quilting guilds and the sharing of patterns, including those available as a flange binding PDF, contributed to its widespread adoption.

Jenny Doan of Missouri Star Quilt Company significantly boosted its modern resurgence through accessible tutorials. Today, it remains a popular choice, blending classic quilting with contemporary design sensibilities. It’s a testament to how a simple addition can elevate a quilt’s aesthetic, continuing to inspire quilters worldwide.

Materials Needed for Flange Binding

Flange binding requires fabric for the flange, binding, backing, and quilt top. A flange binding PDF often lists precise yardage calculations for each component.

Fabric Requirements (Calculating Yardage)

Determining fabric needs for flange binding involves calculating the quilt’s perimeter and adding extra for mitering corners and joining strips. A flange binding PDF guide typically advises adding 20 inches to the perimeter measurement.

For the flange itself, 1-inch wide strips cut across the width of fabric (WOF) are common. The binding strip is usually 2.5 inches wide, also cut WOF. Many resources suggest cutting enough strips to equal or surpass the calculated length.

Consider the fabric width (typically 42-44 inches) when estimating how many strips you’ll need. A detailed PDF will often include a yardage chart based on quilt size. Don’t forget to account for potential pattern matching if using directional prints!

Tools: Rotary Cutter, Mat, Ruler, Sewing Machine

Essential tools for successful flange binding, detailed in most flange binding PDF tutorials, include a rotary cutter, self-healing cutting mat, and a clear acrylic ruler – ideally 6” x 24” for long cuts. Precision is key for accurate strip measurements.

A reliable sewing machine is, of course, crucial; A ¼-inch seam foot is highly recommended for consistent seam allowances. Iron and ironing board are also vital for pressing seams flat, ensuring a neat finish.

Seam rippers are useful for correcting mistakes, and pins or clips help hold fabric layers together. Some PDF guides suggest using a walking foot for even fabric feed, especially with multiple layers.

Creating the Flange Binding: Step-by-Step

Flange binding creation, often detailed in PDF guides, begins with cutting fabric strips, joining them, and then carefully sewing the flange and binding together.

Step 1: Cutting the Fabric Strips

Flange binding PDF tutorials consistently emphasize precise fabric strip cutting as the foundational step. Begin by calculating your quilt’s perimeter and adding 20 inches for overlap and corners.

Next, cut strips of fabric – typically 1 inch wide – from your chosen flange and binding fabrics. The width of one inch is standard, but variations exist.

Cut enough strips to equal or surpass the calculated perimeter length. Many PDF guides suggest using width-of-fabric (WOF) cuts for efficiency, minimizing seams.

Accuracy is crucial; a rotary cutter, mat, and ruler are essential tools for achieving consistent strip widths. Consistent width ensures a professional-looking flange binding.

Remember to label your flange and binding strips to avoid confusion during the subsequent sewing stages, as detailed in many online resources.

Step 2: Joining the Strips to Create a Long Binding Strip

Most flange binding PDF guides detail joining fabric strips to create a continuous binding length. Begin by arranging your cut strips end-to-end, right sides together.

Sew the strips together using a 45-degree angle seam, creating a diagonal join. This minimizes bulk and ensures a smoother binding application. Press the seams open to reduce bulk further.

Repeat this process until all strips are joined, forming one long binding strip for both the flange and the main binding sections.

Carefully manage the seams as you sew, ensuring they are flat and aligned. A consistent ¼ inch seam allowance is recommended for accuracy, as highlighted in many tutorials.

Press the entire joined strip to set the seams and prepare it for the next stage – attaching the flange.

Step 3: Sewing the Flange and Main Binding Strips Together

Many flange binding PDF tutorials emphasize the importance of accurately joining the flange and main binding strips. Place the flange strip (typically wider) right side down, and the main binding strip (narrower) right side up.

Align the raw edges and sew them together using a ¼ inch seam allowance. This creates a combined binding strip with the flange extending beyond the main binding fabric.

Press the seam towards the main binding strip, ensuring a clean finish. This step is crucial for achieving a professional look, as detailed in numerous online guides.

Carefully trim any excess flange fabric to maintain a consistent width. This combined strip is now ready for attachment to the quilt, completing the binding preparation.

Consistent pressing throughout this process is key to a smooth and successful flange binding application.

Attaching Flange Binding to a Quilt

Flange binding PDF guides detail attaching the prepared binding to the quilt, starting at the midpoint of a side, using a 45-degree angle;

Precise alignment and consistent seam allowances are vital for a professional finish.

Preparing the Quilt for Binding

Flange binding PDF resources consistently emphasize thorough quilt preparation as a foundational step. Begin by ensuring your quilt top is squared up – accurate corners and straight edges are crucial for a neat binding application.

Remove any loose threads and press the quilt surface to create a smooth canvas. Next, baste the quilt layers together securely, whether by machine or hand, to prevent shifting during the binding process.

Many PDF tutorials recommend trimming excess batting and backing fabric close to the quilt top for a cleaner edge. Finally, lightly starching the edges can provide extra stability and make handling easier, especially with larger quilts. A well-prepared quilt significantly simplifies attaching the flange binding.

Folding and Attaching the Binding (45-Degree Angle Technique)

Flange binding PDF guides frequently highlight the 45-degree angle technique for seamless attachment. Begin by aligning the raw edges of the flange binding with the quilt’s raw edge, right sides together.

Fold the binding at a 45-degree angle, extending it slightly beyond the quilt’s edge. This creates a neat corner start. Pin securely, ensuring the flange portion lies flat against the quilt back.

Stitch along the folded edge, gradually easing the binding around the quilt. Consistent ¼ inch seam allowance is vital. Many PDFs recommend stopping ¼ inch from each corner, backstitching to secure, and pivoting for a mitered finish. This technique ensures a professional, crisp look throughout the quilt.

Mitering Corners with Flange Binding

Flange binding PDF tutorials emphasize precise mitering for polished corners. After stitching to ¼ inch from the corner, stop with the needle down. Lift the presser foot and pivot the quilt 90 degrees, folding the binding to create a 45-degree angle.

Lower the presser foot and continue stitching, maintaining a consistent ¼ inch seam allowance. This creates a neat, mitered fold. Many PDF guides suggest pressing the mitered corner open for a flatter finish.

Repeat this process at each corner, ensuring consistent angles and seam allowances. Careful mitering is crucial for a professional-looking flange binding. Some quilters prefer hand-pressing the miters before stitching for added precision.

Finishing the Flange Binding

Flange binding PDF resources detail hand or machine stitching options for a clean finish. Secure ends neatly, ensuring durability and a professional, polished quilt edge.

Hand Stitching vs. Machine Stitching the Binding

Flange binding PDF tutorials often present a choice: hand stitching or machine stitching the binding. Hand stitching, typically using a blind stitch, offers a nearly invisible finish, prized for its quality and heirloom appearance.

However, it’s more time-consuming. Machine stitching, conversely, is significantly faster, utilizing a coordinating or matching thread and a close stitch-in-the-ditch technique.

While quicker, machine stitching may be more visible, especially on patterned fabrics. Many quilters opt for machine stitching on the quilt back for speed and hand stitching on the quilt front for a refined look.

Ultimately, the best method depends on your preference, skill level, and the desired aesthetic of your finished quilt, as detailed in comprehensive flange binding PDF guides.

Securing the Binding Ends

Flange binding PDF instructions emphasize careful end-securing for a professional finish. Overlap the binding ends by at least 8-10 inches, ensuring a secure join. Precise alignment is crucial, especially with patterned bindings.

Many tutorials recommend angling the overlap to minimize bulk. After overlapping, stitch through all layers – binding, flange, and quilt backing – to firmly secure the join.

Trim excess binding fabric close to the seam, being careful not to cut the stitches. Some quilters prefer to hand-stitch the final few inches for a cleaner look.

Detailed flange binding PDF resources often include diagrams illustrating proper overlap and stitching techniques, guaranteeing a durable and aesthetically pleasing quilt edge.

Flange Binding Variations & Techniques

Flange binding PDF guides showcase faux flange options and varying flange/binding widths for customized looks.

Experimenting with fabric choices and dimensions allows for unique quilt finishes and creative expression.

Faux Flange Binding Tutorial

Faux flange binding offers the look of traditional flange binding without the added bulk or complexity, often detailed in helpful flange binding PDF tutorials.

This technique cleverly simulates the flange effect by utilizing a single strip of fabric folded to create the illusion of two distinct layers.

Typically, a wider binding strip is used, then folded in half lengthwise with the wrong sides together, effectively concealing the raw edges.

The folded binding is then attached to the quilt as usual, creating a subtle, raised effect that mimics a true flange.

Many online resources and PDF guides demonstrate this simplified method, making it accessible for quilters of all skill levels seeking a streamlined approach.

It’s a fantastic option when you desire the aesthetic of flange binding but prefer a less cumbersome process.

Using Different Widths for Flange and Binding

Experimenting with varying widths for the flange and binding components unlocks creative possibilities, often detailed in comprehensive flange binding PDF resources.

Traditionally, a 1-inch flange paired with a 2.5-inch binding is common, but deviating from this standard can yield unique visual effects.

A narrower flange (e.g., 0;5 inch) creates a more subtle frame, while a wider flange (e.g., 1.5 inches) makes a bolder statement.

Similarly, adjusting the binding width alters the overall proportion; a wider binding complements a larger flange, and vice versa.

Many quilters consult flange binding PDF tutorials to visualize these variations and calculate fabric requirements accurately.

Consider the quilt’s design and desired aesthetic when selecting flange and binding widths for a harmonious finish.

Resources and Tutorials

Numerous online resources, including detailed flange binding PDF guides, offer step-by-step instructions and visual aids for quilters of all skill levels.

Missouri Star Quilt Company and various video platforms provide excellent tutorials to enhance your flange binding expertise.

Missouri Star Quilt Company Flange Binding Tutorial

Missouri Star Quilt Company (MSQC) offers a comprehensive flange binding tutorial featuring Jenny Doan, a beloved figure in the quilting community.

This tutorial, often available as a video and sometimes accompanied by a downloadable PDF guide, breaks down the process into manageable steps, perfect for beginners.

Jenny clearly demonstrates how to create the flange, attach it to the binding, and then apply the finished binding to a quilt.

The MSQC tutorial emphasizes a user-friendly approach, making flange binding accessible to quilters of all experience levels.

Many quilters appreciate the visual clarity and detailed explanations provided, often referencing the tutorial repeatedly as they practice the technique.

You can find this valuable resource on the MSQC website and their YouTube channel, often linked with helpful PDF resources.

Online Video Tutorials and Guides

Beyond Missouri Star, numerous online video tutorials and guides demonstrate flange binding techniques, catering to diverse learning styles.

Platforms like YouTube host a wealth of content, from quick overviews to in-depth, step-by-step instructions, often with accompanying PDF downloads.

These resources frequently cover variations, such as faux flange binding, and offer tips for achieving precise miters and secure finishes.

Many quilters find these videos helpful for visualizing the process and troubleshooting common challenges.

Websites and quilting blogs also provide written guides, often including diagrams and printable templates, sometimes as a convenient PDF.

Searching for “flange binding tutorial” will yield a plethora of options, allowing quilters to choose the resource that best suits their needs.

panasonic kx tgea20 user manual

Panasonic KX-TGEA20 User Manual: Comprehensive Guide

Welcome! This comprehensive guide details the Panasonic KX-TGEA20 cordless phone system. Access free PDF manuals online, covering installation, operation, and troubleshooting.

The Panasonic KX-TGEA20 is a digital cordless telephone system designed for reliable home communication. This user manual provides detailed instructions for setup, operation, and maximizing its features. It’s a user-friendly phone, offering essential functions like caller ID, call history, and a phonebook.

Find installation guides and operating instructions readily available as PDF downloads. This system, including the optional KX-TGA20 key detector, aims to simplify your daily calls and enhance convenience.

Unboxing and Component Check

Upon opening your Panasonic KX-TGEA20 package, carefully verify all components are present. The base unit and handset are primary, alongside the AC adapter and phone line cord. A belt clip (KX-TGEA20) is also included for convenient portability.

Refer to the included documentation for a complete parts list. Ensure no items are missing or damaged. The installation manual details each component’s function, preparing you for a smooth setup process.

Handset Contents

The Panasonic KX-TGEA20 handset package includes the cordless handset itself, designed for comfortable use. You’ll also find the rechargeable battery pack, essential for operation. A protective handset cover is provided, alongside a belt clip for added convenience.

Confirm the battery is securely installed. The included documentation details proper battery handling and charging procedures. Verify all components are present and undamaged before proceeding with setup.

Base Unit Contents

The Panasonic KX-TGEA20 base unit package contains the main base station, serving as the central hub for the system. It includes an AC power adapter, crucial for powering the base. A telephone line cord is also provided for connecting to a landline.

Ensure the power adapter is correctly connected. Verify the telephone line cord is securely attached. Inspect all components for any visible damage before initial setup and operation.

Initial Setup and Installation

Begin by carefully unpacking all components. Initial setup involves connecting the base unit to a power outlet using the provided AC adapter and a telephone wall jack with the telephone line cord.

Ensure a stable connection. Next, charge the handset – detailed in the following section. Refer to the installation manual for specific registration procedures if needed. Proper installation ensures optimal performance.

Connecting the Base Unit

To connect the base unit, plug the AC adapter into a working electrical outlet. Then, connect one end of the telephone line cord to the wall jack and the other end to the base unit’s telephone line port.

Verify a secure connection at both ends. The base unit is now ready to power on and begin the registration process with the handset. Consult the installation manual for visual guidance.

Charging the Handset

Before initial use, fully charge the handset. Place the handset into the base unit’s cradle, ensuring proper contact with the charging terminals. A charging indicator will illuminate on the handset display.

Full charging typically takes approximately 7 hours. Continuous placement in the cradle maintains battery charge. Refer to the manual for battery specifications and optimal charging practices.

Understanding the Handset Display

The Panasonic KX-TGEA20 handset features a clear, easy-to-read display. It presents vital information like signal strength, battery level, and call status. Icons indicate features such as call waiting and new voice mail messages.

Navigating the menu is intuitive, utilizing the directional pad and select buttons. The display dynamically changes to reflect your current actions and settings within the phone’s interface.

Display Icons and Indicators

Key icons on the KX-TGEA20 display provide quick status updates. A battery icon shows remaining power, while signal strength bars indicate network connectivity. A handset icon confirms registration to the base unit.

Call-related icons signal incoming calls, call hold, and call waiting; Voicemail indicators alert you to new messages. Understanding these visual cues enhances your phone experience.

Navigating the Menu

Access the menu on your KX-TGEA20 by pressing the Menu button. Use the directional pad (up, down, left, right) to scroll through options. Press OK or the center button to select a menu item.

Return to the previous screen using the Back or Cancel button. The menu structure is intuitive, allowing easy access to phonebook, call history, and settings.

Making and Receiving Calls

To make a call, enter the number using the keypad and press the Talk button. Utilize the phonebook for stored contacts. Answering an incoming call is simple – press Talk. During a call, use Speakerphone for hands-free operation.

End calls by pressing Red or End. The KX-TGEA20 supports clear audio and reliable connectivity for everyday communication needs.

Making Outgoing Calls

Initiating a call with the Panasonic KX-TGEA20 is straightforward. Dial the desired number using the keypad. Alternatively, access and select a contact from your phonebook. Press the green Talk button to connect. For quick redial, press the Redial button.

Pause during dialing is supported; use the Pause button. Ensure a strong signal for optimal call quality. The handset displays the call duration during active conversations.

Answering Incoming Calls

When receiving a call on your Panasonic KX-TGEA20, the handset will ring and display the Caller ID if available. Press the green Talk button to answer the call. To reject an incoming call, press the Redial/Flash button. You can also silence the ringer by pressing any key except the Talk button.

Adjust the ringer volume using the volume control buttons on the side of the handset for personalized comfort.

Phonebook Features

The Panasonic KX-TGEA20 offers a convenient phonebook for storing frequently called numbers. You can store up to 100 names and numbers. Access the phonebook via the Menu button, then select Phonebook. Easily add, edit, or delete contacts as needed. Utilize speed dial for quick access to saved entries.

Storing contacts simplifies making calls and enhances organization, eliminating the need to manually dial numbers repeatedly.

Adding Contacts

To add a contact on your Panasonic KX-TGEA20, press Menu, then select Phonebook. Choose New Entry. Enter the contact’s name using the keypad – press the number corresponding to each letter. Next, input the phone number. Save the entry by pressing OK or Save.

Ensure accurate entry for seamless dialing. The phonebook supports storing up to 100 contacts, providing ample space for your important connections.

Editing and Deleting Contacts

To edit a phonebook entry on your Panasonic KX-TGEA20, access Phonebook via the Menu. Select the contact you wish to modify, then choose Edit. Update the name or number as needed, and save your changes. To delete a contact, select it and choose Delete, confirming your action when prompted.

Carefully review changes before saving. Deletion is permanent and cannot be undone, so confirm before proceeding.

Caller ID and Call History

The Panasonic KX-TGEA20 displays incoming Caller ID information, showing the caller’s name and number if available. Access the Call History through the Menu to review recent calls – both incoming, outgoing, and missed. You can easily redial from the call history list.

Ensure your phone line supports Caller ID services for this feature to function correctly. The phone stores a limited number of entries.

Viewing Caller ID Information

When receiving a call, the KX-TGEA20 displays the caller’s number and name (if stored in your phonebook) on the handset screen. Press the Caller ID button during or after a call to review the details again.

If the number is unknown, it will appear as “Unknown Caller” or simply the number. Ensure your telephone service provides Caller ID for this feature to work.

Accessing Call History

The Panasonic KX-TGEA20 stores a history of incoming and outgoing calls. Press the Call History button on the handset to view the call log. Use the navigation buttons to scroll through the list, displaying date, time, and number.

You can also view call duration. The capacity of the call history may be limited; older calls are automatically overwritten as new ones are received or made.

Advanced Call Features

The Panasonic KX-TGEA20 offers convenient features beyond basic calling. Call Waiting alerts you to a second incoming call while already on a call. Call Hold allows you to temporarily pause the current call.

Conference Calling enables three-way conversations. Refer to the full user manual for detailed instructions on activating and utilizing these advanced functionalities for enhanced communication.

Call Waiting and Call Hold

Call Waiting on the KX-TGEA20 alerts you to an incoming call during an existing conversation with a distinctive beep. To answer the new call, press the Talk button. To put the current call on Hold and accept the incoming call, press Hold, then Talk.

Returning to the held call is simple – press Hold again. Ensure your service supports Call Waiting for these features to function correctly.

Conference Calling

Conference Calling allows you to connect three parties simultaneously on your KX-TGEA20. After establishing a call, place the first caller on Hold. Dial the second party and, once connected, press the Conference button. This joins all three parties into a single call.

To end the conference, press Stop or Hold. Remember that service provider restrictions may apply to conference call duration or participant limits.

Key Detector (KX-TGA20) Setup

The KX-TGA20 Key Detector offers added security by alerting you if the handset is left behind. Installation requires following the separate Key Detector installation manual for proper pairing and functionality. Ensure the detector is within range of the base unit.

Refer to the dedicated manual for detailed setup instructions and troubleshooting tips. This accessory enhances the KX-TGEA20’s features, providing peace of mind.

Installing the Key Detector

Proper installation of the KX-TGA20 Key Detector is crucial for reliable operation. Begin by inserting the provided batteries, ensuring correct polarity. Then, follow the pairing instructions detailed in the Key Detector’s separate installation manual. Position the detector near the frequently used handset location.

Test the functionality after installation to confirm it alerts when the handset moves out of range. Refer to the manual for optimal placement and troubleshooting.

Key Detector Functionality

The KX-TGA20 Key Detector enhances security by alerting you when the handset is moved outside a designated range. This feature is particularly useful for preventing theft or loss. Activation requires successful pairing with the base unit, as outlined in the installation guide.

The detector emits an audible alarm when the handset leaves the monitored area, providing immediate notification. Adjust sensitivity settings for optimal performance.

Troubleshooting Common Issues

Experiencing problems? This section addresses frequent concerns. No dial tone? Verify the phone line connection and base unit power. Handset not charging? Ensure proper placement on the base and check the AC adapter. Refer to the full manual PDF for detailed steps.

Restarting both handset and base can often resolve minor glitches. If issues persist, consult Panasonic support resources.

No Dial Tone

Encountering a lack of dial tone? First, confirm the telephone line cord is securely connected to both the base unit and the wall jack. Verify the wall jack is active by testing with a known working phone. Ensure the base unit’s power adapter is firmly plugged in.

Check for any service outages in your area. Consult the PDF manual for detailed diagrams and troubleshooting steps.

Handset Not Charging

Is your handset failing to charge? Ensure the handset is correctly placed in the base unit’s charging cradle. Confirm the base unit’s power adapter is securely connected and functioning. Clean the charging contacts on both the handset and base unit with a soft, dry cloth.

Refer to the PDF manual for battery information and potential replacement options.

Downloading the User Manual (PDF)

Need a digital copy? You can easily access the Panasonic KX-TGEA20 user manual in PDF format online. Visit manualsonline or the official Panasonic support website to download it. This allows for convenient offline access and easy searching of features.

Save the PDF to your computer or mobile device for quick reference anytime, anywhere!

Accessing the Manual Online

Find the manual quickly! To access the Panasonic KX-TGEA20 user manual online, visit reputable websites like manualsonline. Alternatively, navigate to the official Panasonic support section on their website. Search for your model number – KX-TGEA20 – to locate and view the PDF directly in your browser.

This provides instant access without needing a download!

Saving the Manual for Offline Use

Download for convenience! Once you’ve found the Panasonic KX-TGEA20 manual online (typically in PDF format), select the download option. Ensure you save the file to a readily accessible location on your computer or mobile device.

This allows you to view the manual even without an internet connection, perfect for troubleshooting on the go!

Specifications and Technical Details

Key details revealed! The Panasonic KX-TGEA20 operates on standard household power, with specific voltage requirements outlined in the full manual. Its operating range, while dependent on environmental factors, provides substantial coverage within a typical home.

Further technical specifications, including dimensions and weight, are comprehensively detailed within the downloadable PDF user guide.

Power Requirements

Essential power information! The Panasonic KX-TGEA20 base unit requires standard AC power – typically 120V/60Hz. The handset utilizes rechargeable batteries, specifically Ni-MH or Ni-Cd types, for cordless operation.

Detailed voltage and amperage specifications are available in the complete PDF manual, ensuring correct and safe operation of your telephone system.

Operating Range

Maximize your cordless freedom! The Panasonic KX-TGEA20 boasts an approximate indoor operating range of up to 300 feet (90 meters) and an outdoor range of up to 1,000 feet (300 meters).

However, actual range varies significantly based on environmental factors like building construction, interference, and obstacles. Refer to the full PDF manual for details and tips on optimizing signal strength.

Belt Clip Installation and Usage

Enhance portability! The Panasonic KX-TGEA20 handset is compatible with the optional KX-TGA20 belt clip. To install, slide the clip onto the designated slot on the handset’s back.

Securely attach the clip for hands-free convenience. The belt clip allows for easy carrying during work or daily activities. Refer to the PDF manual for visual guidance and safety precautions.

Factory Reset and Initialization

Restore default settings! A factory reset on your Panasonic KX-TGEA20 erases all personalized data, returning the phone to its original state. This process can resolve certain software glitches.

Consult the PDF user manual for specific reset instructions, as the procedure may vary. Back up important contacts before performing a reset. Initialization re-registers the handset to the base unit.

Safety Precautions

Important safety information! To prevent fire or shock hazards, avoid water exposure and extreme temperatures. Do not disassemble the Panasonic KX-TGEA20; refer servicing to qualified personnel.

Use only the provided power adapter. Keep the device away from flammable materials. Read the complete safety instructions within the PDF user manual for detailed guidance and warnings.

Warranty Information

Panasonic offers a limited warranty on the KX-TGEA20 against defects in materials and workmanship. The warranty period varies by region; consult your purchase documentation or the official Panasonic website for specifics.

This warranty does not cover damage from misuse, accidents, or unauthorized repairs. Retain your proof of purchase for warranty claims. Further details are available in the PDF user manual.

Contacting Panasonic Support

Panasonic provides extensive online support resources, including FAQs, troubleshooting guides, and downloadable manuals for the KX-TGEA20. Visit the official Panasonic website for access to these materials.

For direct assistance, phone support details are also available online. Locate the appropriate contact number for your region to speak with a Panasonic representative regarding your product.

Online Support Resources

Panasonic’s website offers a wealth of self-help resources for the KX-TGEA20. Explore FAQs addressing common issues, detailed troubleshooting guides, and a searchable knowledge base. Downloadable manuals, including the complete user guide in PDF format, are readily available.

Additionally, you can find archived manuals and product information. These online tools empower you to resolve many issues independently and efficiently.

Phone Support Details

Panasonic provides dedicated phone support for the KX-TGEA20. While specific contact numbers may vary by region, visiting the official Panasonic support website is the best way to locate the most current phone support details.

Be prepared to provide your model number and a description of the issue when contacting support for efficient assistance. Expect potential wait times during peak hours.

golf workout program pdf

Golf Workout Program: A Comprehensive Guide

Elevate your game! This detailed program enhances strength, flexibility, and power, leading to improved performance and a reduced risk of injury on the course.

Golf, often perceived as a leisurely pursuit, demands a surprising level of physical conditioning. While technical skill is paramount, a golfer’s physical capabilities significantly influence swing mechanics, power generation, and overall consistency. Ignoring fitness can lead to diminished performance, increased fatigue, and a higher susceptibility to injuries.

A well-structured fitness program specifically designed for golf addresses the unique physical demands of the sport. It’s not simply about building general strength; it’s about developing functional strength, flexibility, and endurance tailored to the golf swing. This includes enhancing core stability, rotational power, and the ability to maintain balance throughout the swing.

Investing in your physical fitness translates directly to improvements on the course. You’ll experience greater distance, improved accuracy, and the stamina to perform consistently throughout a round. Furthermore, a proactive fitness approach can help prevent common golf-related injuries, allowing you to enjoy the game for years to come.

Understanding the Physical Demands of Golf

The golf swing is a complex, athletic movement requiring a coordinated effort from nearly every muscle group in the body. It’s a dynamic sequence involving rotation, flexion, extension, and stabilization – placing significant stress on the spine, shoulders, and core. Understanding these demands is crucial for designing an effective training program.

Unlike many sports with continuous exertion, golf involves bursts of high-intensity activity followed by periods of relative rest. This intermittent nature requires a blend of strength, power, and endurance. The ability to repeatedly generate force throughout a round is vital for maintaining consistency and preventing fatigue-related errors.

Furthermore, the asymmetrical nature of the swing creates imbalances in muscle development and can contribute to injury. A comprehensive fitness program must address these imbalances, focusing on strengthening supporting muscles and improving overall stability to protect vulnerable joints and tissues.

Swing Mechanics and Muscle Engagement

The golf swing isn’t just about arm speed; it’s a full-body rotation initiated from the ground up. The lower body – glutes, hamstrings, and quads – generates the initial power, transferring energy through the core muscles (obliques, transverse abdominis, and lower back). These muscles act as a stable base for the upper body’s rotational movement.

During the backswing, the latissimus dorsi, rhomboids, and trapezius muscles work to control shoulder rotation and maintain posture. The chest and shoulder muscles then engage during the downswing to deliver clubhead speed. Grip strength, provided by the forearms, is also critical for control.

Effective power transfer relies on sequential muscle activation and efficient kinetic chain movement. Weaknesses in any link of this chain can limit swing speed and accuracy. A targeted workout program should address these specific muscle groups to optimize swing mechanics and maximize performance.

Common Golf-Related Injuries

Golf, despite appearing low-impact, places significant stress on specific body parts. Lower back pain is incredibly common, often stemming from repetitive twisting and hyperextension during the swing. This can lead to muscle strains, ligament sprains, and even disc issues.

“Golfer’s elbow” (medial epicondylitis) and “tennis elbow” (lateral epicondylitis) are frequent overuse injuries affecting the elbow joint due to repetitive arm movements and gripping. Shoulder injuries, including rotator cuff strains and impingement, can also occur from the forceful rotation.

Wrist injuries, such as tendonitis, are prevalent due to the constant impact and pressure from gripping the club. Knee pain and hip problems can arise from the rotational forces and weight shifting. A comprehensive fitness program focusing on strength, flexibility, and proper technique can significantly reduce the risk of these injuries.

Phase 1: Building a Foundation (4-6 Weeks) ⎻ Flexibility & Core

This initial phase prioritizes establishing a solid base of flexibility and core stability, crucial for injury prevention and efficient swing mechanics. We’ll focus on increasing range of motion in key areas like the hips, shoulders, and spine, preparing your body for more demanding exercises.

Core strength isn’t about visible abs; it’s about building a strong, stable center to transfer power effectively. This phase emphasizes anti-rotation exercises to resist unwanted twisting during the swing, alongside foundational stability work. Expect a blend of dynamic and static stretches, alongside controlled core engagement.

Consistency is key during these first weeks. Aim for 3-4 sessions per week, focusing on proper form over intensity. This phase lays the groundwork for future power development and ensures your body can handle the stresses of the golf swing.

Dynamic Stretching for Golfers

Dynamic stretches prepare your muscles for the specific movements of the golf swing, increasing blood flow and range of motion. Unlike static stretches, these involve controlled movements through a full range of motion, mimicking the actions you’ll perform on the course.

Key exercises include torso twists, leg swings (forward, backward, and lateral), arm circles, and hip rotations. These movements enhance flexibility in the spine, hips, shoulders, and legs – all critical areas for a powerful and consistent swing. Focus on controlled, fluid motions, avoiding bouncing or jerky movements.

Perform these stretches before each round or practice session. A typical routine should last 5-10 minutes, focusing on the areas most involved in the golf swing. Prioritize quality of movement over quantity, ensuring each stretch is performed with proper form and control.

Static Stretching for Golfers – Post-Round Recovery

Static stretching is crucial for post-round recovery, helping to reduce muscle soreness and improve flexibility. Unlike dynamic stretches, static stretches involve holding a stretch in a challenging, yet comfortable, position for a period of time – typically 20-30 seconds.

Focus on major muscle groups used during the golf swing, including the hamstrings, hip flexors, glutes, shoulders, and back. Examples include hamstring stretches, quad stretches, triceps stretches, and torso twists. Remember to breathe deeply and relax into each stretch.

Perform these stretches after your round or practice session, when your muscles are warm; Holding each stretch for the recommended duration allows the muscles to lengthen and recover, promoting flexibility and preventing stiffness. Consistent static stretching aids in long-term injury prevention.

Core Strengthening Exercises – Anti-Rotation Focus

A strong core is paramount for golf, and resisting rotational forces is key. Unlike simply twisting, anti-rotation exercises build stability and prevent energy leaks during the swing. These exercises challenge your core to maintain a stable spine while your limbs move.

Effective exercises include Paloff presses (using a resistance band or cable machine), where you resist the pull of the band while maintaining a stable posture. Another excellent choice is the single-arm farmer’s carry, demanding core engagement to prevent lateral flexion.

Focus on controlled movements and proper form. Begin with lighter resistance and gradually increase it as your strength improves. Incorporate 3 sets of 10-12 repetitions for each exercise, 2-3 times per week. A stable core translates directly to a more powerful and consistent golf swing.

Core Stability Exercises – Plank Variations

Planks are foundational for core stability, but variations increase the challenge and target different muscle groups crucial for golf. Standard planks build isometric strength, while dynamic variations enhance functional fitness.

Try side planks to strengthen obliques, vital for resisting lateral flexion during the swing. Incorporate plank with arm/leg lifts to challenge stability further. For an advanced option, perform plank jacks or renegade rows (with dumbbells).

Maintain proper form: a straight line from head to heels, engaging your glutes and core. Avoid sagging hips or a rounded back. Aim for 3 sets, holding each plank variation for 30-60 seconds, or completing 10-15 repetitions for dynamic variations. Consistent plank training builds a resilient core, improving power transfer and preventing injuries.

Phase 2: Power Development (4-6 Weeks) ⸺ Strength & Explosiveness

Transitioning from foundational strength, this phase focuses on generating explosive power – essential for maximizing clubhead speed and distance. We’ll build upon the core stability established in Phase 1, adding heavier loads and faster movements.

Expect a shift towards compound exercises like squats, lunges, and deadlifts, performed with increased intensity. Upper body work will emphasize rotational power, mimicking the golf swing. Plyometrics – jump training – will be introduced to develop reactive strength.

Prioritize proper form over lifting heavy weight. This phase requires careful progression to avoid injury. Focus on controlled movements with a full range of motion. Remember to warm up thoroughly before each workout and cool down afterward. This phase is about translating strength into usable power on the course.

Lower Body Strength Training – Squats, Lunges, Deadlifts

A powerful golf swing originates from the ground up, making lower body strength paramount. This section details exercises targeting key muscle groups – glutes, hamstrings, and quads – crucial for generating power and stability.

Squats (back, front, goblet) build overall lower body strength. Lunges (forward, reverse, lateral) improve balance and single-leg stability, mirroring the swing’s weight shift. Deadlifts (conventional, Romanian) enhance posterior chain strength, vital for hip hinge mechanics.

Begin with bodyweight variations, progressing to weighted versions as strength increases. Focus on maintaining proper form: a neutral spine, controlled descent, and explosive ascent. Incorporate 3-4 sets of 8-12 repetitions for each exercise. Prioritize quality over quantity, and listen to your body.

Upper Body Strength Training – Rotational Power Exercises

Generating swing speed isn’t solely about brute force; rotational power is key. This section focuses on exercises that build strength and explosiveness through a rotational plane, mimicking the golf swing’s motion.

Medicine ball throws (rotational, overhead) develop explosive power in the core and upper body. Cable rotations (standing, kneeling) build rotational strength and stability. Resistance band pull-aparts improve scapular control and shoulder stability, crucial for preventing injuries.

Focus on controlled movements with a slight pause at the peak of rotation. Emphasize core engagement throughout each exercise. Perform 3-4 sets of 10-15 repetitions. Remember to maintain proper form to maximize effectiveness and minimize risk. Gradually increase resistance as you get stronger.

Plyometrics for Golf – Jump Training & Explosive Movements

Plyometrics are vital for developing the explosive power needed to generate clubhead speed. These exercises utilize the stretch-shortening cycle, enhancing your ability to rapidly switch from eccentric to concentric muscle contractions – mirroring the golf swing’s acceleration phase.

Box jumps (various heights) build lower body power. Lateral bounds improve side-to-side explosiveness, important for stability. Depth jumps (controlled landings) enhance reactive strength. Medicine ball slams (overhead, rotational) develop full-body power.

Start with low-intensity plyometrics and gradually increase the difficulty. Focus on proper landing mechanics to minimize joint stress. Perform 2-3 sets of 8-12 repetitions. Allow adequate rest between sets. Prioritize quality over quantity; controlled, explosive movements are key.

Grip Strength & Forearm Conditioning

A strong grip is fundamental for controlling the club and maximizing power transfer. Neglecting forearm conditioning can lead to fatigue and inconsistencies during a round. This section focuses on exercises to build endurance and strength in your hands, wrists, and forearms.

Farmer’s walks (holding heavy dumbbells) build overall grip strength and forearm endurance. Wrist curls (palms up and down) target the flexors and extensors. Reverse curls specifically strengthen the forearm muscles. Grip strengtheners (hand grippers) provide targeted resistance.

Incorporate these exercises 2-3 times per week. Start with lighter weights and gradually increase the resistance. Focus on controlled movements and avoid overtraining. Remember, a balanced approach is crucial – strengthening both the flexors and extensors prevents imbalances.

Phase 3: Golf-Specific Conditioning (Ongoing) ⎻ Integration & Maintenance

This phase bridges the gap between general fitness and the unique demands of the golf swing. It’s about refining movements, enhancing coordination, and maintaining the gains achieved in previous phases. Consistency is key – this isn’t a temporary fix, but a long-term commitment to performance.

Focus shifts to integrating strength and power into swing mechanics. Drills should mimic the golf motion, emphasizing rotational power and efficient energy transfer. Regular practice of these drills reinforces proper technique and builds muscle memory. This phase also prioritizes injury prevention through continued flexibility and stability work.

Think of this as ‘maintenance’ – 2-3 sessions per week are sufficient to stay sharp. Adjust the intensity based on your playing schedule and listen to your body. Prioritize quality over quantity, ensuring each repetition is performed with proper form.

Rotational Power Drills with Resistance Bands

Resistance bands are invaluable for developing rotational power, mimicking the forces experienced during the golf swing. These drills enhance core stability and improve the sequencing of muscle activation, crucial for maximizing clubhead speed. Begin with lighter resistance and gradually increase it as strength improves.

Key drills include band rotations – anchoring the band and rotating the torso while maintaining a stable lower body. Another effective exercise is the “wood chop,” simulating the downswing motion. Focus on controlled movements and engaging the core throughout each repetition. Visualize the golf swing to reinforce proper technique.

Perform 3 sets of 10-12 repetitions for each drill, 2-3 times per week. Prioritize quality over quantity, ensuring proper form to avoid injury. These drills are best incorporated into Phase 3, after a solid foundation of strength and stability has been established.

Balance and Proprioception Training

Maintaining balance throughout the golf swing is paramount for consistent contact and power. Proprioception – your body’s awareness of its position in space – plays a vital role. Training these elements enhances stability and improves your ability to react to uneven lies.

Exercises include single-leg stands, both with eyes open and closed, progressing to unstable surfaces like balance boards or foam pads. Incorporate dynamic movements, such as reaching in different directions while maintaining balance. Wobble board exercises are also highly beneficial, challenging your ankle and core stability.

Aim for 3 sets of 30-60 seconds per exercise, 2-3 times weekly. Focus on controlled movements and engaging your core. These drills are particularly important in Phase 3, integrating balance into your golf-specific conditioning. Consistent practice will translate to improved stability on the course.

Speed and Agility Drills for Golf

Golf isn’t solely about power; quickness and agility are crucial for efficient movement and responding to the dynamic demands of the swing. These drills improve footwork, reaction time, and rotational speed, contributing to a more powerful and controlled swing.

Implement ladder drills focusing on quick feet and coordination. Cone drills, such as shuttle runs and figure-eight patterns, enhance agility and change-of-direction speed. Medicine ball throws, emphasizing rotational power, are also effective. Consider incorporating short sprints with a focus on explosive first steps.

Perform 2-3 sets of each drill, with adequate rest between sets, 2-3 times per week. Prioritize proper form over speed initially, gradually increasing intensity as your fitness improves. These drills are best suited for Phase 3, complementing your golf-specific conditioning.

Warm-up Routine for Before a Round

A proper warm-up is paramount for preparing your body for the stresses of a golf round, minimizing injury risk, and maximizing performance. This routine should be dynamic, focusing on movements that mimic the golf swing and increase blood flow to key muscle groups.

Begin with 5-10 minutes of light cardio, like brisk walking or jogging. Follow this with dynamic stretches, including torso twists, leg swings, and arm circles. Incorporate golf-specific movements like practice swings, gradually increasing range of motion. Include exercises targeting core activation and shoulder mobility.

Spend approximately 15-20 minutes on your warm-up, progressing from general movements to more golf-specific drills. This prepares your muscles, joints, and nervous system for the demands of the course, ensuring you’re ready to perform at your best from the first tee.

Nutrition for Golf Performance

Optimal nutrition is a cornerstone of any successful golf performance plan, often overlooked despite its significant impact. Fueling your body correctly provides sustained energy, enhances focus, and aids in recovery, allowing you to maintain peak performance throughout a round and during training.

Prioritize complex carbohydrates for sustained energy release, such as whole grains, fruits, and vegetables. Include lean protein sources to support muscle repair and recovery. Healthy fats are also crucial for overall health and energy levels. Avoid processed foods, sugary drinks, and excessive caffeine.

Strategic timing of nutrient intake is key. Consume a balanced meal 2-3 hours before your round, and snack on easily digestible foods during play to maintain energy levels. Post-round recovery nutrition should focus on replenishing glycogen stores and repairing muscle tissue.

Hydration Strategies for Golfers

Maintaining proper hydration is absolutely critical for golfers, often underestimated due to the seemingly moderate exertion. Even mild dehydration can significantly impair performance, leading to fatigue, decreased concentration, and reduced muscle power – all detrimental to your game.

Begin hydrating well before your round, drinking water consistently throughout the day. During play, aim to drink fluids every 2-3 holes, even if you don’t feel thirsty. Consider electrolyte-rich beverages, especially in hot and humid conditions, to replace lost sodium and potassium.

Avoid sugary drinks and excessive caffeine, as they can lead to dehydration. Monitor your urine color – pale yellow indicates adequate hydration, while dark yellow suggests you need to drink more. Post-round rehydration is equally important for recovery.

Fueling Your Body On and Off the Course

Optimal nutrition is paramount for golfers seeking peak performance and sustained energy throughout a round. A balanced diet, rich in complex carbohydrates, lean proteins, and healthy fats, provides the necessary fuel for both physical exertion and mental focus.

Prior to a round, focus on carbohydrate-rich foods like oatmeal, whole-wheat toast, or a banana to provide sustained energy. During play, opt for easily digestible snacks such as energy bars, fruit, or trail mix to maintain blood sugar levels.

Post-round recovery requires replenishing glycogen stores and repairing muscle tissue. Consume a meal containing both carbohydrates and protein within an hour of finishing your round. Consistent, healthy eating habits off the course are equally vital for supporting your training and overall well-being.

Recovery and Injury Prevention

Proactive recovery is crucial for golfers to maintain performance and minimize the risk of injury. Implementing consistent recovery strategies allows your body to adapt to the demands of training and playing, preventing overuse injuries and promoting long-term health.

Prioritize active recovery, such as light walking or stretching, on rest days. Incorporate regular foam rolling and self-myofascial release techniques to address muscle tightness and improve flexibility.

Adequate sleep (7-9 hours) is essential for muscle repair and recovery. Listen to your body and don’t push through pain. Addressing minor discomfort early can prevent it from escalating into a more serious injury. A well-rounded approach to recovery ensures you stay on the course and playing your best.

Foam Rolling and Self-Myofascial Release

Self-myofascial release (SMR), commonly using a foam roller, is a fantastic tool for golfers to improve muscle flexibility, reduce soreness, and enhance recovery. Targeting key muscle groups used in the golf swing – like the glutes, hamstrings, quads, back, and shoulders – can significantly improve range of motion and prevent injuries.

Apply moderate pressure to tender areas, holding for 30-60 seconds. Slow, controlled movements are key; avoid rolling directly over joints. Focus on areas that feel tight or restricted.

Regular foam rolling, even just 10-15 minutes several times a week, can dramatically improve tissue quality and prepare your body for optimal performance. It’s a simple yet effective addition to any golfer’s recovery routine, promoting flexibility and reducing the risk of strains.

Cool-down Routine for After a Round or Workout

A proper cool-down is crucial for transitioning your body from exertion back to a resting state, minimizing muscle soreness and promoting recovery. After a round of golf or a dedicated workout, dedicate 10-15 minutes to gentle movements and static stretching.

Include stretches targeting the major muscle groups used during golf: hamstrings, glutes, lower back, shoulders, and chest. Hold each stretch for 30 seconds, focusing on deep, controlled breathing. Gentle torso twists and arm circles can also aid in recovery.

Prioritizing a cool-down helps flush out metabolic waste, reduces muscle tension, and improves flexibility, setting the stage for your next performance. Don’t skip this vital step – your body will thank you!

Sample Weekly Workout Schedule

This schedule provides a framework; adjust based on your fitness level and available time. Remember to warm up before each session and cool down afterward. Listen to your body and prioritize rest when needed.

Monday: Lower Body Strength (Squats, Lunges, Deadlifts – 3 sets of 8-12 reps). Tuesday: Core & Flexibility (Plank variations, dynamic/static stretching – 30-45 minutes). Wednesday: Active Recovery (Light cardio, foam rolling – 30 minutes).

Thursday: Upper Body & Rotational Power (Resistance band exercises, dumbbell rotations – 3 sets of 10-15 reps). Friday: Plyometrics & Speed (Jump squats, agility drills – 20-30 minutes). Saturday/Sunday: Golf & Rest. Consistency is key for optimal results!

Resources & Further Learning

To continue your golf fitness journey, explore these valuable resources. Websites like Stack & Tilt Golf and Titleist Performance Institute (TPI) offer in-depth articles and training programs. Consider investing in a SuperSpeed Golf training system for swing speed gains.

For equipment, brands like SKLZ and Bionic offer specialized golf fitness tools. YouTube channels dedicated to golf fitness, such as Rick Shiels Golf and George Gankas Golf, provide instructional videos.

Finding a qualified golf fitness professional (TPI certified) can provide personalized guidance. Local gyms and golf academies often have trainers specializing in golf-specific conditioning. Remember to prioritize credible sources and tailor your learning to your individual needs and goals for lasting improvement.

Recommended Golf Fitness Equipment

To maximize your training, consider these equipment options. Resistance bands are versatile for rotational power drills and warm-ups. A stability ball enhances core engagement and balance training. Medicine balls are excellent for explosive power development and rotational movements.

For flexibility, a foam roller aids in self-myofascial release and muscle recovery. Weighted clubs build swing speed and strength. Speed stacks improve hand-eye coordination and reaction time.

Invest in a good quality yoga mat for stretching and floor exercises. Adjustable dumbbells offer progressive resistance for strength training. Don’t forget a reliable heart rate monitor to track intensity and optimize your workouts. Prioritize quality and durability for long-term use.

Finding a Qualified Golf Fitness Professional

Seeking expert guidance can significantly accelerate your progress. Look for professionals with certifications like Titleist Performance Institute (TPI), Gray Institute, or credentials from the National Strength and Conditioning Association (NSCA). Experience working specifically with golfers is crucial.

Inquire about their assessment process – a thorough evaluation of your movement patterns, flexibility, and strength is essential. A good professional will tailor a program to your specific needs and limitations, not a generic routine.

Check references and read reviews. Don’t hesitate to ask about their success stories and approach to injury prevention. A qualified professional will prioritize long-term health and performance, not just quick fixes. Investing in expert coaching is an investment in your game.

trigonometric identities worksheet pdf

Trigonometric identities are fundamental tools in mathematics, simplifying complex expressions and solving equations. Worksheets and PDF resources provide structured practice, covering essential identities like Pythagorean and reciprocal identities, helping students master these concepts through guided exercises and sample problems.

1.1 Overview of Trigonometric Identities

Trigonometric identities are equations involving trigonometric functions that hold true for all values of the variable. They are essential for simplifying expressions, solving equations, and proving other identities. Worksheets and PDF resources provide comprehensive practice, covering foundational identities like the Pythagorean identity, reciprocal identities, and co-function identities. These resources often include sample problems, such as proving identities like tanx sinx = cosx or simplifying expressions using reciprocal relationships. By mastering these identities through guided exercises, students build a strong foundation for advanced trigonometric applications. These worksheets are invaluable for reinforcing concepts and improving problem-solving skills.

1.2 Importance of Trigonometric Identities in Mathematics

Trigonometric identities are crucial in mathematics as they simplify complex expressions, enabling easier manipulation and solving of equations. They form the foundation for advanced topics like calculus and physics, where such simplifications are essential. Worksheets and PDF resources, such as those found online, provide structured practice, helping students grasp these identities through exercises and sample problems. Mastering trigonometric identities enhances problem-solving skills and deepens understanding of trigonometric functions, making them indispensable in both academic and real-world applications. These resources are vital for students aiming to excel in mathematics, offering a clear path to proficiency in trigonometric concepts.

Types of Trigonometric Identities

Trigonometric identities include Pythagorean, reciprocal, co-function, sum/difference, and double angle identities. Worksheets often categorize these, providing exercises to master each type effectively for problem-solving.

2.1 Pythagorean Identities

Pythagorean identities form the foundation of trigonometric identities, derived from the Pythagorean theorem. The primary identity is sin²θ + cos²θ = 1. Additional identities include 1 + tan²θ = sec²θ and 1 + cot²θ = csc²θ. These identities are crucial for simplifying expressions and solving equations. Worksheets and PDF resources often include exercises to prove and apply these identities, such as rewriting expressions like tanxsinx/cosx or 1/tanx using Pythagorean relationships. Practice problems also involve verifying identities step-by-step, ensuring a strong grasp of these essential trigonometric building blocks.

2.2 Reciprocal Identities

Reciprocal identities relate trigonometric functions to their reciprocals, such as sin x and csc x, cos x and sec x, and tan x and cot x. These identities are essential for simplifying expressions and solving equations. Worksheets often include problems like expressing tan x in terms of sin x and cos x, or proving identities such as tan x = sin x / cos x. Practice resources, including PDFs, provide exercises to master these relationships, ensuring students can transform and simplify complex trigonometric expressions effectively. These identities are foundational for advanced topics in calculus and real-world applications.

2.3 Co-Function Identities

Co-function identities establish relationships between trigonometric functions of complementary angles, such as sin(θ) = cos(90° – θ) and tan(θ) = cot(90° – θ). These identities are essential for simplifying expressions and solving equations involving complementary angles. Worksheets and PDF resources provide numerous exercises, such as proving identities and expressing functions in terms of their cofunctions. For example, problems may ask to prove that cosec x = 1/sin x or to express sec x in terms of cos x. Practicing these identities enhances understanding of trigonometric relationships and their applications in various mathematical problems and real-world scenarios.

2.4 Sum and Difference Identities

Sum and difference identities simplify expressions involving the sine and cosine of angle sums or differences. Key identities include:

  • sin(A ± B) = sin A cos B ± cos A sin B
  • cos(A ± B) = cos A cos B ∓ sin A sin B

These identities are essential for solving trigonometric equations and simplifying complex expressions. Worksheets and PDF resources provide ample practice, such as proving identities like tan x sin x / cos x sec x and solving expressions involving cosec x – sin x / cos x cot x. Mastering these identities enhances problem-solving skills and deepens understanding of trigonometric relationships.

2.5 Double Angle Identities

Double angle identities express trigonometric functions of double angles in terms of single angles. Key identities include sin(2θ) = 2 sinθ cosθ, cos(2θ) = cos²θ – sin²θ, and tan(2θ) = 2 tanθ / (1 – tan²θ). These identities are crucial for simplifying expressions and solving equations. Worksheets often include problems like expressing cosec x sec x in terms of tan x or proving identities involving double angles. Practice resources, such as PDF worksheets, provide numerous exercises to master these identities, ensuring a strong foundation in trigonometric manipulations.

Proving Trigonometric Identities

Trigonometric identities worksheets offer structured practice in proving identities, guiding students through logical steps and essential manipulations to master these fundamental mathematical tools for effectively.

3.1 Steps to Prove Trigonometric Identities

Proving trigonometric identities involves systematic steps to simplify expressions using known identities. Start by selecting one side of the identity to transform. Apply fundamental identities like Pythagorean or reciprocal identities to simplify the expression. Continue manipulating the expression step-by-step, ensuring each transformation is valid. The goal is to show that one side of the identity matches the other. Practice worksheets, such as those found in PDF resources, provide guided exercises to master these techniques, offering sample problems to enhance understanding and proficiency in proving identities.

3.2 Common Mistakes in Proving Identities

When proving trigonometric identities, common mistakes include misapplying reciprocal identities, mishandling negative signs, and incorrectly using Pythagorean identities. Students often forget to simplify expressions properly or apply identities in the wrong context. For instance, confusing sine and cosecant or misusing tangent identities can lead to incorrect proofs. Additionally, failing to factor correctly or cancel terms appropriately is a frequent error. Worksheets and PDF resources highlight these pitfalls, emphasizing the importance of careful algebraic manipulation and attention to detail. Practicing with exercises from these resources helps students identify and avoid such mistakes, ensuring a stronger grasp of identity proofs.

Solving Trigonometric Equations Using Identities

4.1 Strategies for Solving Equations

Trigonometric identities simplify solving equations by isolating variables and reducing complexity. Worksheets offer exercises in applying identities to various equation types, enhancing problem-solving skills effectively.

4.1 Strategies for Solving Equations

Mastering strategies to solve trigonometric equations involves leveraging identities to simplify expressions. Start by using reciprocal and co-function identities to rewrite complex terms. Next, apply sum and difference formulas to combine or separate angles. Factoring is another effective method to solve equations by breaking them into simpler components. Additionally, squaring both sides can help eliminate square roots, though it may introduce extraneous solutions. Always verify solutions by substituting them back into the original equation. Graphical approaches can also provide insights by visualizing function intersections. Practice worksheets and PDF resources offer guided exercises to refine these techniques and ensure accuracy.

4.2 Examples of Solving Equations with Identities

Using trigonometric identities to solve equations involves simplifying expressions to find unknown angles or verify solutions. For instance, consider the equation tanx/sinx = secx. By applying the reciprocal identity, tanx = sinx/cosx and secx = 1/cosx, the equation simplifies to sinx/cosx * 1/sinx = 1/cosx, confirming the identity. Another example is solving cosec x – sinx = cosx cotx, where using cosec x = 1/sinx and cotx = cosx/sinx helps verify the equation. These examples demonstrate how identities streamline solving trigonometric equations, making them essential tools in mathematics.

Graphical Representation of Trigonometric Identities

Graphs visualize trigonometric identities, illustrating relationships between functions like sine, cosine, and tangent. Worksheets often include graphical interpretations to enhance understanding of identity transformations and periodic behaviors.

5.1 Understanding Identities Through Graphs

Graphs provide a visual approach to understanding trigonometric identities, making abstract relationships more tangible. By plotting functions like sine, cosine, and tangent, students can observe how identities hold true across intervals. For example, the Pythagorean identity sin²x + cos²x = 1 is evident when graphing sine and cosine functions, as their squares always sum to 1. Similarly, reciprocal identities like cscx = 1/sinx can be verified by comparing the graphs of cosecant and the reciprocal of sine. Visual tools also help identify periodicity and symmetry, reinforcing conceptual understanding and aiding in the verification of complex identities.

5.2 Visualizing Trigonometric Functions and Their Identities

Visualizing trigonometric functions and their identities enhances understanding by transforming abstract concepts into graphical representations. Graphs of sine, cosine, and tangent functions reveal periodicity and symmetry, aiding in identifying relationships like co-function identities. Plotting identities such as sin²x + cos²x = 1 illustrates fundamental truths. Interactive tools allow exploration of how identities like tanx = sinx/cosx behave graphically. This visual approach clarifies complex relationships, making identities more intuitive for problem-solving and equation simplification. Worksheets often include graphing exercises to reinforce these connections, providing a practical link between theory and application.

Applications of Trigonometric Identities

Trigonometric identities are essential in various fields such as physics and engineering. Worksheets and PDF resources provide practical examples, helping students apply these identities to real-world problems, enhancing their problem-solving skills.

6.1 Applications in Calculus

Trigonometric identities are essential in calculus for simplifying complex expressions, aiding in differentiation and integration. They facilitate solving limits and integrating functions by transforming intricate trigonometric expressions into manageable forms. This reduces errors and saves time. Additionally, these identities are crucial in differential equations involving trigonometric functions. A strong understanding of trigonometric identities is vital for excelling in calculus.

6.2 Real-World Applications of Trigonometric Identities

Trigonometric identities are essential in various real-world applications, including physics, engineering, and astronomy. In physics, they simplify calculations involving wave patterns and oscillations. Engineers use them to design structures and mechanisms, ensuring stability and precision. Astronomers rely on these identities to calculate orbital trajectories and celestial movements. Additionally, computer graphics and game development utilize trigonometric identities for 3D modeling and animations. These practical uses highlight the importance of mastering trigonometric identities, as they provide the mathematical foundation for solving complex, real-world problems efficiently and accurately.

Practice Resources for Trigonometric Identities

Abundant resources like trigonometric identities worksheets and PDF files are available online, offering structured exercises and sample problems to practice and master trigonometric identities effectively.

7.1 Recommended Worksheets and PDF Resources

For mastering trigonometric identities, various worksheets and PDF resources are available online. These materials offer structured practice, covering essential identities like Pythagorean, reciprocal, and co-function identities. Many worksheets include sample problems, such as proving identities like tanx/sinx = secx or simplifying expressions involving cotx and tanx. Resources like the Trigonometric Identities Worksheet provide exercises for beginners, while advanced PDF guides include solutions for complex equations. These tools are ideal for self-study or classroom use, ensuring a comprehensive understanding of trigonometric concepts. They are freely accessible and designed to cater to learners of all skill levels.

7.2 Online Tools for Practicing Trigonometric Identities

Various online tools and platforms offer interactive exercises and worksheets for mastering trigonometric identities. Websites like Khan Academy and GeoGebra provide step-by-step solutions and visual graphs to enhance understanding. Additionally, Symbolab allows users to practice and verify identity proofs digitally. Many resources, such as Trigonometric Identities Worksheets, are available as downloadable PDFs, offering a wide range of problems to solve. These tools are invaluable for self-study, enabling learners to practice at their own pace and reinforce their grasp of trigonometric concepts through interactive and visual learning experiences.

Conclusion

Mastering trigonometric identities is essential for problem-solving in mathematics. Worksheets and PDF resources offer comprehensive practice, helping students grasp and apply these fundamental concepts effectively.

8.1 Summary of Key Points

Trigonometric identities are essential for simplifying expressions and solving equations. Worksheets and PDF resources offer comprehensive practice, covering Pythagorean, reciprocal, and co-function identities. They include sample problems like proving identities such as tanx/sinx = secx and 1 + tanx = sinx/cosx. These resources help students master identities through structured exercises, ensuring a strong foundation in trigonometry. Regular practice with these materials enhances problem-solving skills and prepares students for advanced applications in calculus and real-world scenarios. By focusing on key identities and their proofs, these worksheets provide an invaluable tool for achieving proficiency in trigonometric concepts.

8.2 Final Tips for Mastering Trigonometric Identities

To master trigonometric identities, start by understanding basic concepts and gradually tackle complex ones. Practice regularly using worksheets and PDF resources, focusing on proving and simplifying expressions. Avoid common mistakes like mixing up similar identities or forgetting reciprocal relationships. Use online tools for additional practice and visualization. Break down problems into smaller steps and verify each part. Collaborate with peers or tutors to discuss challenging topics. Lastly, review and apply identities in real-world problems to reinforce your understanding and retention.

apprendre à utiliser un smartphone pdf

Understanding the Importance of Smartphones in Daily Life

Smartphones are essential tools for communication, navigation, and accessing information. They simplify daily tasks, enhance productivity, and offer entertainment on the go, making them indispensable in modern life.

Smartphones have become indispensable tools, serving as multi-functional devices that simplify daily tasks. They enable instant communication, navigation, and access to information, making them vital for modern living. Beyond basic calls and messages, smartphones empower users to manage schedules, track health, and stay connected socially. Their ability to run apps tailored for learning, productivity, and entertainment underscores their versatility. For beginners, mastering smartphone basics opens doors to endless possibilities, from accessing educational resources to enhancing personal growth. This section highlights how smartphones integrate into daily routines, fostering efficiency and convenience in a fast-paced world.

Key Features of Modern Smartphones

Modern smartphones boast high-resolution displays, powerful processors, and advanced camera systems. They often include multi-lens cameras, night mode, and video recording capabilities. Long-lasting batteries with fast charging are standard, ensuring all-day use. Connectivity options like 5G, Wi-Fi 6, and Bluetooth enable seamless communication. Biometric security, such as fingerprint or face ID, enhances privacy. Customizable software and regular updates keep devices secure and functional. Additional features like water resistance, wireless charging, and expandable storage cater to diverse needs. These innovations make smartphones indispensable for productivity, entertainment, and daily tasks, offering a personalized experience for users of all levels.

Setting Up Your Smartphone for the First Time

Setting up your smartphone for the first time involves several key steps. Start by charging the device and inserting your SIM card or eSIM. Power it on and follow the on-screen instructions to select your language and country/region. Choose your Wi-Fi network or connect via mobile data. Set up a security method like a PIN, pattern, or biometric authentication. Create or sign in to your account (e.g., Google or Apple ID) to access essential services. Finally, restore data from a backup or set up as a new device. This process ensures your smartphone is ready for use, with personalized settings and security in place.

Choosing the Right Smartphone

Selecting the Best Operating System (iOS or Android)

Choose between iOS and Android based on your preferences. iOS offers simplicity and security, while Android provides customization and affordability, catering to different user needs.

  • Consider app ecosystem and hardware integration.
  • Think about budget and device longevity.
  • Check reviews for reliability and performance.

Choosing between iOS and Android depends on your preferences and needs. iOS offers a seamless, user-friendly experience with regular updates and a secure ecosystem, ideal for those invested in Apple products. Android provides more customization options, a wider range of devices, and greater flexibility in hardware and software. Consider factors like app availability, integration with other devices, and personal familiarity. iOS is known for its simplicity and consistency, while Android appeals to those who value versatility and control. Research both to determine which aligns best with your lifestyle and requirements for learning smartphone basics effectively.

Evaluating Hardware Specifications for Your Needs

When choosing a smartphone, evaluate hardware specs based on your usage. The processor (CPU) affects performance, with higher-end chips offering smoother multitasking. RAM is crucial for app handling—4GB is basic, while 8GB or more is ideal for heavy users. Storage capacity (32GB to 512GB) should match your needs for apps, photos, and files. Battery capacity (mAh) determines longevity; look for at least 4000mAh for all-day use. Display quality (HD, FHD, or AMOLED) impacts viewing pleasure. Consider cameras (MP, aperture) for photography needs. Ensure the hardware aligns with your lifestyle, whether for gaming, productivity, or casual use, to avoid overspending or underperformance.

Budget-Friendly vs. High-End Smartphones

When choosing a smartphone, budget-friendly options offer essential features at lower prices, ideal for basic tasks like calls, messaging, and web browsing. High-end models, while more expensive, provide advanced performance, superior cameras, and premium designs. Budget phones often sacrifice on processor speed and display quality, while flagship devices deliver cutting-edge technology. Brands like Xiaomi and Samsung offer affordable options, whereas Apple and Google cater to high-end users. Consider your needs: budget phones are perfect for casual use, while high-end models suit tech enthusiasts or professionals requiring top-tier performance. Both options ensure connectivity and functionality, making them accessible to a wide range of users.

Basic Operations and Navigation

Mastering basic smartphone operations involves turning it on/off, navigating the home screen, using the app drawer, making calls, sending messages, and understanding gestures for efficient use.

Turning On and Off Your Smartphone

To turn on your smartphone, locate the power button, typically on the side or top. Press and hold it until the screen lights up and the startup process begins. Follow on-screen instructions to complete the initial setup. To turn it off, press and hold the power button until a shutdown option appears. Select “Power off” or “Restart” based on your needs. Ensure the device is fully powered down before storing it. Regularly restarting your phone can help maintain performance and resolve minor issues. Always use the power button to avoid improper shutdowns, which might cause data loss or system instability.

Navigating the Home Screen and App Drawer

The home screen displays shortcuts to frequently used apps, widgets, and essential features. To navigate, swipe left or right to access additional screens. The app drawer, accessed by swiping up or tapping the grid icon, lists all installed apps. Organize apps into folders by dragging icons onto each other. Use shortcuts for quick access to functions like calling or messaging contacts. Widgets provide glanceable information, such as weather or calendar events. Customize the layout by pressing and holding an empty area to adjust settings, change wallpapers, or add widgets. This setup enhances efficiency and personalizes your smartphone experience for daily use.

Making and Receiving Calls

Making and receiving calls is a fundamental feature of smartphones. To make a call, open the phone app, enter the number using the dialer, and press the call button. To receive a call, swipe the answer button when your phone rings. Adjust volume during calls using the side buttons. Use the speakerphone for hands-free conversations or mute to pause audio. Access call logs to view missed, dialed, or received calls. Manage call settings like call waiting or forwarding in the phone app. Ensure a stable network connection for clear communication. Learn these basics to master voice communication on your smartphone effectively.

Sending and Managing SMS Messages

Sending SMS messages is a fundamental feature of smartphones, enabling quick communication. To send an SMS, open the messaging app, compose your message, add recipients, and press send. You can also attach media like photos or videos. Managing messages involves organizing conversations, deleting old chats, and marking important texts as read. Many phones allow scheduling messages or using emojis for a personalized touch. Notifications alert you to new messages, and you can customize tones or mute conversations. Regularly cleaning up your inbox helps maintain storage and keeps your messaging app running smoothly. Backup options ensure your messages are saved securely.

Essential Features and Functions

Using the Camera and Photo Gallery

Smartphones offer high-quality cameras for capturing moments and organizing photos; Learn to use modes like Portrait or Pro for professional results and manage your gallery efficiently.

Smartphones offer high-quality cameras for capturing life’s moments. Open the camera app, usually found on the home screen or app drawer. Switch between photo and video modes, and explore features like portrait, night, or pro mode for better results. Adjust settings like flash, zoom, and timers for optimal shots. After taking photos, access the photo gallery to view, organize, and edit your images. Create albums, apply filters, or share photos directly from the gallery. Many phones also support advanced editing tools, allowing you to enhance or crop images effortlessly. Regularly manage your gallery to free up storage and keep your memories organized.

Managing Contacts and Address Book

Managing contacts on your smartphone is straightforward. You can add, edit, or delete contacts in the address book app. Syncing contacts with your email or cloud accounts ensures they are backed up and accessible across devices. Organize contacts into groups for easier communication. Use the search function to quickly find specific contacts. Editing a contact allows you to update phone numbers, emails, or addresses. Deleting unwanted contacts helps keep your list clean. Many smartphones also support importing contacts from SIM cards or other devices. Regularly updating your address book ensures you stay connected with friends, family, and colleagues efficiently.

Setting Up and Using Wi-Fi and Bluetooth

To connect your smartphone to Wi-Fi, go to the Settings app, select “Wi-Fi,” and choose a network from the list. Enter the password if required. Once connected, you can browse the internet, stream content, and use online services. For Bluetooth, open Settings, enable Bluetooth, and pair your device with accessories like headphones or speakers. Ensure both devices are in pairing mode; After pairing, you can enjoy wireless audio or file transfers. Regularly review connected devices and adjust settings to optimize performance and security. Troubleshoot issues by restarting your phone or resetting network settings. Properly managing Wi-Fi and Bluetooth enhances your smartphone experience.

Understanding Notifications and Alerts

Notifications and alerts are essential features that keep you informed about updates, messages, and system changes. They appear as banners, icons, or pop-ups, ensuring you stay connected and informed.
Notifications can be managed by swiping or tapping to view details, while alerts often require immediate attention, like confirming actions or setting reminders.
Customizing notification settings allows you to prioritize alerts, mute unnecessary ones, and enhance your smartphone experience.
Regularly reviewing notifications helps maintain productivity and avoids clutter.
Understanding these tools ensures you stay updated without overwhelming your device or daily routine.

Customizing Your Smartphone

Personalize your home screen with wallpapers, themes, and app shortcuts. Organize apps into folders for easy access and adjust display settings for better visibility and comfort.

Changing Wallpapers and Themes

Personalizing your smartphone’s appearance is straightforward. To change wallpapers, go to Settings > Wallpaper, then choose from preloaded options or select a personal photo. Themes can be downloaded from app stores or adjusted through built-in settings. Customize colors, icons, and layouts to match your style. This enhances user experience and makes your device unique. Regular updates often introduce new themes, keeping your phone fresh and modern. Experiment with different looks to find what suits you best. This feature allows for endless creativity and personalization, making your smartphone truly yours.

Organizing Apps with Folders and Shortcuts

Organizing apps with folders and shortcuts helps streamline your smartphone experience. Create folders by dragging one app icon onto another, naming them based on categories like “Productivity” or “Social Media.” This reduces clutter and makes apps easier to find. For frequently used apps, add shortcuts to your home screen by pressing and holding the app icon, then selecting the “Add to Home Screen” option. You can also customize shortcut names or icons for personalization. Regularly reviewing and updating your app layout ensures efficiency. This simple yet effective method enhances navigation and saves time, making your smartphone more user-friendly and tailored to your needs.

Adjusting Display Settings for Better Visibility

Adjusting your smartphone’s display settings can significantly enhance your user experience. Start by tweaking the brightness and auto-brightness features to suit your environment. Lowering the screen timeout duration can conserve battery life while keeping the display responsive. For better readability, adjust the font size or enable zoom options. Night mode or dark theme can reduce eye strain in low-light conditions. Additionally, explore color temperature settings to customize the screen’s warmth. These adjustments ensure optimal visibility and comfort, making your smartphone more user-friendly. Experiment with these settings to find the perfect balance for your daily needs and preferences.

Personalizing Ringtones and Sounds

Personalizing ringtones and sounds enhances your smartphone experience, making it unique to your preferences. To customize, go to the Settings app, select “Sounds” or “Sound and Vibration,” and choose from pre-installed options or upload your own. Assign specific ringtones to contacts for easy identification. Adjust notification tones, alarm sounds, and system sounds to suit your lifestyle. You can also enable vibration patterns or use silent modes for discreet notifications. Some devices allow recording custom sounds or syncing with cloud storage for more options. Experiment with these settings to create a personalized audio experience tailored to your daily routine and preferences.

Intermediate Tips and Tricks

Multitasking and Split-Screen Mode

Master multitasking by using split-screen mode to run two apps simultaneously, enhancing productivity and efficiency while navigating through tasks seamlessly on your smartphone.

Multitasking on smartphones allows users to switch between apps seamlessly, enhancing productivity. Split-screen mode enables using two apps simultaneously, perfect for tasks like browsing and note-taking. To activate, swipe from the edge or use gestures. This feature boosts efficiency, letting you manage multiple tasks without switching apps constantly. For example, you can watch a video while messaging or compare shopping deals side by side. Modern smartphones optimize performance for smooth multitasking, ensuring apps run without lag. Mastering split-screen mode can significantly improve how you utilize your device, making it an essential skill for everyday use.

Using Voice Assistants like Siri or Google Assistant

Voice assistants like Siri and Google Assistant simplify smartphone use by enabling hands-free control. Activate them with a voice command or button press to perform tasks like setting reminders, sending messages, or searching for information. These assistants learn your preferences over time, improving accuracy. For example, Siri can schedule appointments, while Google Assistant excels at providing detailed information. Customize settings to enhance performance, such as adjusting sensitivity or training the assistant to recognize your voice better. Regular updates add new features, making these tools indispensable for efficient smartphone use. Mastering voice assistants can save time and enhance your overall mobile experience significantly;

Managing Battery Life and Power-Saving Modes

Smartphones often face battery drain due to heavy usage. To extend battery life, enable power-saving modes that limit background data and reduce screen brightness. Adjust settings like auto-brightness and screen timeout. Close unused apps running in the background, as they consume power. Use dark mode if available, as it saves OLED screen energy. Disable location services and Bluetooth when not needed. Charge your phone correctly—avoid overcharging, as it can degrade battery health. Regularly update your phone’s software, as newer versions often include battery optimizations. By adopting these habits, you can significantly improve your smartphone’s battery performance and longevity.

Enhancing Productivity with Shortcuts

Smartphones offer various shortcuts to streamline tasks, saving time and effort. Features like Siri Shortcuts on iOS or Quick Settings on Android allow users to automate routines, such as sending messages or opening apps. Custom shortcuts can be created for frequently used actions, enhancing efficiency. These tools reduce screen time and simplify complex processes, making daily tasks more manageable. By leveraging these features, users can optimize their smartphone experience, focusing on productivity and convenience. Learning these shortcuts is a key step in mastering smartphone usage, as highlighted in guides like “apprendre à utiliser un smartphone PDF.”

Advanced Features and Settings

Explore gesture navigation, customize quick settings, and utilize advanced camera modes like Pro Mode. Enhance security with biometric features such as fingerprint or face recognition for seamless device control.

Understanding Gesture Navigation

Gesture navigation is a modern feature that replaces traditional buttons with swipe gestures, offering a cleaner interface. Swipe up to go home, swipe back to navigate, or swipe from the side to go back. This system enhances usability and provides a more immersive experience. Different brands may vary in gesture implementations, so check your device’s settings to customize. Practice these gestures to improve navigation speed and efficiency. Adjust sensitivity in settings for a smoother experience. Gesture navigation is a key feature in contemporary smartphones, making it essential to master for optimal device control and productivity.

Customizing Quick Settings and Control Center

Customizing quick settings and the control center allows for easier access to frequently used features. On most smartphones, you can edit quick tiles in the notification shade. For iOS, the Control Center can be customized via the Settings app, while Android users can rearrange or add tiles by long-pressing and dragging. This personalization enhances efficiency, ensuring your most-used functions are just a swipe away. Experiment with different layouts to streamline your smartphone experience and make navigation more intuitive. Regularly reviewing and updating these settings ensures they remain relevant to your daily needs, keeping your device optimized for convenience and productivity.

Using Advanced Camera Modes (Pro Mode, Portrait, etc.)

Advanced camera modes like Pro Mode and Portrait enhance your smartphone photography experience. Pro Mode allows manual adjustments to ISO, exposure, and focus for precise control. Portrait mode creates a bokeh effect, blurring the background to highlight your subject. Night mode captures crisp images in low light, while HDR balances lighting for vibrant colors. To access these modes, open your camera app and swipe through the options. Experiment with settings to master lighting and composition. Practice regularly to improve your skills and unlock the full potential of your smartphone’s camera capabilities for stunning, professional-quality photos.

Setting Up Biometric Security (Fingerprint or Face ID)

Biometric security enhances smartphone protection using fingerprint or facial recognition. To set up fingerprint ID, go to Settings > Security > Fingerprint Recognition, and follow prompts to scan your fingerprint. For Face ID, navigate to Settings > Face ID & Passcode, and complete the facial scan process. Ensure your device supports these features. Biometric security offers convenience and improved protection against unauthorized access. Regularly update your biometric data for accuracy. This feature is ideal for quick, secure unlocking, balancing ease of use with robust security measures. Always enable a passcode as a backup for added safety.

Maintenance and Troubleshooting

Updating Software and Installing Security Patches

Regular software updates enhance security, fix bugs, and improve performance. Install patches promptly to protect your device from vulnerabilities and ensure smooth operation.

Regular software updates are crucial for maintaining your smartphone’s performance, security, and functionality. These updates often include bug fixes, new features, and security patches to protect your device from vulnerabilities. To update your smartphone, go to the settings menu, select “Software Update,” and follow the prompts. Ensure your device is connected to Wi-Fi and has sufficient battery life. Installing security patches is equally important, as they address potential risks and enhance privacy. Always prioritize these updates to keep your smartphone running smoothly and securely. By staying updated, you ensure optimal performance and protection against emerging threats.

Cleaning and Maintaining Your Smartphone

Regular cleaning and maintenance are crucial for extending your smartphone’s lifespan. Use a soft, dry cloth to wipe the screen and remove fingerprints. Avoid harsh chemicals or abrasive materials that could damage the display. For tougher smudges, lightly dampen the cloth with water, but ensure it’s not soaking wet. Clean the charging port with a soft brush or compressed air to prevent dust buildup. Avoid exposing your phone to extreme temperatures or moisture. Update your software regularly to maintain performance and security. Store your phone in a protective case to prevent scratches and drops. Proper care ensures optimal functionality and longevity.

Managing Storage Space and Freeing Up Memory

Managing storage space is crucial for optimal smartphone performance. Start by checking your device’s storage settings to identify what’s consuming the most memory, such as photos, videos, or apps. Regularly delete unused apps, clear app caches, and remove large files. Use cloud storage services like Google Drive or iCloud to offload media, freeing up internal space. Additionally, enable automatic updates for apps and consider using lightweight versions of apps to save space. Organizing files into folders and deleting duplicates can also help. By maintaining your storage, you ensure smoother performance and prevent slowdowns or app crashes.

Troubleshooting Common Issues (Slow Performance, App Crashes)

Smartphones can encounter issues like slow performance or app crashes. To address these, restart your device to clear temporary glitches. Check for software updates, as they often fix bugs. Clearing app cache or uninstalling unused apps can free up memory and improve speed. For persistent problems, perform a factory reset after backing up data. Disable background data usage for apps you don’t need. Close unused apps running in the background. Ensure your device has enough storage space, as low memory can cause slowdowns. Regularly updating apps and avoiding overclocking can also prevent crashes. These steps help maintain smooth functionality and extend your smartphone’s lifespan.

Learning Resources and Guides

Best PDF Guides for Smartphone Beginners

Discover comprehensive PDF guides that offer step-by-step tutorials for mastering smartphone basics, from setup to advanced features, perfect for new users seeking structured learning materials.

For those looking to master smartphone basics, PDF guides are an excellent resource. These comprehensive manuals offer step-by-step instructions, covering essential features, settings, and troubleshooting tips. Many guides are designed for specific operating systems, such as iOS or Android, ensuring tailored advice. They often include visuals and tutorials, making complex tasks easier to understand. Popular guides focus on topics like app management, customization, and security. Beginners can find these PDFs on official manufacturer websites, tech forums, or educational platforms. They provide a structured learning path, helping users transition from basics to advanced features seamlessly. These resources are ideal for self-paced learning and quick reference.

Online Courses for Mastering Smartphone Skills

Online courses are an excellent way to master smartphone skills, offering structured learning paths for all levels. Platforms like Coursera and Udemy provide courses tailored to beginners, covering basic operations, app management, and essential features. Advanced users can explore topics like multitasking, gesture navigation, and customization. Many courses include hands-on exercises and quizzes to reinforce learning. Additionally, websites like LinkedIn Learning offer bite-sized tutorials for specific skills, such as setting up biometric security or optimizing battery life. These resources are ideal for those seeking a comprehensive understanding of smartphone functionality, ensuring they make the most of their device’s capabilities.

Recommended Apps for Learning Smartphone Tricks

Several apps are designed to help users master smartphone features and tricks. Apps like Phone Guide and Smartphone Tutorial offer step-by-step lessons for beginners. Coursera and Udemy provide courses on smartphone productivity. Additionally, apps such as Guides for Android and iPhone Tips focus on specific operating systems, offering detailed tutorials and shortcuts. These resources are ideal for users looking to enhance their smartphone skills and discover hidden features. They cater to all skill levels, ensuring everyone can learn efficiently. Exploring these apps can significantly improve your smartphone experience and help you make the most of its capabilities.

Joining Communities and Forums for Support

Joining online communities and forums is a great way to get support while learning to use your smartphone. These platforms offer valuable resources, troubleshooting tips, and tutorials. Many users share their experiences, providing insights and solutions to common issues. For example, forums like Reddit’s r/Android or r/iPhone are popular for discussing smartphone-related topics. Additionally, official manufacturer forums often host expert advice and updates. Engaging with these communities can help you stay updated on the latest features and best practices. They also provide a space to ask questions and receive personalized guidance, making your learning journey smoother and more enjoyable.

assassin’s creed unity trophy guide

Welcome to the Assassin’s Creed Unity Trophy Guide! This guide helps you unlock all 51 trophies‚ including the Platinum‚ with expert tips and strategies for 100% completion.

Overview of the Game and Trophy System

Assassin’s Creed Unity is an action-adventure game set in Revolutionary France‚ offering a rich narrative and expansive open-world exploration. The trophy system includes 51 achievements: 1 Platinum‚ 1 Gold‚ 13 Silver‚ and 36 Bronze. These trophies reward players for completing story missions‚ achieving specific in-game feats‚ and mastering various skills like combat‚ stealth‚ and parkour. The system is designed to encourage exploration and mastery of the game’s mechanics‚ with trophies ranging from straightforward objectives to challenging tasks. Unlocking all trophies requires approximately 60-80 hours of gameplay‚ depending on skill level and dedication. This guide provides a detailed roadmap to help players navigate the trophy system efficiently and achieve 100% completion.

Importance of Trophies in Achieving 100% Completion

Trophies are essential for achieving 100% completion in Assassin’s Creed Unity‚ as they reward players for exploring every aspect of the game. From completing story missions to mastering specific skills like stealth and combat‚ trophies encourage players to fully engage with the game’s mechanics and world. Earning all trophies not only showcases a player’s dedication but also unlocks the prestigious Platinum trophy‚ “Unity Platinum.” Trophies also add replay value‚ as some require multiple playthroughs or precise in-game actions. By pursuing trophies‚ players can discover hidden content‚ optimize their strategies‚ and experience the game to its fullest potential‚ making the journey to 100% completion both rewarding and challenging.

Platinum Trophy: “Unity Platinum”

The Unity Platinum trophy is awarded for earning all other trophies in the game‚ requiring approximately 49 hours of gameplay. It symbolizes complete mastery of Assassin’s Creed Unity.

Requirements for Unlocking the Platinum Trophy

To unlock the Unity Platinum trophy‚ you must earn all other trophies in Assassin’s Creed Unity‚ including 1 gold‚ 13 silver‚ and 36 bronze trophies. This requires completing the main story‚ all side missions‚ and optional objectives. You’ll need to achieve 100% synchronization in every memory sequence‚ complete all Paris Stories‚ and master various skills like combat‚ stealth‚ and parkour. Additionally‚ you must collect all collectibles‚ such as cockades and nostradamus enigmas‚ and participate in cooperative heists. The estimated time to unlock the Platinum trophy is around 49 hours‚ depending on your skill level and familiarity with the game. Dedication and thorough exploration of the game’s content are essential to achieving this prestigious award.

Estimated Time to Achieve Platinum

Unlocking the Unity Platinum trophy in Assassin’s Creed Unity requires approximately 49 hours of gameplay‚ though this can vary depending on your skill level and familiarity with the game. Completing the main story and side missions efficiently will save time‚ while optional objectives and collectibles may extend your playtime. To achieve 100% completion‚ you’ll need to explore Paris thoroughly‚ complete all memory sequences with full synchronization‚ and finish cooperative heists. Players with prior experience in the series may complete it faster‚ while newcomers might need closer to 60-80 hours. Plan your progress strategically to minimize time and enjoy the journey to becoming a true Assassin.

Gold Trophies

Assassin’s Creed Unity features one gold trophy‚ “The Baguette Communion” and “The Perfect Heist”‚ each requiring specific challenges and mastery of stealth or heist mechanics to unlock.

“The Baguette Communion” Trophy Guide

To unlock the gold trophy “The Baguette Communion”‚ you must complete a challenging sequence in the game. This trophy requires you to kill 4 enemies with a sword and a gun without taking any damage. Equip Arno with a sword and a pistol‚ then find a group of enemies. Use stealth to isolate them or engage directly‚ ensuring you defeat each quickly. Timing and precision are key. Avoid taking damage by parrying or dodging attacks. Once all four enemies are defeated‚ the trophy will unlock. This achievement tests your combat skills and mastery of Arno’s abilities. Follow these steps carefully to succeed and claim your reward.

“The Perfect Heist” Trophy Guide

The gold trophy “The Perfect Heist” is awarded for completing a specific heist mission without being detected and synchronizing all viewpoints. To achieve this‚ focus on stealth and strategy‚ avoiding direct combat. Use the environment to your advantage‚ blending into crowds and utilizing shadows. Equip Arno with a phantom blade for silent takedowns and ensure all optional objectives are met. Completing this trophy requires patience and precise execution‚ as any mistake can void the attempt. This achievement highlights your mastery of stealth mechanics in Assassin’s Creed Unity. Follow the mission’s guidelines carefully and practice to perfection for a seamless heist experience.

Silver Trophies

Silver trophies in Assassin’s Creed Unity include 13 achievements‚ such as “La Révolutionnaire” and “Theatre of the Absurd”‚ rewarding mastery of combat‚ exploration‚ and story progression.

“La Révolutionnaire” Trophy Guide

To unlock the “La Révolutionnaire” trophy‚ you must complete all faction missions outside of the main story. This includes 16 missions across various factions like the Revolutionaries‚ Royalists‚ and more. Focus on one faction at a time to avoid confusion. Complete each mission thoroughly‚ ensuring all objectives are met. Check the in-game menu to track your progress. This trophy rewards your dedication to exploring the game’s rich side content and immersing yourself in the story of 18th-century Paris. The trophy unlocks automatically upon completing the final faction mission‚ contributing to your journey toward 100% completion.

“Theatre of the Absurd” Trophy Guide

The “Theatre of the Absurd” trophy is a bronze achievement in Assassin’s Creed Unity. To unlock it‚ you must complete the mission “Theatre of the Absurd” in the main story. This mission involves infiltrating a theater to gather information about a target. Use stealth and strategy to avoid detection‚ as open combat will fail the mission. Utilize your skills like Eagle Vision to spot guards and hidden paths. Complete all objectives without raising the alarm to earn this trophy. It’s a straightforward mission that tests your ability to navigate and observe. This trophy is part of the main storyline‚ so progression will naturally lead you to it. Ensure you follow the mission prompts carefully to succeed.

“Curiosity and Discipline” Trophy Guide

The “Curiosity and Discipline” trophy is a silver achievement in Assassin’s Creed Unity. To unlock it‚ you must complete the mission “Memory 03: The Physician” and achieve 100% synchronization; This mission focuses on stealth and precision‚ requiring you to follow specific instructions without deviating. Use your skills like Eagle Vision to track targets and avoid guards. Completing this mission flawlessly demonstrates your mastery of Assassin techniques. The trophy is part of the main storyline‚ so progression will naturally lead you to it. Ensure you follow the mission prompts carefully and avoid raising the alarm to achieve full synchronization. This trophy highlights your ability to blend discipline with curiosity in your gameplay.

Bronze Trophies

Assassin’s Creed Unity features 36 bronze trophies‚ each rewarding specific achievements like combat‚ stealth‚ and exploration. These trophies cover a wide range of skills and activities‚ from mastering parkour to completing side missions. While some are straightforward‚ others require precise execution and patience. Bronze trophies are the most common but still offer a sense of accomplishment. They encourage players to explore the game’s mechanics and Parisian environment thoroughly. Earning all bronze trophies is essential for progressing toward the Platinum and showcases a well-rounded playstyle.

“First Trip to Versailles” Trophy Guide

The “First Trip to Versailles” trophy is unlocked by completing the memory “The Palace of Versailles” in Assassin’s Creed Unity. This memory introduces players to the opulent Palace of Versailles‚ where Arno must navigate its grand halls and gardens. To earn the trophy‚ simply progress through the story mission‚ completing all objectives as they appear. No additional challenges or hidden requirements are needed. The memory is relatively straightforward‚ focusing on exploration and light combat. Completing it also contributes to 100% synchronization‚ which involves finding hidden chests and completing optional objectives within the memory. This trophy is a great way to familiarize yourself with the game’s open-world design and historical settings. It’s a quick and enjoyable part of your journey to 100% completion.

“Bastille Believer” Trophy Guide

The “Bastille Believer” trophy is awarded for completing the memory “The Bastille” in Assassin’s Creed Unity. This memory is a key part of the game’s story‚ where Arno infiltrates the Bastille to rescue a fellow Assassin. To unlock the trophy‚ simply progress through the mission‚ completing all objectives as they appear. The memory is relatively straightforward‚ focusing on stealth and light combat. Completing it also contributes to 100% synchronization‚ which involves finding hidden chests and completing optional objectives within the memory. This trophy is a great way to experience the game’s historical setting and story-driven gameplay. It’s a quick and enjoyable part of your journey to 100% completion.

“Gentleman of the Revolution” Trophy Guide

The “Gentleman of the Revolution” trophy is a bronze achievement in Assassin’s Creed Unity. To unlock it‚ you must complete the memory “The Gentleman” during Sequence 4. This memory focuses on Arno’s encounter with a mysterious figure tied to the Assassin Brotherhood. The trophy is straightforward‚ requiring you to follow the story and complete the mission’s objectives. No additional challenges or hidden requirements are involved. This trophy is a great example of the game’s narrative-driven achievements‚ offering insight into Arno’s character development and the broader Assassin-Templar conflict. Completing this memory also contributes to your overall progress toward 100% synchronization and the Platinum trophy.

“The Brawler” Trophy Guide

The “The Brawler” trophy is a bronze achievement in Assassin’s Creed Unity. To unlock it‚ you must win a fistfight. This trophy is straightforward and requires no additional challenges beyond defeating an opponent in hand-to-hand combat. Fistfights can be initiated by approaching enemies and engaging them without using weapons. The trophy is a simple way to showcase Arno’s combat skills and is part of the game’s combat system. It does not require any specific conditions or achievements beyond the fight itself. This trophy is a great early achievement for players looking to progress through the game’s challenges and contribute to their overall completion journey.

“The Entertainer” Trophy Guide

The “The Entertainer” trophy is a bronze achievement in Assassin’s Creed Unity. To unlock it‚ you must perform an actor’s mime gesture in Paris. This trophy is part of the game’s optional objectives and requires interacting with specific NPCs. Locate an actor near a crowd‚ approach them‚ and press the interact button to perform the mime action. This achievement is straightforward and adds to your progress toward 100% completion. It does not contribute directly to the Platinum trophy but is a fun way to engage with the game’s world. Ensure you complete this in a single interaction to unlock the trophy seamlessly.

“The Exterminator” Trophy Guide

The “The Exterminator” trophy is a bronze achievement in Assassin’s Creed Unity. To unlock it‚ you must complete a Murder Mystery mission without being detected. This trophy is part of the game’s side activities and requires precision and stealth. Start by investigating the crime scene‚ follow the clues‚ and identify the killer. Use your Eagle Vision to highlight important details and remain undetected while tailing suspects. Completing this objective without raising an alarm will grant you the trophy. It’s a fun and challenging way to engage with the game’s detective-like gameplay. Ensure you stay patient and methodical to avoid detection and achieve this trophy effortlessly.

“The Freeman” Trophy Guide

The “The Freeman” trophy is a bronze achievement in Assassin’s Creed Unity. To unlock it‚ you must complete 10 missions for Pierre Bellec‚ a key character in the game. These missions are part of the side activities and involve various objectives such as sabotage‚ espionage‚ and assassination. Completing these missions not only grants you the trophy but also provides valuable experience and resources for your character‚ Arno. The missions are spread across Paris‚ and you can access them by visiting Bellec in his hideout. Ensure you complete each mission carefully‚ as some may require stealth or precision. This trophy is a great way to deepen your involvement in the game’s story and improve your skills. It’s a straightforward achievement that adds to your progress toward 100% completion.

“The Heist” Trophy Guide

The “The Heist” trophy is a bronze achievement in Assassin’s Creed Unity. To unlock it‚ you must complete a specific heist mission in the game. Heist missions are part of the side activities and involve infiltrating heavily guarded locations to steal valuable items. These missions require a mix of stealth‚ strategy‚ and precision. To achieve this trophy‚ focus on completing the mission objectives without being detected. Utilize your skills such as Eagle Vision to spot guards and plan your route carefully. The trophy is straightforward but requires attention to detail and patience. Completing heist missions also contributes to your overall progress and character development‚ making it a worthwhile achievement to pursue.

“The Infiltrator” Trophy Guide

The “The Infiltrator” trophy is a bronze achievement in Assassin’s Creed Unity. To unlock it‚ you must complete a mission without being detected by guards. This trophy emphasizes stealth and strategy‚ requiring you to use your skills effectively. Utilize your environment‚ such as hiding spots and distractions‚ to remain undetected. Plan your route carefully‚ and use Eagle Vision to anticipate guard patrols. Avoid confrontations and focus on silent takedowns if necessary. The trophy is a testament to your mastery of stealth mechanics‚ a core aspect of the Assassin’s Creed experience. With patience and practice‚ you can seamlessly infiltrate and complete the mission‚ earning this rewarding achievement.

“The Investigator” Trophy Guide

The “The Investigator” trophy is a bronze achievement in Assassin’s Creed Unity. To unlock it‚ you must complete all the Nostradamus riddles and Paris Stories. This trophy requires dedication and attention to detail‚ as you’ll need to explore the game’s world thoroughly. Each riddle and story provides insight into the game’s lore and characters. Use your skills to solve puzzles and uncover hidden secrets. The trophy is a great way to immerse yourself in the game’s narrative and world-building. With persistence and a keen eye for detail‚ you can unlock this achievement and deepen your understanding of the Assassin’s Creed universe. It’s a rewarding challenge for completionists and story enthusiasts alike.

“The Mercenary” Trophy Guide

The “The Mercenary” trophy is a bronze achievement in Assassin’s Creed Unity. To unlock it‚ you must complete all the Heist missions in the game. Heist missions are cooperative activities that require teamwork and strategy. Each mission has specific objectives‚ such as stealing valuable items or eliminating targets. To succeed‚ coordinate with your team‚ use your skills like stealth and combat effectively‚ and avoid detection. Completing these missions not only unlocks the trophy but also rewards you with valuable resources and experience. This trophy is a great way to test your multiplayer skills and contribute to the game’s progression. With practice and teamwork‚ you can easily achieve this bronze trophy and enhance your gaming experience.

“The Mentor” Trophy Guide

The “The Mentor” trophy is a bronze achievement in Assassin’s Creed Unity. To unlock it‚ you must complete 10 missions for other players. This trophy focuses on cooperative play and helping others progress. To achieve it‚ join or create public missions and assist fellow players in completing objectives. Ensure you contribute actively to the mission’s success‚ whether through combat‚ stealth‚ or puzzle-solving. The trophy rewards your dedication to teamwork and mentorship within the game’s multiplayer mode. It’s a great way to engage with the community while earning this bronze trophy. With consistent participation and helpful gameplay‚ you can unlock “The Mentor” and enhance your Assassin’s Creed Unity experience.

“The Murderer” Trophy Guide

The “The Murderer” trophy is a bronze achievement in Assassin’s Creed Unity. To unlock it‚ you must kill a total of 1000 enemies throughout the game. This trophy is straightforward but time-consuming‚ requiring consistent combat engagement. Focus on completing missions‚ side activities‚ and exploring Paris to accumulate kills. Use a variety of weapons like swords‚ pistols‚ and heavy weapons to diversify your combat style. Additionally‚ consider replaying missions or engaging in enemy encounters in open-world areas to maximize your kill count. Avoid unnecessary combat to prevent increasing your notoriety level‚ which could attract unwanted attention. With patience and persistence‚ you can unlock “The Murderer” and add it to your collection of achievements.

“The Renegade” Trophy Guide

The “The Renegade” trophy is a bronze achievement in Assassin’s Creed Unity. To unlock it‚ you must complete 10 missions without being detected by enemies. This trophy emphasizes stealth and strategy‚ requiring you to master the game’s sneaking mechanics. Use Arno’s abilities like Eagle Vision to spot guards‚ and utilize cover and hiding spots effectively. Avoid direct combat and focus on silent takedowns or distractions. Completing optional objectives in missions can also help you stay undetected. Patience is key‚ as rushing through missions may lead to detection. With careful planning and execution‚ you can earn “The Renegade” and showcase your mastery of stealth in the game.

“The Rival” Trophy Guide

The “The Rival” trophy is a bronze achievement in Assassin’s Creed Unity. To unlock it‚ you must complete 10 missions without being detected by enemies. This trophy emphasizes stealth and strategy‚ requiring you to master the game’s sneaking mechanics. Use Arno’s abilities like Eagle Vision to spot guards‚ and utilize cover and hiding spots effectively. Avoid direct combat and focus on silent takedowns or distractions. Completing optional objectives in missions can also help you stay undetected. Patience is key‚ as rushing through missions may lead to detection. With careful planning and execution‚ you can earn “The Rival” and showcase your mastery of stealth in the game.

“The Scientist” Trophy Guide

The “The Scientist” trophy is a bronze achievement in Assassin’s Creed Unity. To unlock it‚ you must complete all of Nostradamus’s missions‚ which involve solving riddles tied to historical events and figures in the French Revolution. These missions are scattered across Paris and require careful exploration and attention to detail. Each riddle leads you to a specific location or character‚ and solving them progresses the storyline. While the trophy is bronze‚ it can be challenging due to the complexity of some riddles. Take your time to explore and use in-game tools like Eagle Vision to locate clues. Completing these missions not only unlocks the trophy but also deepens your understanding of the game’s historical context and narrative.

“The Socialite” Trophy Guide

The “The Socialite” trophy is a bronze achievement in Assassin’s Creed Unity. To unlock it‚ you must complete all of Madame Leprince’s missions at the Café Théâtre. These missions involve interacting with Parisian society‚ attending plays‚ and completing tasks for Madame Leprince. The missions are relatively straightforward but require attention to dialogue choices and timely completion of objectives. Completing these missions not only unlocks the trophy but also provides insight into the game’s social dynamics and the character of Madame Leprince. Use Eagle Vision to locate her easily and enjoy the unique storytelling experience this trophy offers. It’s a great way to immerse yourself in the game’s historical setting while earning the achievement.

“The Thief” Trophy Guide

The “The Thief” trophy is a bronze achievement in Assassin’s Creed Unity. To unlock it‚ you must pickpocket and loot a total of 100 items from enemies and the environment. This trophy is straightforward but requires patience and consistent effort. Focus on pickpocketing guards and looting chests in crowded areas like markets or during missions. Use Eagle Vision to identify guards with valuable items and avoid detection by crouching and staying out of their sight cones. Completing this trophy rewards you with a unique weapon and contributes to your overall progress toward 100% completion. It’s a great way to enhance your stealth skills while exploring the game’s vibrant world.

“The Volunteer” Trophy Guide

The “The Volunteer” trophy is a bronze achievement in Assassin’s Creed Unity. To unlock it‚ you must complete 10 side missions‚ known as “Volunteer” missions‚ scattered throughout Paris. These missions are optional but provide valuable experience and rewards. They range from helping citizens in distress to completing specific tasks for NPCs. To find these missions‚ use your Eagle Vision to locate exclamation marks on the map‚ indicating available side quests. Completing these missions not only unlocks the trophy but also contributes to your overall progression and enhances your Assassin’s skills. Focus on exploring thoroughly and engaging with the game’s dynamic environment to ensure you don’t miss any opportunities. This trophy is a great way to immerse yourself in the game’s world while earning rewards.

13 virtues of benjamin franklin pdf

Benjamin Franklin’s 13 Virtues are a timeless guide to moral perfection and personal growth. Developed in his 20s‚ they serve as a framework for self-improvement. Each virtue‚ such as Temperance and Humility‚ offers practical wisdom for living a disciplined and compassionate life. This introduction explores their historical roots and enduring relevance‚ encouraging readers to adopt these principles for a balanced and meaningful existence.

Overview of the 13 Virtues

Benjamin Franklin’s 13 Virtues are a collection of moral principles designed to guide individuals toward self-improvement and a virtuous life. These virtues—Temperance‚ Silence‚ Order‚ Resolution‚ Frugality‚ Diligence‚ Sincerity‚ Justice‚ Moderation‚ Cleanliness‚ Tranquility‚ Chastity‚ and Humility—were carefully chosen to cultivate character and promote ethical living. Franklin believed that by focusing on one virtue per week and tracking his progress‚ he could gradually master all of them. This systematic approach reflects his commitment to personal growth and moral perfection. The virtues are timeless‚ offering practical wisdom for modern life‚ and serve as a blueprint for anyone seeking to enhance their character and contribute positively to society. Franklin’s method remains a powerful tool for self-reflection and development‚ encouraging individuals to embrace these principles in their daily lives.

Historical Context of Franklin’s Virtues

Benjamin Franklin’s 13 Virtues were conceived in the 1720s‚ a period of significant personal and societal transformation. At just 20 years old‚ Franklin sought to improve himself morally and intellectually‚ reflecting the Enlightenment era’s emphasis on reason and self-improvement. Drawing inspiration from philosophical ideals and religious teachings‚ he crafted these virtues as a practical guide for living a disciplined and ethical life. Franklin’s approach was innovative‚ as he created a systematic method to track his progress‚ focusing on one virtue weekly. This practice‚ documented in his autobiography‚ highlights his commitment to self-reflection and growth. The historical context underscores Franklin’s desire to transcend his humble beginnings and become a model of moral integrity‚ leaving a lasting legacy that continues to inspire modern audiences.

Significance of the Virtues in Modern Life

Benjamin Franklin’s 13 Virtues remain remarkably relevant in modern life‚ offering timeless wisdom for personal and professional growth. In today’s fast-paced world‚ these principles provide a moral compass‚ encouraging qualities like honesty‚ humility‚ and moderation. The virtues promote self-discipline‚ resilience‚ and ethical decision-making‚ which are essential for building strong relationships and achieving success. Franklin’s emphasis on sincerity and justice aligns with contemporary values of transparency and fairness. By fostering a mindset of continuous improvement‚ these virtues help individuals cultivate a balanced and fulfilling life. Their universal appeal lies in their adaptability‚ making them a valuable guide for navigating modern challenges while maintaining integrity and compassion. Adopting these virtues can empower individuals to lead more purposeful and harmonious lives in an ever-changing world.

The 13 Virtues Explained

Benjamin Franklin’s 13 Virtues are a set of moral principles designed for personal improvement. Developed in his 20s‚ they include Temperance‚ Silence‚ and Humility‚ guiding ethical living and self-refinement. Each virtue offers practical wisdom‚ encouraging individuals to cultivate self-discipline and compassion. These timeless principles remain adaptable to modern life‚ promoting a balanced and virtuous existence.

Temperance

Temperance‚ the first of Benjamin Franklin’s 13 Virtues‚ emphasizes moderation in all aspects of life. It involves avoiding excess and maintaining balance‚ particularly in indulgences like eating‚ drinking‚ and sensual pleasures. Franklin believed that excess often leads to negative consequences‚ both physically and morally. By practicing Temperance‚ individuals can cultivate self-control and avoid harmful vices. This virtue encourages a disciplined approach to desires‚ promoting a healthier and more balanced lifestyle. Franklin’s focus on Temperance reflects his practical philosophy of gradual self-improvement‚ aiming to replace unhealthy habits with virtuous ones. This principle remains relevant today‚ offering guidance on living a moderate and restrained life amidst modern temptations and challenges.

Silence

Silence‚ the second of Benjamin Franklin’s 13 Virtues‚ underscores the importance of speaking only when necessary and beneficial. Franklin believed that unnecessary talk often leads to misunderstandings‚ conflict‚ or the sharing of harmful ideas. By practicing Silence‚ individuals can avoid idle chatter and focus on meaningful communication. This virtue encourages reflection before speaking‚ ensuring that words are thoughtful and purposeful. Franklin’s approach to Silence was part of his broader goal of moral perfection‚ aiming to cultivate self-discipline and wisdom. In modern life‚ this virtue remains relevant‚ reminding us to listen more and speak with intention. By embracing Silence‚ one can foster clearer communication‚ avoid unnecessary disputes‚ and contribute to a more harmonious environment. Franklin’s method of self-assessment also helped him track his progress in adhering to this principle‚ reinforcing its value in daily interactions.

Order

Order‚ the third of Benjamin Franklin’s 13 Virtues‚ emphasizes the importance of organization and structure in daily life. Franklin believed that maintaining order in both personal and professional affairs fosters efficiency and reduces unnecessary stress. He advised‚ “Let all your things have their places‚ and let each part of your business have its time.” This virtue encourages individuals to create systems for managing tasks‚ belongings‚ and time‚ ensuring everything operates smoothly. By prioritizing order‚ one can avoid chaos and focus on meaningful pursuits. Franklin’s commitment to order reflected his broader goal of self-improvement and moral perfection. This virtue remains timeless‚ offering practical guidance for modern individuals seeking to enhance productivity and clarity in their lives. Embracing order aligns with Franklin’s philosophy of living intentionally and purposefully.

Resolution

Resolution‚ the fourth of Benjamin Franklin’s 13 Virtues‚ underscores the importance of determination and perseverance in overcoming challenges. Franklin defined it as the ability to stand firm in one’s decisions and commitments‚ even when faced with adversity. He believed that resolving to achieve a goal and maintaining unwavering focus was essential for personal and professional success. This virtue encourages individuals to cultivate self-discipline and avoid procrastination. By adhering to resolution‚ Franklin aimed to build character and ensure steady progress toward his aspirations. His approach to resolution was practical‚ emphasizing the need to stay committed to one’s values and objectives. This virtue remains relevant today‚ offering a timeless lesson in the power of determination and the importance of staying resolute in pursuit of one’s goals.

Frugality

Frugality‚ the fifth of Benjamin Franklin’s 13 Virtues‚ emphasizes the importance of avoiding unnecessary expenses and being mindful of resource management. Franklin believed that true wealth lies in saving and investing wisely‚ rather than indulging in extravagance. He practiced this virtue by living modestly‚ wearing simple clothing‚ and prioritizing investments in education and business ventures. Frugality‚ for Franklin‚ was not about deprivation but about making intentional choices that align with long-term goals. This virtue encourages individuals to value simplicity‚ reduce waste‚ and cultivate financial independence. By embracing frugality‚ Franklin aimed to free himself from debt and focus on what truly mattered—personal growth‚ intellectual pursuits‚ and contributing to society. This timeless principle remains relevant today‚ offering a practical guide to achieving financial stability and living a more intentional life.

Diligence

Diligence‚ the sixth of Benjamin Franklin’s 13 Virtues‚ underscores the importance of hard work‚ responsibility‚ and consistent effort. Franklin viewed diligence as a cornerstone of personal and professional success‚ believing that idleness leads to vice and unhappiness. He practiced this virtue by maintaining a strict daily schedule‚ dedicating time to productive activities such as reading‚ writing‚ and scientific experiments. Franklin’s commitment to diligence allowed him to excel in multiple fields‚ from printing to diplomacy. This virtue encourages individuals to embrace industriousness‚ avoid procrastination‚ and pursue their goals with perseverance. By cultivating diligence‚ Franklin aimed to maximize his potential and contribute meaningfully to society. His approach remains inspiring‚ reminding us that consistent effort is essential for achieving lasting accomplishments and living a purposeful life.

Sincerity

Sincerity‚ the seventh of Benjamin Franklin’s 13 Virtues‚ emphasizes honesty and integrity in all interactions. Franklin believed that sincerity fosters trust and strong relationships‚ essential for personal and professional success. He viewed insincerity as a hindrance to progress‚ advocating for truthfulness in words and actions. Franklin practiced this virtue by being transparent in his dealings and avoiding deceit. His commitment to sincerity earned him respect and credibility‚ both in his personal life and public career. This virtue encourages individuals to communicate openly‚ act with authenticity‚ and uphold ethical standards. By embracing sincerity‚ Franklin demonstrated that honesty is not only a moral imperative but also a practical foundation for building lasting trust and achieving long-term goals. His approach remains a timeless lesson in the power of integrity.

Justice

Justice‚ the eighth of Benjamin Franklin’s 13 Virtues‚ underscores the importance of fairness‚ equality‚ and moral rightness. Franklin believed in treating others justly and upholding the law‚ emphasizing impartiality in all dealings. He viewed justice as a cornerstone of a harmonious society‚ advocating for the fair treatment of everyone regardless of status. Franklin’s commitment to justice was reflected in his public life‚ where he championed democratic principles and equality. This virtue encourages individuals to act with integrity‚ respect the rights of others‚ and promote fairness in their interactions. By embracing justice‚ Franklin demonstrated its role in fostering trust and stability in both personal and societal contexts. His approach to justice remains a powerful reminder of the need for ethical behavior in all aspects of life.

Moderation

Moderation‚ the ninth of Benjamin Franklin’s 13 Virtues‚ emphasizes balance and restraint in all aspects of life. Franklin believed in avoiding extremes‚ whether in behavior‚ emotions‚ or habits‚ to maintain harmony and stability. He advocated for self-control‚ particularly in indulgences like eating‚ drinking‚ or speaking‚ to prevent harm to oneself or others. Moderation was seen as a means to preserve health‚ relationships‚ and reputation. Franklin’s approach to moderation was practical‚ encouraging individuals to align their actions with reason and wisdom. By practicing moderation‚ one could achieve a balanced and virtuous life‚ fostering inner peace and outer respect. This virtue remains relevant today‚ reminding us of the importance of balance in a world often driven by excess.

Cleanliness

Cleanliness‚ the eleventh of Benjamin Franklin’s 13 Virtues‚ underscores the importance of personal hygiene and purity. Franklin viewed cleanliness as essential for both physical health and moral integrity. He believed that maintaining a clean body and living space reflected self-respect and discipline. This virtue extended beyond personal appearance‚ encompassing the environment and habits. Franklin likely practiced cleanliness diligently‚ given his emphasis on self-discipline and order. By adhering to this virtue‚ individuals could avoid sickness‚ present themselves respectfully‚ and create a positive impression. Cleanliness also symbolized purity of character‚ aligning with Franklin’s broader goal of moral perfection. This timeless principle encourages individuals to take pride in their appearance and surroundings‚ fostering a sense of responsibility and dignity in daily life. Its relevance endures‚ reminding us of the value of cleanliness in promoting well-being and respect.

Tranquility

Tranquility‚ the twelfth of Benjamin Franklin’s 13 Virtues‚ emphasizes the importance of maintaining inner peace and avoiding unnecessary disturbances. Franklin believed that a tranquil mind fosters clarity‚ focus‚ and emotional stability. He encouraged individuals to cultivate this virtue by refraining from engaging in arguments or disputes that could disrupt their peace of mind. Tranquility also involves being content with one’s circumstances and not being easily unsettled by life’s challenges. By practicing this virtue‚ Franklin aimed to create a sense of calm and composure‚ which he saw as essential for personal growth and effective decision-making. This principle remains relevant today‚ offering a timeless reminder of the value of maintaining emotional balance in a fast-paced world. Tranquility‚ as Franklin understood it‚ is a cornerstone of a harmonious and fulfilling life.

Chastity

Chastity‚ the eleventh of Benjamin Franklin’s 13 Virtues‚ refers to the practice of self-control and moral purity in one’s actions and thoughts. Franklin viewed chastity as essential for maintaining personal integrity and respect for oneself and others. This virtue emphasizes the importance of avoiding indulgence in inappropriate desires and fostering healthy‚ respectful relationships. By adhering to chastity‚ Franklin believed individuals could cultivate a sense of dignity and self-respect‚ which are foundational to a virtuous life. This principle also aligns with his broader philosophy of self-discipline and moderation. In modern times‚ chastity remains relevant as a guide for ethical behavior and personal boundaries‚ encouraging individuals to approach relationships and personal conduct with mindfulness and responsibility. Franklin’s inclusion of chastity underscores its enduring value in promoting moral character and emotional well-being.

Humility

Humility‚ the thirteenth of Benjamin Franklin’s 13 Virtues‚ emphasizes modesty and the avoidance of arrogance. Franklin believed that humility was essential for fostering harmony in relationships and personal growth. He defined humility as not being overly proud of one’s accomplishments or status. This virtue encourages individuals to recognize their place in the world and to treat others with kindness and respect‚ regardless of their position or achievements. Franklin’s approach to humility was practical‚ advocating for a balanced perspective that avoids both excessive pride and unwarranted self-deprecation. By embracing humility‚ individuals can cultivate a sense of inner peace and contribute positively to society. This virtue remains relevant today‚ promoting a mindset of gratitude and equality in an increasingly complex world. Franklin’s inclusion of humility underscores its importance in achieving moral and personal excellence.

How Franklin Practiced the Virtues

Franklin practiced the virtues through a structured method‚ focusing on one virtue weekly and tracking progress with a chart. He reviewed daily‚ marking transgressions‚ aiming for moral perfection.

The Weekly Focus Method

Benjamin Franklin’s Weekly Focus Method was a cornerstone of his virtue practice. He dedicated each week to mastering one specific virtue‚ cycling through all 13 annually. This structured approach allowed him to concentrate his efforts‚ ensuring steady progress. By focusing on a single virtue‚ Franklin could deeply reflect on its application in daily life‚ making it a habit over time. This method demonstrated his belief in consistent‚ incremental self-improvement. The weekly focus not only helped him track his development but also provided a clear roadmap for others seeking moral growth. Franklin’s disciplined yet flexible approach remains a practical strategy for cultivating virtuous living in modern times‚ inspiring individuals to adopt similar techniques for personal development.

The Virtue Chart and Self-Assessment

Benjamin Franklin’s Virtue Chart was a pivotal tool in his quest for moral perfection. Each evening‚ he reviewed his day‚ marking transgressions against the 13 virtues. This chart allowed him to track progress‚ identify weaknesses‚ and foster self-awareness. By systematically assessing his actions‚ Franklin aimed to eliminate vices and cultivate virtuous habits. The chart’s simplicity made it an effective accountability mechanism‚ ensuring he remained committed to his goals. This method not only helped Franklin refine his character but also provided a practical framework for others to evaluate and improve their own behavior. The Virtue Chart exemplifies Franklin’s belief in self-reflection and continuous improvement‚ making it a timeless resource for personal growth and ethical living.

Overcoming Vices Through Virtues

Benjamin Franklin’s 13 Virtues were designed to replace vices with positive traits‚ fostering moral and personal growth. By focusing on one virtue per week‚ Franklin systematically addressed weaknesses‚ substituting harmful habits with virtuous ones. For example‚ he countered procrastination with Resolution and excess with Moderation. His method emphasized self-awareness and gradual improvement‚ ensuring lasting change. Franklin believed that by cultivating virtues‚ individuals could overcome vices and achieve a balanced‚ ethical life. This approach remains relevant today‚ offering a practical roadmap for transforming negative tendencies into positive behaviors. Franklin’s strategy demonstrates the power of intentional self-improvement‚ proving that virtues can effectively replace vices when consistently practiced.

Modern Relevance of the 13 Virtues

Benjamin Franklin’s 13 Virtues remain timeless‚ offering guidance for personal and professional ethics. Their emphasis on honesty‚ humility‚ and moderation continues to inspire modern individuals in pursuit of balanced‚ purposeful lives.

Applying the Virtues in Daily Life

Benjamin Franklin’s 13 Virtues offer practical guidance for modern living. By focusing on one virtue per week‚ individuals can cultivate habits like Temperance‚ Silence‚ and Order. For instance‚ practicing Temperance involves avoiding excesses‚ while Silence encourages mindful communication. Incorporating these virtues into daily routines fosters self-discipline and integrity. Franklin’s method of self-assessment‚ using a virtue chart‚ can help track progress and identify areas for improvement. These principles are universal‚ making them applicable to personal and professional life. Embracing the virtues promotes ethical decision-making‚ stronger relationships‚ and a sense of purpose. By integrating these timeless values‚ individuals can achieve a more balanced and fulfilling life‚ aligning with Franklin’s vision of moral and personal growth.

Using the Virtues for Personal Growth

Benjamin Franklin’s 13 Virtues provide a powerful framework for personal growth. By focusing on self-improvement‚ individuals can cultivate qualities like Temperance‚ Silence‚ and Humility. Franklin’s method involved tracking progress through a virtue chart‚ marking transgressions to identify areas for improvement. This practice fosters self-awareness and accountability‚ essential for overcoming vices. Each virtue‚ such as Resolution and Diligence‚ encourages individuals to set and achieve goals‚ building discipline and perseverance. Over time‚ these habits shape a strong moral foundation‚ leading to greater self-confidence and emotional resilience. The virtues also promote introspection and self-refinement‚ helping individuals align their actions with their values. By embracing these principles‚ one can embark on a journey of continuous improvement‚ embodying Franklin’s belief that personal growth is a lifelong pursuit.

Integrating the Virtues into Professional Ethics

Benjamin Franklin’s 13 Virtues offer a compelling framework for professional ethics. Virtues like Sincerity‚ Justice‚ and Diligence promote honesty‚ fairness‚ and hard work‚ fostering trust and integrity in business dealings. By embracing these principles‚ professionals can build strong reputations and ethical decision-making skills. For instance‚ practicing Moderation and Temperance helps avoid extremes‚ ensuring balanced and thoughtful actions. Humility and Chastity encourage respect and self-control‚ while Resolution and Frugality emphasize commitment to goals and responsible resource management. These virtues create a foundation for ethical leadership‚ encouraging professionals to act with moral clarity and accountability. Integrating Franklin’s Virtues into workplace culture can cultivate a more principled and productive environment‚ aligning personal and organizational values with timeless ethical standards.

Benjamin Franklin’s 13 Virtues remain a timeless guide for personal and moral growth. Their practical wisdom fosters integrity‚ self-discipline‚ and purposeful living‚ inspiring individuals to embrace a balanced life.

Final Thoughts on the 13 Virtues

Benjamin Franklin’s 13 Virtues offer a profound framework for personal development and ethical living. By focusing on qualities like Temperance‚ Silence‚ and Humility‚ individuals can cultivate self-discipline and moral integrity. These virtues‚ though conceived centuries ago‚ remain remarkably relevant in modern life‚ guiding people toward a balanced and purposeful existence. Franklin’s approach emphasizes consistent practice and self-reflection‚ encouraging gradual improvement rather than perfection. His method of tracking progress through a virtue chart demonstrates a practical commitment to growth. Ultimately‚ the 13 Virtues serve as a timeless blueprint for anyone seeking to enhance their character and contribute positively to society‚ embodying Franklin’s enduring legacy of wisdom and self-mastery.

Encouragement to Adopt the Virtues

Embracing Benjamin Franklin’s 13 Virtues offers a transformative path to personal growth and moral excellence. By integrating these principles into daily life‚ individuals can foster self-discipline‚ integrity‚ and compassion. Franklin’s method of focusing on one virtue per week‚ coupled with self-assessment‚ provides a practical approach to gradual improvement. These timeless values‚ such as Temperance and Humility‚ are not only relevant but essential in today’s fast-paced world. Adopting the virtues encourages individuals to strive for balance‚ sincerity‚ and purpose‚ leading to a more fulfilling and honorable life. Franklin’s legacy invites us to embark on this journey of self-refinement‚ promising lasting positive change and a deeper connection to our values. Start your own virtuous journey today and discover the profound impact these principles can have on your life and society.

black and decker toaster oven air fryer manual

The Black and Decker Toaster Oven Air Fryer combines air frying and toasting functionality, offering a healthier cooking alternative with minimal oil. This manual provides essential guidance for optimal performance and safety, ensuring users can harness the appliance’s full potential while avoiding potential hazards. Always read the manual thoroughly before use to maximize efficiency and ensure safe operation.

Overview of the Black and Decker Toaster Oven Air Fryer

The Black and Decker Toaster Oven Air Fryer is a versatile, all-in-one kitchen appliance that combines the functions of a toaster oven and an air fryer. Designed with a sleek and modern aesthetic, it offers a wide range of cooking capabilities, including baking, toasting, and air frying. This innovative appliance uses advanced Air Fry Technology to deliver crispy, flavorful results with minimal oil, making it a healthier alternative to deep-frying. With its user-friendly interface and robust temperature range of 120°F to 450°F, it caters to various culinary needs, from reheating to cooking intricate dishes. Its compact design and efficient performance make it a practical addition to any kitchen, providing convenience and versatility for home cooks.

Importance of Reading the Manual

Reading the manual for the Black and Decker Toaster Oven Air Fryer is essential for safe and effective operation. It provides detailed instructions on assembly, usage, and maintenance, ensuring you understand the appliance’s capabilities and limitations. The manual highlights safety precautions, such as proper ventilation and avoiding overheating, to prevent accidents. It also explains how to utilize features like air frying, baking, and toasting efficiently. By following the guidelines, you can optimize performance, avoid damage, and extend the appliance’s lifespan. Additionally, the manual offers troubleshooting tips and warranty information, making it a vital resource for resolving issues and understanding coverage. Taking the time to read and follow the manual ensures a safe and satisfying cooking experience.

Product Overview

The Black and Decker Toaster Oven Air Fryer is a versatile kitchen appliance combining toasting, baking, and air frying capabilities in one compact design. It offers convenience, efficiency, and healthy cooking options with minimal oil usage. Designed for modern kitchens, it features an intuitive interface and sleek construction, making it easy to cook a variety of dishes. Perfect for home cooks and busy households, this appliance integrates multiple functions seamlessly, ensuring delicious results while saving space and time. Its innovative air fry technology promotes crispy textures without excess oil, making it a practical and nutritious choice for everyday meals.

Key Features of the Black and Decker Toaster Oven Air Fryer

The Black and Decker Toaster Oven Air Fryer boasts a range of impressive features that enhance cooking convenience and versatility. Its advanced air fry technology allows for crispy results with minimal oil, while the multi-function design enables toasting, baking, and air frying in one unit. The appliance features a spacious interior, accommodating up to four slices of bread or a 12-inch pizza. Digital controls provide precise temperature adjustments, and the 60-minute timer ensures accurate cooking times. The non-stick air fry basket and pan are dishwasher-safe for easy cleanup. Additional accessories, such as a baking pan and rack, expand cooking possibilities. This appliance is perfect for preparing healthy, delicious meals with ease and efficiency, making it a valuable addition to any kitchen.

Design and Build Quality

The Black and Decker Toaster Oven Air Fryer is constructed with durable materials, ensuring long-lasting performance. Its sleek, stainless steel exterior offers a modern look while withstanding regular use. The compact design saves counter space, making it ideal for small kitchens. The appliance features a clear LED display for easy navigation and intuitive controls. The interior is well-insulated, promoting even heat distribution and efficient cooking. The air fry basket and pan are made of high-quality, non-stick materials that resist wear and tear. The cool-touch handle provides safe operation, while the secure door locking mechanism prevents accidental openings. Overall, the build quality ensures reliability and durability, making it a dependable addition to any kitchen.

Safety Precautions

Always keep children away from the appliance. Avoid overheating by monitoring cooking times. Use oven mitts when handling hot surfaces. Never leave the appliance unattended while in use. Ensure the appliance is placed on a stable, heat-resistant surface. Avoid using damaged cords or accessories to prevent electrical hazards. Regularly clean food residues to prevent fire risks. Follow the manual’s guidelines for safe operation and maintenance.

Important Safety Tips for Using the Appliance

  • Always unplug the Black and Decker Toaster Oven Air Fryer when not in use or before cleaning to avoid electrical shock.
  • Never insert metal utensils or sharp objects into the appliance, as this may cause damage or injury.
  • Keep the appliance away from children and ensure they are supervised if nearby.
  • Do not place the appliance near flammable materials or on an unstable surface.
  • Avoid overheating by monitoring cooking times and temperatures, especially when air frying.
  • Never leave the appliance unattended while it is in operation.
  • Use oven mitts or tongs to handle hot trays or food to prevent burns.
  • Ensure proper ventilation in the kitchen to avoid smoke buildup.
  • Regularly clean food residues to prevent fire hazards and maintain performance.
  • Follow the manufacturer’s guidelines for recommended cooking times and temperatures.

By following these safety tips, you can ensure a safe and enjoyable cooking experience with your Black and Decker Toaster Oven Air Fryer.

Fire Hazard Prevention Measures

To prevent fire hazards when using the Black and Decker Toaster Oven Air Fryer, ensure proper maintenance and usage. Regularly clean food residues and grease from the interior, as buildup can ignite during high-temperature cooking. Avoid overcrowding the air fryer basket, as this can cause uneven cooking and potential overheating. Never leave the appliance unattended during operation, especially when cooking fatty foods that may splatter. Keep the area around the appliance clear of flammable materials, such as towels or curtains. Always follow the recommended temperature settings and cooking times to avoid excessive heat. Proper ventilation in the kitchen is essential to prevent smoke accumulation, which could lead to fire risks. By adhering to these measures, you can minimize the risk of fire and ensure safe operation.

Caution When Handling Hot Surfaces

When using the Black and Decker Toaster Oven Air Fryer, exercise extreme caution when handling hot surfaces to avoid burns. Always use oven mitts or tongs to remove food from the air fryer basket or oven rack, as these surfaces can reach very high temperatures during cooking. Never touch the exterior, door, or interior components with bare hands immediately after cooking. Allow the appliance to cool down for at least 30 minutes before cleaning or handling any internal parts. Keep children away from the appliance while it is in operation or cooling down. For added safety, place the air fryer on a heat-resistant surface to prevent accidental contact with hot areas.

Features and Functions

The Black and Decker Toaster Oven Air Fryer combines air frying, baking, toasting, and broiling in one compact appliance, offering versatile cooking options with precise temperature control.

Understanding the Air Fry Technology

The Black and Decker Toaster Oven Air Fryer utilizes advanced air fry technology to cook food evenly with minimal oil. This technology employs hot air circulation, distributing heat uniformly around the food for crispy results. Unlike traditional deep frying, it requires little to no oil, making it a healthier alternative. The air fryer function leverages a powerful fan to circulate hot air at high speeds, ensuring consistent cooking and a golden finish. This innovative approach allows for frying, baking, and roasting with precision, offering a versatile cooking experience. The digital interface and preset settings further enhance the ease of achieving perfect results every time;

Multiple Cooking Modes (Bake, Toast, Air Fry)

The Black and Decker Toaster Oven Air Fryer offers versatile cooking options with its multiple modes. The Bake mode allows for even cooking of dishes like cakes, cookies, and casseroles, similar to a traditional oven. The Toast mode quickly browns slices of bread to your desired crispiness, perfect for breakfast or snacks. The Air Fry mode enables healthier frying with minimal oil, producing crispy results for foods like fries, chicken, and vegetables. Each mode is designed to deliver optimal performance, catering to various culinary needs. This versatility makes the appliance a valuable addition to any kitchen, providing users with a wide range of cooking possibilities in one convenient unit.

Temperature Range and Settings

The Black and Decker Toaster Oven Air Fryer features a wide temperature range, allowing users to cook a variety of dishes with precision. The appliance operates between 200°F and 400°F, providing flexibility for baking, toasting, and air frying. The temperature can be adjusted in 5°F increments, ensuring accurate control for different cooking tasks. The digital controls make it easy to set and monitor the temperature, while the clear LCD display provides real-time feedback. This range accommodates everything from delicate pastries to crispy fried foods, making it suitable for both light and heavy-duty cooking. The temperature settings are designed to deliver consistent results, whether you’re baking cookies or air frying vegetables.

Operating the Appliance

Plug in the appliance safely, select your desired mode, and adjust temperature and timer settings. Press start to begin cooking. Always monitor cooking progress.

Initial Setup and Assembly

Begin by carefully unboxing and inspecting the appliance for any damage. Clean all surfaces with a damp cloth before first use. Place the toaster oven air fryer on a stable, heat-resistant countertop, ensuring proper ventilation. Plug the power cord into a nearby outlet, avoiding extension cords for safety. Remove all packaging materials and accessories from the interior. Preheat the oven at 400°F for 10 minutes to eliminate any manufacturing odors. Familiarize yourself with the control panel, including the dials for temperature, timer, and function selection. Ensure the air fryer basket and pan are securely in place before operation. Refer to the manual for specific assembly instructions if necessary.

Basic Operating Instructions

To operate the Black and Decker Toaster Oven Air Fryer, begin by plugging it in and ensuring the control panel is accessible. Select your desired cooking mode (Bake, Toast, or Air Fry) using the function dial. Set the temperature using the temperature control knob, ensuring it matches your recipe requirements. Use the timer dial to set the cooking duration, then press the start button to begin. The appliance will automatically start and stop based on your settings. Always monitor the cooking process and avoid leaving the appliance unattended. Once cooking is complete, allow the unit to cool slightly before removing food or cleaning. For specific settings and adjustments, refer to the manual for detailed guidance.

Using the Air Fryer Function

To use the air fryer function on your Black and Decker Toaster Oven Air Fryer, begin by selecting the Air Fry mode using the function dial. Place food in a single layer in the air fry basket to ensure even cooking. Set the temperature between 175°F and 400°F, depending on the recipe, and adjust the timer accordingly. Press the start button to initiate cooking. The air fryer uses hot air circulation to achieve crispy results with minimal oil. For optimal performance, pat food dry before cooking and avoid overcrowding the basket. Shake the basket halfway through cooking if needed. Once done, let the appliance cool before cleaning. Refer to the manual for specific temperature and time recommendations for various foods.

Using the Toaster Oven Function

To use the toaster oven function on your Black and Decker Toaster Oven Air Fryer, start by selecting the Toast mode using the function dial. Place the oven rack in the desired position based on the type of food you’re preparing. Set the temperature and timer using the control knobs, ensuring they align with your recipe requirements. Place food directly on the rack or in a baking pan. Press the start button to begin cooking. The oven will preheat automatically before starting the timer. Monitor the cooking progress through the window to ensure your food is cooked to your liking. Once done, let the oven cool slightly before removing the food. Always use oven mitts when handling hot racks or pans. For best results, refer to the manual for specific temperature and time guidelines for different types of food.

Cooking Modes and Settings

The Black and Decker Toaster Oven Air Fryer offers multiple cooking modes, including bake, toast, and air fry, with precise temperature control and timer settings for optimal results.

Temperature Control for Different Cooking Tasks

The Black and Decker Toaster Oven Air Fryer features precise temperature control, allowing users to adjust settings for various cooking tasks. For baking, a lower temperature (around 300°F) is ideal for delicate items like pastries or fish, while higher temperatures (up to 400°F) are better for roasting meats or vegetables. Air frying typically requires a medium-high temperature (350-375°F) to achieve crispy results. The appliance also includes preset temperature settings for common tasks, ensuring consistent outcomes. Users can manually adjust the temperature dial to suit specific recipes or food types, making it versatile for a wide range of dishes. Always refer to the manual for guidance on optimal temperature ranges for different cooking modes.

Using the Timer Function

The Black and Decker Toaster Oven Air Fryer includes a convenient timer function to ensure perfectly cooked meals. The timer allows you to set cooking durations up to 60 minutes, providing precise control over your dishes. To use the timer, simply turn the dial to your desired time and press the dial to start. A beep will sound when the timer expires, alerting you that your food is ready. Always set the timer according to the cooking mode and recipe requirements. For air frying, shorter times are often needed, while baking may require longer durations. Ensure the timer is set correctly to avoid overcooking or undercooking. Once the timer goes off, let the appliance cool slightly before checking or cleaning.

Air Frying vs. Baking: Key Differences

Air frying and baking are two distinct cooking methods offered by the Black and Decker Toaster Oven Air Fryer, each with unique benefits. Air frying uses hot air circulation to crisp food quickly, mimicking deep-frying results with little to no oil. Baking, on the other hand, relies on radiant heat for even cooking, ideal for dishes like cakes, bread, and roasted vegetables. Air frying typically requires shorter cooking times and lower temperatures compared to baking. For example, fries air fry in 15-20 minutes, while baking them may take 30-40 minutes; Air frying is also healthier, reducing oil usage by up to 75%. Both modes are versatile, but air frying excels for crispy textures, while baking is better for even cooking and browning. Choose the mode based on your recipe and desired outcome for optimal results.

Maintenance and Care

Regular cleaning and drying are essential to maintain the appliance’s performance and longevity. Always wipe down surfaces and check for food residue after use.

Cleaning the Toaster Oven Air Fryer

Regular cleaning is crucial for maintaining the performance and hygiene of your Black and Decker Toaster Oven Air Fryer. Always unplug the appliance before cleaning to ensure safety. Use a damp cloth to wipe down the exterior and interior surfaces, paying attention to any food residue. Avoid using abrasive cleaners or scouring pads, as they may damage the finish. The crumb tray and air fryer basket should be removed and washed with warm, soapy water after each use. For tough stains, soak them in warm water before scrubbing gently. Never submerge the main unit in water, as this can cause electrical damage. Dry all parts thoroughly to prevent rust or mineral buildup. Regular cleaning prevents food particles from burning onto surfaces during future use and ensures optimal functionality. Always refer to the manual for specific cleaning recommendations to maintain your appliance’s warranty and performance.

Troubleshooting Common Issues

If your Black and Decker Toaster Oven Air Fryer is not functioning properly, check for common issues. Ensure the power cord is securely plugged into a working outlet. If the appliance does not turn on, verify that the outlet is operational. For uneven cooking, ensure proper air circulation by leaving space around the unit and checking that the racks are correctly positioned. If food is not cooking evenly, adjust the temperature or timer settings. Noise during operation, such as rattling, may indicate loose parts; tighten any screws or components. Refer to the manual for specific troubleshooting steps. If issues persist, contact Black and Decker customer support for assistance, as outlined in the warranty information.

The Black and Decker Toaster Oven Air Fryer offers versatility, efficiency, and ease of use, making it a great addition to any kitchen. Proper maintenance and adherence to safety guidelines ensure optimal performance and longevity. Explore its features, experiment with recipes, and enjoy healthier cooking options. Refer to the manual for troubleshooting and warranty details to maximize your experience. Happy cooking!

Final Tips for Optimal Performance

For the best results with your Black and Decker Toaster Oven Air Fryer, always preheat the unit before cooking to ensure even heating. Avoid overcrowding the basket or oven rack, as this can affect air circulation and cooking performance. Regularly clean the appliance to prevent food residue buildup, which can hinder its efficiency. Use the correct-sized pans and utensils to maintain proper airflow. Follow the recommended temperature and time settings for specific foods to achieve desired outcomes. Experiment with the air fry and bake functions to find your preferred cooking styles. Store the appliance in a cool, dry place when not in use to prolong its lifespan. Happy cooking!

Warranty and Customer Support Information

Your Black and Decker Toaster Oven Air Fryer is backed by a 2-year limited warranty, covering defects in materials and workmanship. For warranty claims, contact Black and Decker’s customer support team via phone, email, or live chat through their official website. Ensure to have your product serial number and purchase receipt ready. The company also provides dedicated customer service for troubleshooting, replacement parts, and general inquiries. Visit their website for detailed warranty terms, FAQs, and downloadable resources. If issues arise, reach out promptly to resolve them efficiently. Black and Decker’s customer support ensures reliable assistance, helping you maintain your appliance’s performance and extend its lifespan;