
Dur-A-Quartz Application Instructions
Dur-A-Quartz TM is a seamless‚ ⎼ inch thick decorative epoxy resin flooring system․ It consists of 100 solids epoxy body coats with decorative Q28 or Q11 quartz broadcasts‚ finished with a durable urethane topcoat ensuring excellent wear and chemical resistance․ Dur-A-Quartz TM is applied by trowel method․ When recommended spread rates are followed‚ a 1/8 to 3/16 thick finish will be produced․ It can also be applied at 1/4 to fill and level damaged concrete floors․
Introduction
Dur-A-Quartz TM is a high-performance‚ decorative epoxy resin flooring system designed to provide a durable‚ seamless‚ and aesthetically pleasing finish for a variety of applications․ This system is ideal for both residential and commercial settings‚ offering exceptional wear resistance‚ chemical resistance‚ and slip resistance․ Dur-A-Quartz TM is known for its unique blend of 100 solids epoxy body coats with decorative Q28 or Q11 quartz broadcasts‚ creating a visually appealing and long-lasting surface․ The system is further enhanced by a durable urethane topcoat‚ ensuring excellent protection against wear and tear‚ as well as chemical spills․
Dur-A-Quartz TM offers a range of benefits‚ including its ability to be installed in thicknesses ranging from 1/8 to 3/16 inches‚ allowing for customization based on project requirements․ It can be used to create a smooth‚ even surface or a textured finish‚ depending on the desired aesthetic․ The system also offers excellent adhesion to concrete substrates‚ ensuring a long-lasting and durable installation․ Dur-A-Quartz TM meets various industry standards‚ including ADA‚ USDA‚ FDA‚ NFSI‚ and OSHA guidelines‚ highlighting its commitment to safety and compliance․
This application guide provides comprehensive instructions for the proper installation of Dur-A-Quartz TM‚ covering essential steps from surface preparation to curing and maintenance․ By following these guidelines‚ you can ensure a successful installation that meets the highest standards of quality and performance․
Surface Preparation
Proper surface preparation is crucial for a successful and long-lasting Dur-A-Quartz TM installation․ A well-prepared substrate ensures optimal adhesion‚ prevents delamination‚ and maximizes the performance of the flooring system․ The following steps outline the essential surface preparation procedures⁚
Clean the Surface⁚ Thoroughly remove all dirt‚ debris‚ dust‚ grease‚ oil‚ and other contaminants from the concrete surface․ Use a suitable cleaning agent‚ such as a degreaser or a concrete cleaner‚ and follow the manufacturer’s instructions․ A pressure washer can be helpful for removing stubborn contaminants․
Repair Cracks and Defects⁚ Address any cracks‚ holes‚ or other imperfections in the concrete surface․ For minor imperfections‚ use a patching compound or epoxy filler․ For larger cracks or holes‚ consider using a concrete repair system․ Ensure that the repairs are properly cured before proceeding with the installation․
Grind and Profile the Surface⁚ Grind or profile the concrete surface to achieve a suitable roughness and create a mechanical bond for the epoxy․ The desired surface profile should be between 3 and 4‚ as per the Concrete Surface Profile (CSP) guidelines․ This step helps ensure proper adhesion and prevents the Dur-A-Quartz TM from detaching from the concrete surface․
Prime the Surface⁚ Apply a suitable primer to the prepared concrete surface․ The primer helps improve adhesion‚ seal the pores‚ and promote a uniform finish․ Choose a primer specifically designed for epoxy flooring systems and follow the manufacturer’s instructions for application and drying time․
Allow the Primer to Dry⁚ After priming‚ allow the primer to dry completely according to the manufacturer’s recommendations․ This ensures that the primer is fully cured and ready to receive the Dur-A-Quartz TM flooring system․
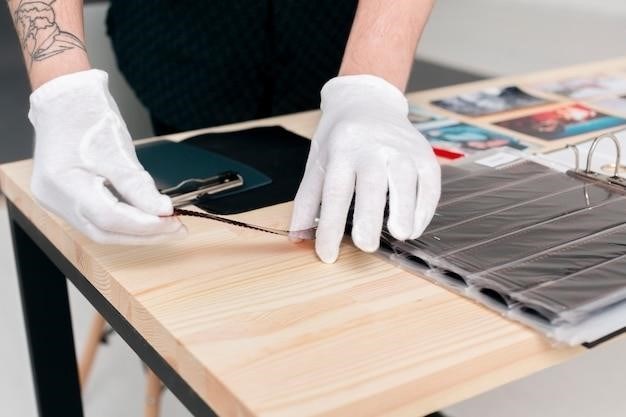
Application Method
The application method for Dur-A-Quartz TM involves a series of carefully executed steps‚ ensuring a seamless and durable flooring system․ The process typically involves a combination of troweling‚ broadcasting‚ and finishing techniques․ This section outlines the general steps involved in the application process⁚
Prepare the Mixing Area⁚ Set up a clean and dry mixing area‚ ensuring adequate ventilation․ Use a clean mixing container and appropriate mixing tools‚ such as a drill with a paddle attachment or a heavy-duty mixer․ Follow the manufacturer’s instructions for mixing ratios and mixing times․
Mix the Epoxy Resin⁚ Thoroughly mix the epoxy resin according to the manufacturer’s instructions․ Pay close attention to the mixing ratios and mixing times to ensure proper curing and adhesion․ For best results‚ use a slow-speed mixer to avoid introducing air bubbles into the mixture․
Apply the Epoxy Base Coat⁚ Using a trowel‚ apply the mixed epoxy resin as a base coat to the prepared concrete surface․ Spread the epoxy evenly and ensure complete coverage․ For thicker applications‚ apply multiple coats‚ allowing each coat to cure thoroughly before applying the next․
Broadcast the Quartz Aggregate⁚ While the epoxy base coat is still wet‚ broadcast the decorative quartz aggregate over the surface․ Use a measured amount of aggregate‚ ensuring even coverage and a uniform appearance․ The quartz aggregate should be embedded in the epoxy resin to create a durable and attractive finish․
Trowel and Smooth the Surface⁚ After broadcasting the quartz aggregate‚ use a trowel to smooth the surface‚ ensuring that the aggregate is evenly distributed and embedded in the epoxy․ Remove any excess aggregate and ensure a level and consistent finish․
Apply the Topcoat⁚ Once the base coat and quartz aggregate have cured properly‚ apply a durable urethane topcoat․ This topcoat provides added protection against wear‚ abrasion‚ chemicals‚ and stains‚ enhancing the longevity and performance of the Dur-A-Quartz TM flooring system․
Spread Rates
Spread rates for Dur-A-Quartz TM are crucial for achieving the desired thickness and ensuring optimal performance of the flooring system․ The recommended spread rates vary depending on the specific application and the size of the quartz aggregate used․ Here’s a breakdown of typical spread rates for Dur-A-Quartz TM⁚
Double Broadcast or Slurry/Broadcast: For a nominal 1/8 inch thick finish‚ a double broadcast or a slurry/broadcast method is recommended․ This typically involves applying two layers of quartz aggregate‚ either as a dry broadcast or as a slurry mixed with epoxy resin․
Triple Broadcast or Slurry/Double Broadcast⁚ To achieve a nominal 3/16 inch thick finish‚ a triple broadcast or a slurry/double broadcast method is preferred․ This involves applying three layers of quartz aggregate‚ with the slurry method offering greater control over the thickness and consistency․
Q-11 Aggregate⁚ When using the larger Q-11 quartz aggregate‚ it’s essential to consult the application instructions for specific spread rates․ The larger size of Q-11 requires more resinous material to achieve the desired texture and ensure proper bonding․
Surface Preparation⁚ The spread rates are also influenced by the surface preparation․ A smooth and level concrete surface will require less material than a rough or uneven surface․
Manufacturer’s Recommendations⁚ Always refer to the manufacturer’s instructions for specific spread rates and application guidelines․ These instructions provide detailed information tailored to the specific product and intended application․
By adhering to the recommended spread rates‚ you can ensure a consistent thickness‚ optimal performance‚ and a durable and attractive Dur-A-Quartz TM flooring system․
Curing Time
Curing time for Dur-A-Quartz TM is a critical factor in achieving optimal strength‚ durability‚ and performance of the flooring system․ The curing process involves the chemical reaction of the epoxy resin with the hardener‚ forming a strong and durable bond․ The curing time is influenced by various factors‚ including temperature‚ humidity‚ and the thickness of the applied layer․
Typically‚ Dur-A-Quartz TM requires a minimum of 24 hours to cure at room temperature (70°F)․ However‚ it’s important to note that the flooring system will continue to gain strength over time‚ reaching its full cure strength after 7 days․
Here’s a breakdown of the curing process and factors that influence the curing time⁚
Initial Curing⁚ The initial curing phase involves the rapid hardening of the epoxy resin‚ typically within the first few hours․ This phase results in a significant increase in strength and stiffness․
Full Cure⁚ The full cure occurs over a longer period‚ reaching its full strength and resistance to chemicals and wear after 7 days․
Temperature⁚ Higher temperatures accelerate the curing process‚ while lower temperatures slow it down․
Humidity⁚ Excessive humidity can hinder curing and result in a weaker bond․
Thickness⁚ Thicker layers of Dur-A-Quartz TM require longer curing times to allow the epoxy resin to fully react and solidify․
It’s essential to follow the manufacturer’s instructions regarding curing time and recommended precautions․ Avoid applying heavy loads or traffic to the flooring system until it has fully cured․
Maintenance
Maintaining Dur-A-Quartz TM flooring is relatively straightforward and requires minimal effort‚ contributing to its long-lasting performance and aesthetic appeal․ The robust nature of the system makes it resistant to wear and tear‚ chemicals‚ and stains‚ minimizing the need for frequent cleaning and upkeep․
Here’s a guide to maintaining your Dur-A-Quartz TM flooring⁚
Regular Sweeping or Vacuuming⁚ Regular sweeping or vacuuming is essential to remove dust‚ dirt‚ and debris that can accumulate on the surface․
Mopping⁚ For routine cleaning‚ use a damp mop with a mild detergent solution․ Avoid using harsh chemicals‚ abrasive cleaners‚ or strong solvents that can damage the flooring surface․
Stain Removal⁚ If spills or stains occur‚ promptly blot up the liquid with a clean cloth or sponge․ For persistent stains‚ use a mild cleaner specific for epoxy flooring․
Avoid Abrasive Materials⁚ Avoid using abrasive materials‚ such as steel wool or scouring pads‚ which can scratch the surface․
Protect from Sharp Objects⁚ Protect the flooring from sharp objects‚ such as furniture with sharp legs or heavy equipment‚ which can cause damage․
Regular Inspection⁚ Regularly inspect the flooring for any signs of wear or damage․
Professional Cleaning⁚ For deep cleaning or restoration‚ consider hiring a professional cleaning service experienced in epoxy flooring maintenance․
By following these simple maintenance tips‚ you can ensure your Dur-A-Quartz TM flooring retains its beauty‚ durability‚ and slip resistance for years to come․
Safety Precautions
When working with Dur-A-Quartz TM products‚ it is crucial to prioritize safety to protect yourself and those around you․ This section outlines essential safety precautions to follow during installation and maintenance⁚
Personal Protective Equipment (PPE)⁚ Always wear appropriate PPE‚ including safety glasses‚ gloves‚ and a respirator‚ to safeguard against potential hazards․ The specific type of PPE will vary depending on the task and materials being used․
Ventilation⁚ Ensure adequate ventilation in the work area to prevent the buildup of fumes and vapors․ Open windows and doors or use exhaust fans to maintain fresh air circulation․
Skin Contact⁚ Avoid prolonged skin contact with the epoxy resin and other components․ Wear protective gloves and clothing․ If skin contact occurs‚ immediately wash the affected area with soap and water․
Eye Contact⁚ Avoid eye contact with the epoxy resin and other components․ Wear safety glasses․ If eye contact occurs‚ flush the eyes with clean water for at least 15 minutes and seek medical attention․
Ingestion⁚ Do not ingest any of the Dur-A-Quartz TM products․ If accidental ingestion occurs‚ seek immediate medical attention․
Fire Hazards⁚ Epoxy resins are flammable․ Store them in a cool‚ dry‚ and well-ventilated area away from heat sources and open flames․
Material Safety Data Sheet (MSDS)⁚ Before using any Dur-A-Quartz TM product‚ carefully read and understand its accompanying Material Safety Data Sheet (MSDS) for detailed safety information‚ handling procedures‚ and emergency response guidelines․
Follow Instructions⁚ Strictly follow the application instructions and safety precautions provided by the manufacturer․
By adhering to these safety precautions‚ you can minimize risks and ensure a safe and successful installation and maintenance of your Dur-A-Quartz TM flooring․
Troubleshooting
While Dur-A-Quartz TM is a robust flooring system‚ issues can arise during installation or after completion․ This section addresses common troubleshooting scenarios and provides potential solutions⁚
Uneven Surface⁚ If the finished floor exhibits unevenness or inconsistencies‚ it may indicate improper surface preparation or incorrect application of the epoxy resin․ Check for areas where the concrete substrate was not adequately leveled or smoothed before application․ Consider resurfacing the problematic areas to achieve a smoother finish․
Discoloration⁚ If the finished floor displays discoloration or uneven color‚ it could be due to inconsistent mixing of the epoxy resin‚ uneven distribution of the quartz aggregate‚ or insufficient curing time․ Ensure the epoxy components are thoroughly mixed according to manufacturer instructions․ Also‚ ensure adequate time is allotted for the epoxy to cure properly․
Cracking⁚ If cracks appear in the finished floor‚ it might be caused by insufficient curing time‚ rapid temperature changes‚ or insufficient substrate preparation․ Allow the epoxy to cure fully before subjecting the floor to heavy traffic․ Avoid exposing the floor to extreme temperature fluctuations․
Bubbling⁚ If air bubbles appear in the finished floor‚ it could be due to improper mixing‚ trapped air during application‚ or inadequate ventilation during curing․ Thoroughly mix the epoxy components to eliminate air bubbles․ Use a roller or trowel to release trapped air during application․ Ensure adequate ventilation to allow the epoxy to cure properly․
Excessive Gloss⁚ If the finished floor has an excessively high gloss‚ it could be due to using too much topcoat or applying the topcoat too thinly․ Ensure the topcoat is applied at the recommended thickness․
For complex or persistent issues‚ consult a professional flooring contractor who is experienced with Dur-A-Quartz TM products․ They can help identify the underlying cause and provide appropriate solutions․