Dive into captivating love stories! Discover a world of free romance novels in PDF format‚ readily available for your e-reader or tablet‚ offering endless enjoyment.
The Growing Popularity of Digital Romance
Digital romance novels have exploded in popularity‚ fueled by convenience and accessibility. Readers now crave instant gratification‚ and eBooks deliver precisely that – immediate access to countless stories. The romance genre‚ always a strong performer‚ has particularly thrived in the digital space.
This surge is driven by several factors. The ease of downloading and carrying an entire library on a single device is a major draw. Furthermore‚ digital platforms offer a level of privacy that some readers appreciate‚ allowing them to indulge in guilty pleasures without judgment. The affordability of many eBooks‚ including free options‚ also contributes to the genre’s widespread appeal. Platforms like BookBubs and Rakuten Kobo showcase this trend‚ offering curated selections and millions of titles.
Why PDF Format Remains Relevant
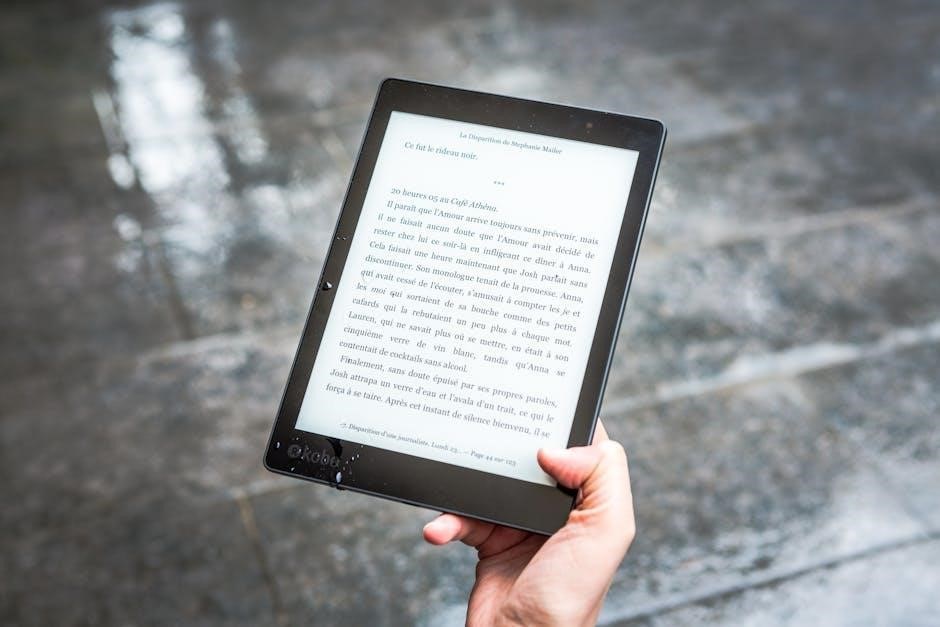
Despite the rise of dedicated eBook formats‚ PDF remains a surprisingly relevant choice for romance novel enthusiasts. Its universal compatibility is a key advantage; PDFs can be opened on virtually any device – computers‚ tablets‚ smartphones – without requiring specific software or conversion.
This accessibility is particularly valuable for readers who prefer a consistent reading experience across platforms. PDFs also preserve formatting‚ ensuring the book appears as intended by the author and publisher. While not always ideal for reflowing text on smaller screens‚ PDFs are perfect for visually rich novels or those with complex layouts. The availability of free romance novels in PDF format further solidifies its continued importance in the digital reading landscape.

Where to Find Free Romance Novels PDF Downloads
Explore numerous online platforms! BookBubs‚ Rakuten Kobo‚ GoodNovel‚ and Amazon Kindle offer a wealth of free romance novels in PDF and other eBook formats.
BookBubs: A Curated Selection
BookBubs stands out as a fantastic resource for discovering free and discounted romance eBooks. Signing up for their free service grants you access to a carefully curated selection of thousands of titles.
This platform excels at categorizing books by subgenre‚ making it easy to find exactly what you’re craving – whether it’s a thrilling Romantic Suspense‚ a heartwarming Contemporary Romance‚ or a captivating Time Travel Romance.
While many titles are entirely free‚ you’ll also find options priced between $0.99 and $2.99. BookBubs is compatible with popular eReaders like NOOK‚ Kindle‚ Kobo‚ Google Play Books‚ and Apple Books‚ ensuring a seamless reading experience. It’s a great way to cozy up with new authors and series!
Rakuten Kobo: Millions of eBooks‚ Including Free Options
Rakuten Kobo offers a vast library of millions of eBooks‚ and within that collection lies a significant number of free romance novels. This platform is a haven for romance readers seeking diverse stories and authors.
You can easily “Turn Up the Heat” with their selection of free romance titles‚ spanning various subgenres to suit every taste. Before downloading‚ take advantage of the opportunity to read a free preview and check out user reviews to ensure it’s the perfect fit.
Rakuten Kobo provides a smooth and convenient reading experience‚ allowing you to start reading your chosen romance novel in seconds. It’s a reliable source for both established and emerging romance authors!
GoodNovel: Online Romance Novel Platform
GoodNovel is a dedicated online platform specifically designed for romance novel enthusiasts. It provides a vast and continuously updated catalog of stories‚ many available for free download in PDF format or directly through their reading app.
The platform boasts a diverse collection of Download Pdf Romance Novels Free‚ catering to a wide range of preferences within the genre. Users can easily find and access popular titles‚ exploring new authors and series with ease.
GoodNovel’s interface is user-friendly‚ making it simple to navigate and discover your next captivating read. It’s a great resource for those who enjoy immersive storytelling and a constant stream of new romance content.
Amazon Kindle Store: Utilizing Free Promotions
Amazon’s Kindle Store frequently offers a wealth of free romance novels in PDF-compatible formats. While many titles are available for purchase‚ savvy readers can uncover a treasure trove through limited-time promotions and author giveaways.
Regularly checking the “Free & Discounted” sections‚ or searching specifically for “free romance ebooks‚” can yield fantastic results. Authors often utilize free promotions to gain visibility and attract new readers‚ providing a cost-effective way to expand your library.
Keep an eye out for Kindle Daily Deals and other promotional events‚ as these often include romance titles. Don’t forget to explore options like Kindle Unlimited for access to a rotating selection of free reads!

Navigating Free eBook Websites
Exercise caution when downloading! Ensure websites offer legal downloads‚ respecting copyright laws‚ to avoid potential risks associated with unverified sources.
Understanding Copyright and Legal Downloads
Protecting authors’ rights is crucial. When exploring free romance novel PDFs‚ always prioritize legal downloads to support creators and avoid copyright infringement. Many websites offer legitimately free eBooks‚ often as promotional tools or through public domain releases.
Verify the source’s credibility. Look for established platforms like Rakuten Kobo or Amazon Kindle Store‚ which clearly indicate free and legally available titles. Be wary of sites offering suspiciously large collections of copyrighted material without proper authorization. Downloading from unverified sources can expose you to malware and legal repercussions.
Respect intellectual property. Legal downloads ensure authors receive compensation for their work‚ fostering a sustainable ecosystem for romance literature. Choosing legitimate options contributes to the continued creation of captivating stories.
Potential Risks of Unverified Sources

Beware of hidden dangers! Downloading romance novel PDFs from unverified websites carries significant risks. These sites often harbor malware‚ viruses‚ and spyware that can compromise your device and personal information. Phishing attempts and unwanted software installations are also common threats.
Copyright violations are a concern. Illegally distributed eBooks often lack quality control‚ featuring formatting errors and incomplete content. Supporting these sources undermines authors and publishers‚ hindering the creation of future romance novels.
Protect your digital wellbeing. Stick to reputable platforms and exercise caution when encountering unfamiliar websites offering free downloads. Prioritize your security and support the romance community by choosing legal and safe options.

Popular Subgenres Available in PDF

Explore diverse romantic worlds! From contemporary tales to historical passions‚ romantic suspense‚ and thrilling time travel adventures‚ PDF format offers a vast selection.
Contemporary Romance: Modern Love Stories
Immerse yourself in relatable connections! Contemporary romance novels in PDF format capture the complexities of modern relationships‚ offering stories that resonate with today’s readers. These tales often explore themes of career ambitions‚ family dynamics‚ and personal growth alongside the blossoming of love.
Expect realistic characters navigating everyday challenges‚ from navigating dating apps to building lasting commitments; You’ll find a wide range of settings‚ from bustling cityscapes to charming small towns‚ each providing a unique backdrop for heartfelt connections. Many free options are available through platforms like BookBubs and Rakuten Kobo‚ allowing you to sample diverse authors and discover your next favorite contemporary romance author without spending a dime. These stories are perfect for escaping into a world of believable emotions and heartwarming moments.
Historical Romance: Passion Through the Ages
Journey back in time for unforgettable love! Historical romance novels in PDF format transport readers to different eras‚ blending passionate storylines with meticulously researched historical details. From Regency England to Victorian America‚ these books offer a captivating escape into the past‚ filled with societal constraints‚ grand estates‚ and compelling characters.
Expect dashing lords‚ independent heroines‚ and forbidden desires as authors weave tales of love against the backdrop of significant historical events. Platforms like Rakuten Kobo and BookBubs frequently offer free historical romance eBooks‚ allowing you to explore various periods and authors. These novels provide a unique blend of escapism and education‚ offering a glimpse into the past while delivering a satisfying romantic experience. Prepare to be swept away by tales of courage‚ intrigue‚ and enduring love.
Romantic Suspense: Thrills and Romance Combined
Experience heart-pounding romance with a dash of danger! Romantic suspense novels in PDF format deliver a thrilling combination of passionate love stories and gripping mystery. These books feature strong heroines‚ enigmatic heroes‚ and high-stakes situations that will keep you on the edge of your seat. Expect twists‚ turns‚ and unexpected revelations as you unravel the secrets alongside the characters.
GoodNovel and BookBubs are excellent sources for discovering free romantic suspense eBooks. Authors skillfully blend elements of romance‚ suspense‚ and often‚ crime or thriller genres‚ creating a uniquely captivating reading experience. Prepare for intense emotions‚ dangerous encounters‚ and a love that blossoms amidst adversity. These novels offer the perfect escape for readers who crave both passion and intrigue.
Time Travel Romance: A Twist on Traditional Love
Journey through history with a touch of romance! Time travel romance novels in PDF format offer a unique and captivating twist on traditional love stories. These books transport readers to different eras‚ where characters defy the boundaries of time to find love. Expect historical settings‚ intriguing paradoxes‚ and passionate connections that transcend centuries.
BookBubs frequently features free time travel romance eBooks‚ providing access to a diverse range of stories. Authors explore themes of destiny‚ fate‚ and the enduring power of love. Prepare to be swept away by tales of star-crossed lovers‚ historical adventures‚ and the challenges of navigating different time periods. These novels offer a delightful escape for readers seeking a blend of romance and fantasy.

Devices for Reading Romance Novels PDF
Enjoy your free reads anywhere! Romance novels in PDF format are perfectly suited for Kindle‚ NOOK‚ Kobo‚ Apple devices‚ and tablets—offering portable bliss.
Kindle E-Readers
Kindle devices are exceptionally popular for enjoying romance novels in PDF format‚ offering a dedicated reading experience. Amazon’s Kindle ecosystem seamlessly integrates with its store‚ allowing easy access to free promotions and purchased eBooks.
While Kindles natively support various formats‚ PDFs sometimes require adjustments for optimal viewing. You can send PDFs to your Kindle via email or USB.
Adjusting font sizes and margins within the Kindle interface ensures comfortable reading. Many readers appreciate the Kindle’s adjustable backlight‚ perfect for reading in any lighting condition.
Furthermore‚ Kindle’s Whispersync technology keeps your place synchronized across devices‚ allowing you to switch between your Kindle and the Kindle app on other devices effortlessly. It’s a fantastic choice for romance novel enthusiasts!
NOOK Devices
Barnes & Noble’s NOOK e-readers provide a compelling alternative for romance novel lovers seeking PDF compatibility. NOOK devices offer a user-friendly interface and access to the Barnes & Noble eBookstore‚ alongside support for sideloading PDFs from your computer.

Similar to Kindle‚ PDFs on NOOK devices may require some formatting adjustments to fit the screen optimally. NOOK allows you to easily transfer files via USB connection.

Readers appreciate the NOOK’s customizable display‚ allowing adjustments to font size‚ line spacing‚ and margins for a personalized reading experience. The built-in dictionary and note-taking features enhance engagement with the stories.
NOOK also boasts a long battery life‚ making it ideal for extended reading sessions. It’s a solid choice for diving into your favorite romance novels in PDF format!
Kobo E-Readers
Rakuten Kobo e-readers are excellent choices for romance novel enthusiasts‚ offering robust PDF support and a seamless reading experience. Kobo devices stand out with their compatibility with various file formats‚ including EPUB and PDF‚ providing flexibility in how you access your books.
Kobo’s OverDrive integration is a significant advantage‚ allowing you to borrow eBooks directly from your local library. PDFs can be easily transferred via USB‚ and Kobo’s Pocket integration lets you save articles for later reading.
Kobo devices feature ComfortLight PRO‚ reducing blue light exposure for comfortable nighttime reading. Customizable fonts and margins further enhance readability.
With a wide range of models available‚ Kobo caters to different budgets and preferences‚ making it a fantastic option for enjoying free romance novels in PDF format;
Apple Books & Other Tablets
Apple Books‚ pre-installed on iPads and iPhones‚ provides a convenient platform for reading romance novels in PDF format. Its intuitive interface and seamless iCloud synchronization make it easy to access your library across devices. PDF support is robust‚ allowing for annotation and bookmarking.
Beyond Apple‚ numerous Android tablets‚ like Samsung Galaxy Tabs‚ also offer excellent PDF reading capabilities. These tablets often support various eBook apps and file management systems‚ providing flexibility.
Tablets generally offer larger screens than e-readers‚ enhancing the visual experience‚ especially for PDFs with complex formatting.
Utilizing apps like Google Play Books or third-party PDF readers‚ you can easily manage and enjoy your free romance novel downloads on these versatile devices.

Staying Updated on Free eBook Deals
Never miss a bargain! Follow blogs‚ newsletters‚ and events like “Stuff Your Kindle Day” to discover the latest free romance novel PDF promotions.
Stuff Your Kindle Day & Similar Events
Mark your calendars for incredible eBook savings! “Stuff Your Kindle Day‚” typically occurring around March 4th‚ is a fantastic opportunity to amass a collection of discounted and free romance novels in PDF format. Keep an eye out for announcements from platforms like Alpharoll‚ which frequently participates with offerings featuring beloved “cinnamon roll” characters – a popular trope within the genre.
However‚ the deals don’t stop there! Numerous similar promotional events pop up throughout the year. Regularly checking eBook retailer websites‚ signing up for email newsletters from authors and publishers‚ and following dedicated book deal websites will ensure you’re always in the loop. These events are a prime way to expand your reading list without expanding your budget‚ providing access to a wide variety of captivating romance stories.
Following Romance eBook Blogs and Newsletters
Stay informed about the latest freebies and deals! Romance eBook blogs and newsletters are invaluable resources for avid readers seeking free novels in PDF format. These dedicated sources curate lists of discounted and complimentary books across various subgenres‚ saving you countless hours of searching.
Subscribing to newsletters from popular eBook retailers like Rakuten Kobo and Amazon provides direct updates on promotions. Furthermore‚ many romance-focused blogs actively track limited-time offers and free book alerts. Regularly checking these platforms ensures you never miss an opportunity to download your next favorite read. It’s a proactive approach to building a substantial digital library without spending a fortune!