Vuori Size Guide⁚ Finding Your Perfect Fit
Vuori is known for its comfortable and stylish athleisure wear, but finding the perfect fit can be tricky․ This Vuori size guide is designed to help you determine the right size for your body type, making sure your Vuori clothes fit comfortably and flatteringly․ We’ll cover everything from understanding Vuori sizing to specific size charts for tops, bottoms, and even conversion charts․
Understanding Vuori Sizing
Vuori’s sizing philosophy is rooted in providing a comfortable and flattering fit, prioritizing both functionality and style․ While their sizing tends to run true to size, it’s essential to understand their approach to ensure a perfect fit․ Vuori often uses a combination of numerical sizes and body measurements, making it easy to compare your measurements to their size chart․ This approach allows for more precision and helps you find the ideal fit, whether you prefer a snug or relaxed feel․
It’s important to remember that Vuori’s sizing can vary slightly depending on the specific garment․ For instance, their tops might have a slightly more relaxed fit compared to their bottoms, which are designed to be more fitted․ This is why referring to their size charts for specific items is crucial․ The size chart for each garment will provide detailed measurements for different areas like chest, waist, hips, and inseam, giving you a clear picture of how the garment will fit․
Vuori also offers a helpful “size conversion chart” that translates their numerical sizes to standard denim sizes․ This is particularly useful for bottoms, as it helps you determine your equivalent denim size based on Vuori’s sizing․ This chart is a great resource for those who are accustomed to shopping for denim and want to easily translate their usual size to Vuori’s sizing system․
Men’s Vuori Size Chart
Vuori’s size chart for men is designed to help you find the perfect fit for their various apparel options, from comfortable t-shirts to performance shorts․ The chart is organized by size, ranging from XS to XXL, and provides detailed measurements for different body areas, including chest, waist, and hips․ This allows you to compare your own measurements to the chart and determine the most suitable size for your body type․
For example, if you have a chest measurement of 37-40 inches, the size chart suggests a Medium (M) would be the best fit․ The chart also includes numerical sizes, which can be helpful for translating your usual size to Vuori’s sizing system․ For instance, a Medium (M) in Vuori corresponds to a numerical size of 32․ This information can be particularly useful for pants and shorts, as it allows you to compare Vuori’s sizing to your typical denim size;
Remember that these are just general guidelines, and it’s always best to consult the size chart specific to the garment you’re interested in․ Vuori’s size charts are available on their website and in their retail stores․ It’s also worth noting that Vuori’s sizing tends to run true to size, so you can generally rely on the chart for a comfortable and flattering fit․ With these insights, you can confidently navigate Vuori’s sizing system and find the perfect fit for your next athleisure purchase․
Women’s Vuori Size Chart
Vuori’s women’s size chart is a valuable tool for ensuring a perfect fit for their stylish and comfortable athleisure wear․ The chart is organized by size, starting from XS and going up to XXL, covering a wide range of body types․ It provides detailed measurements for various body areas, including bust, waist, and hips, allowing you to compare your own measurements to the chart and identify the most suitable size for your figure․
For instance, if your bust measurement falls between 35-36 inches, the size chart suggests a Small (S) would be the most appropriate fit․ It also includes numerical sizes, which can help you translate your regular size to Vuori’s sizing system․ For example, a Small (S) in Vuori corresponds to a numerical size of 2-4, which might be helpful when comparing Vuori’s sizing to your usual dress size․ The chart also includes a “True Waist” column, providing measurements for your natural waistline, which can be particularly useful for bottoms․
Keep in mind that these are general guidelines, and it’s always recommended to consult the specific size chart for the garment you’re interested in․ Vuori’s size charts are readily available on their website and at their retail stores․ Additionally, Vuori’s sizing tends to run true to size, so you can generally rely on the chart for a comfortable and flattering fit․ With these insights, you can confidently navigate Vuori’s sizing system and find the perfect fit for your next athleisure purchase․
Vuori Size Chart for Tops
Vuori’s size chart for tops offers detailed information to help you find the perfect fit for their stylish and comfortable shirts, tanks, and hoodies․ The chart is organized by size, starting from XS and going up to XXL, covering a wide range of body types․ It provides measurements for essential body areas like chest, waist, and hip, allowing you to compare your own measurements to the chart and determine the most suitable size for your physique․
For instance, if your chest measurement falls between 33-35 inches, the chart suggests an XS would be the most appropriate fit for a Vuori top․ It also includes numerical sizes, which can help you translate your regular size to Vuori’s sizing system․ For example, an XS in Vuori corresponds to a numerical size of 28-30, which might be helpful when comparing Vuori’s sizing to your usual shirt size․ This numerical size representation can be especially useful when considering bottoms and other garments with a numerical size designation․
It’s crucial to remember that these are general guidelines, and it’s always recommended to consult the specific size chart for the top you’re interested in․ Vuori’s size charts are readily available on their website and at their retail stores․ They provide detailed measurements for various styles and fabrics, ensuring you can find the perfect fit for your desired top․ Remember, Vuori’s sizing tends to run true to size, so you can generally rely on the chart for a comfortable and flattering fit․
Vuori Size Chart for Bottoms
Vuori’s size chart for bottoms provides a comprehensive guide to help you find the perfect fit for their comfortable and stylish shorts, pants, and leggings․ Similar to the tops chart, it’s organized by size, starting from XS and going up to XXL․ Each size corresponds to specific measurements for key areas like waist, hips, and inseam․ This allows you to compare your own measurements to the chart and determine the most appropriate size for your body type․
For instance, if your waist measurement falls between 27-29 inches, the chart suggests an XS would be the most suitable size for Vuori bottoms․ Additionally, the chart provides a comparison to denim sizes, which can be helpful for those familiar with their usual denim size․ For example, an XS in Vuori bottoms corresponds to a denim size of 28․ This can be a useful reference point when choosing the right size for Vuori’s shorts, pants, or leggings, especially if you’re familiar with your denim sizing․
It’s important to note that the chart is a general guide, and it’s always recommended to consult the specific size chart for the bottom you’re interested in․ Vuori’s size charts are available online on their website and at their retail stores․ They provide detailed measurements for various styles and fabrics, ensuring you can find the perfect fit for your desired bottom․ Remember, Vuori’s sizing tends to run true to size, so you can generally rely on the chart for a comfortable and flattering fit․
Vuori Size Conversion Chart
For those who prefer a more visual representation of Vuori’s sizing, a Vuori size conversion chart can be a helpful tool․ These charts typically offer a clear comparison between Vuori sizes and other familiar sizing systems․ This can be particularly useful when transitioning from another brand or if you’re unsure about how Vuori sizes translate to your usual clothing size․
A typical Vuori size conversion chart might display a range of numerical sizes, such as 0-2, 4-6, 8-10, and so on, alongside the corresponding Vuori size (XS, S, M, L, XL, XXL)․ This allows you to quickly identify which Vuori size aligns with your familiar numerical size․ The chart may also include a comparison with denim sizes, providing a familiar reference point for those who know their usual denim size․ For instance, a Vuori XS might correspond to a denim size 28, while a Vuori S might align with a denim size 30․
It’s important to note that size conversion charts are a general guide and should be used in conjunction with Vuori’s specific size charts․ Different styles and fabrics may have slight variations in sizing, so it’s always best to consult the individual size chart for the garment you’re interested in․ By combining the information from a size conversion chart with the specific garment’s size chart, you can confidently choose the right Vuori size for a comfortable and flattering fit․
Vuori Size Chart for Specific Items
While general size charts provide a helpful overview, Vuori also offers detailed size charts for specific items within their collection․ This level of detail ensures a more precise fit for each garment․ When exploring a particular Vuori product, you’ll find a dedicated size chart that provides measurements for the specific style and fabric of that item․
These specific size charts typically include measurements for key body areas, such as chest, waist, hips, and inseam․ They often feature separate charts for men’s and women’s sizes, reflecting the different body shapes and proportions․ The charts may also include information about the garment’s fit, such as whether it’s designed to be a loose or fitted style․ This helps you visualize how the garment will drape on your body․
It’s recommended to consult the specific size chart for each item you’re interested in, even if you’re familiar with Vuori’s general sizing․ This ensures the best possible fit for each individual garment․ For example, a Vuori tank top may run slightly differently than a Vuori hoodie, even if they’re both categorized as “Small․” By taking advantage of Vuori’s specific size charts, you can confidently select the right size for each item, ensuring comfort, style, and a perfect fit for your body․
Tips for Choosing the Right Vuori Size
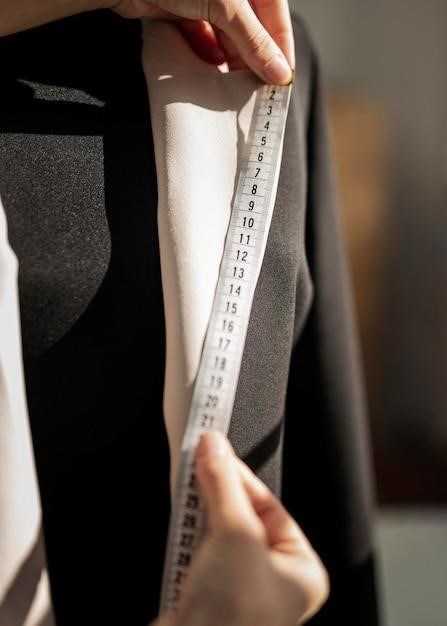
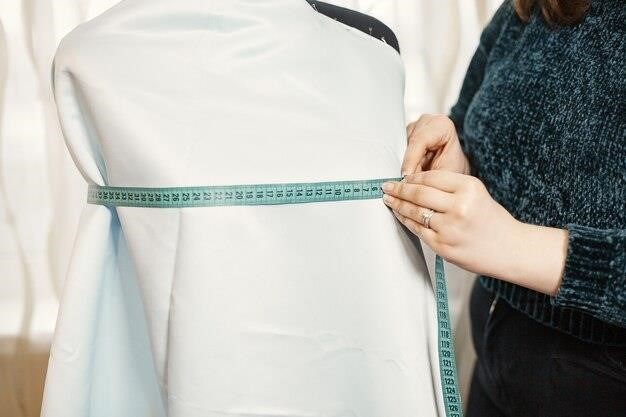
Navigating size charts can sometimes feel like a puzzle, especially when dealing with different brands and styles․ However, with a few key tips, you can confidently select the right Vuori size for your body․ First, take accurate measurements of your chest, waist, and hips․ Use a measuring tape and stand straight, ensuring the tape is level and snug but not too tight․ Record these measurements for easy reference․
Next, compare your measurements to the size chart provided by Vuori․ Pay attention to the specific garment you’re interested in, as sizes can vary slightly between styles․ If your measurements fall between two sizes, it’s generally recommended to choose the larger size for a more comfortable fit․ However, if you prefer a more fitted look, the smaller size might be more suitable․
Consider your preferred fit for the specific garment․ For example, if you’re looking for a looser-fitting tee shirt for a casual look, you might choose a size up․ However, for a performance tank top that needs to be more fitted for movement, you might want to stick to your regular size․ Remember, Vuori’s fabric is designed for comfort and movement, so you might find that a slightly looser fit allows for greater freedom of movement during workouts or everyday activities․ Ultimately, the best way to find your perfect fit is to try on different sizes and styles to see what feels best for you․
Vuori Size Chart FAQs
You’ve consulted the Vuori size chart, but you still have a few questions․ That’s perfectly normal, and we’re here to help! Here are some common questions and answers to guide you⁚
What waist size is Vuori large?
A Vuori large typically corresponds to a waist size of 32-33․5 inches (82-85 cm)․ However, it’s essential to refer to the specific size chart for the garment you’re interested in, as waist measurements can vary slightly between different styles․
How big is Vuori?
Vuori sizing is generally considered true to size, meaning that a size small in Vuori will typically fit a person who usually wears a small in other brands․ However, it’s always best to check the size chart and compare your measurements for a more accurate fit․
Am I size 6 or 8?
This question is a bit tricky, as Vuori doesn’t directly correlate their sizes to numerical sizes like 6 or 8․ However, if you typically wear a size 6 or 8 in other brands, you would likely be a small or medium in Vuori․ Again, comparing your measurements to the size chart for the specific garment will provide the most accurate answer․