Viper Floor Machine Manual: A Comprehensive Guide
Welcome! This manual provides detailed instructions for safe operation‚ maintenance‚ and troubleshooting of your Viper floor cleaning equipment.
Read carefully before use.
Viper floor machines are renowned for their durability‚ efficiency‚ and versatility in maintaining a wide range of floor surfaces. Designed for both commercial and industrial applications‚ these machines significantly reduce cleaning time and effort while delivering professional-grade results.
This manual covers various Viper floor machine models‚ encompassing both rotary and automatic scrubber-dryer types. Understanding the specific features of your model is crucial for optimal performance and longevity. Viper machines are engineered to handle diverse cleaning tasks‚ from routine floor scrubbing and polishing to deep cleaning and restoration.
Whether you’re maintaining a small retail space or a large warehouse‚ a Viper floor machine can streamline your cleaning process. This guide will equip you with the knowledge to operate‚ maintain‚ and troubleshoot your machine effectively‚ ensuring years of reliable service and sparkling clean floors. Always refer to the model-specific information within this manual.
Safety Precautions
Prioritizing safety is paramount when operating any floor cleaning equipment. Viper floor machines‚ while robust and efficient‚ require careful handling to prevent injury and ensure optimal performance. Always read and understand all safety warnings and instructions before using the machine.
Never operate the machine without proper training. Ensure all personnel are familiar with the controls‚ emergency shut-off procedures‚ and potential hazards. Wear appropriate personal protective equipment (PPE)‚ including safety glasses‚ gloves‚ and closed-toe shoes. Keep bystanders at a safe distance during operation.
Be aware of your surroundings and identify potential obstacles or slippery surfaces. Avoid operating the machine on unstable surfaces or near flammable materials. Disconnect the power supply before performing any maintenance or repairs. Failure to adhere to these safety precautions could result in serious injury or damage to the equipment.
General Safety Rules
Always inspect the machine before each use‚ checking for damaged cords‚ loose parts‚ or any unusual noises. Never modify the machine or use unauthorized attachments. Ensure the solution tank is properly secured and filled with the correct cleaning solution‚ avoiding overfilling.
Maintain a firm grip on the handle during operation and avoid pulling or jerking the machine. Be cautious when turning or maneuvering in tight spaces. Never leave the machine unattended while it is running. Report any malfunctions or safety concerns to a qualified technician immediately.
Remember to properly store the machine in a dry and secure location when not in use. Keep the area around the machine clean and free of debris. Adherence to these general safety rules will contribute to a safe and productive cleaning experience with your Viper floor machine.
Electrical Safety
Always ensure the power cord is in good condition‚ free from cuts or damage; Never operate the machine with a frayed or damaged cord. Use a properly grounded outlet that matches the voltage requirements specified on the machine’s nameplate. Avoid using extension cords whenever possible; if necessary‚ use a heavy-duty extension cord rated for the machine’s amperage.
Never immerse the machine‚ power cord‚ or plug in water or other liquids. Do not operate the machine in wet or damp environments. Before performing any maintenance or replacing parts‚ always disconnect the power cord from the outlet. Avoid pulling the cord to disconnect the machine; grasp the plug instead.
If the machine experiences an electrical malfunction‚ immediately disconnect the power and contact a qualified electrician for repair. Ignoring electrical safety precautions can result in serious injury or damage to the equipment;
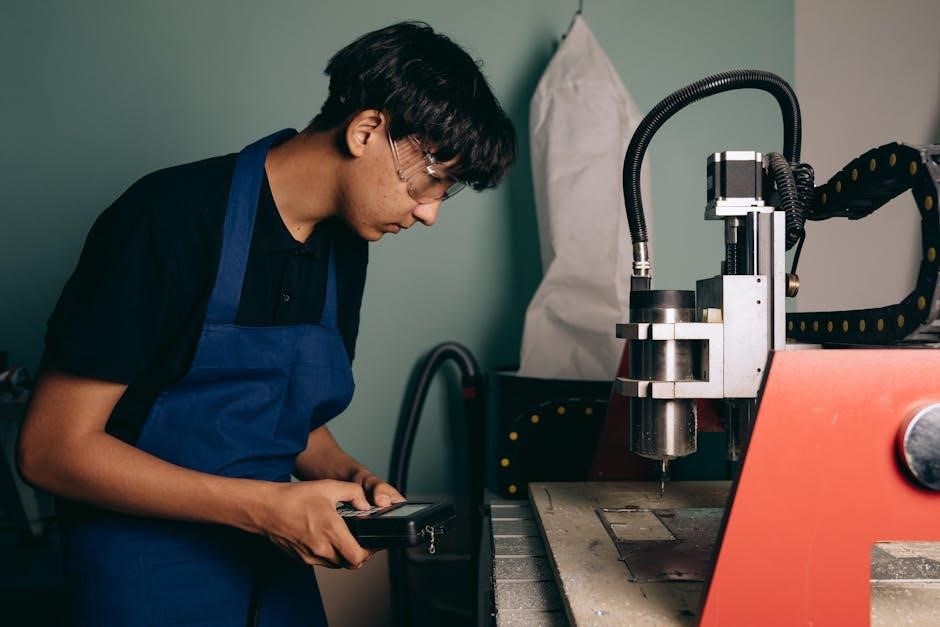
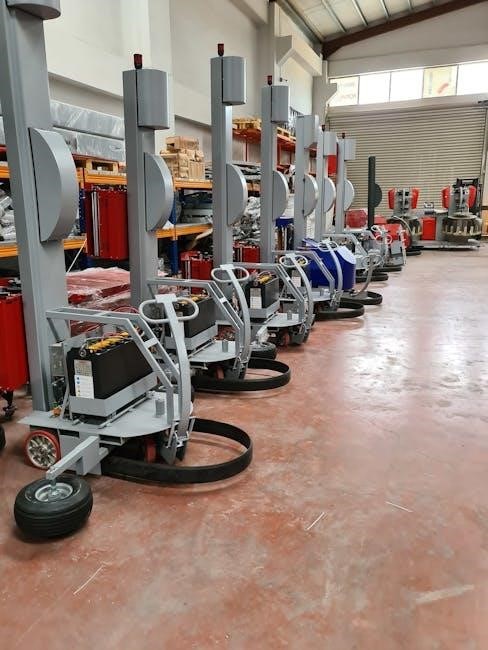
Machine Components & Identification
Familiarize yourself with the key components of your Viper floor machine for optimal operation and maintenance. The primary parts include the machine housing‚ which protects internal components‚ and the handle‚ used for steering and control. The brush/pad driver system‚ detailed further below‚ is responsible for scrubbing or polishing the floor surface.
Essential to operation is the solution tank‚ holding cleaning solution‚ and the vacuum system‚ which recovers dirty water. The recovery tank stores the collected waste. Locate the power switch‚ cord wrap‚ and any adjustable features like brush pressure or solution flow controls. Refer to the detailed diagrams in this manual for precise component locations.
Understanding each part’s function will aid in troubleshooting and performing routine maintenance. Regularly inspect all components for wear and tear‚ and replace as needed using parts specified in the replacement guide.
Brush/Pad Driver System
The brush/pad driver is central to the cleaning process‚ utilizing either a rotating brush or a pad to agitate and clean the floor surface. Viper machines accommodate various brush types – nylon‚ polypropylene‚ or natural fiber – each suited for different floor conditions and soil types. Pad holders accept absorbent pads for scrubbing‚ polishing‚ or bonnet cleaning.
Proper pad or brush selection is crucial for achieving desired results and preventing floor damage. The driver motor powers the rotation‚ and adjustable pressure settings allow customization based on floor type and soil level. Regularly inspect brushes for worn bristles and pads for fraying or damage; replace as needed to maintain cleaning effectiveness.
Ensure the driver is securely attached and that all safety features‚ such as the brush guard‚ are in place before operation. Incorrect installation or damaged components can lead to ineffective cleaning or potential hazards.

Solution Tank & Delivery System
Viper floor machines feature a robust solution tank designed to hold cleaning solution for effective floor scrubbing. The tank capacity varies by model‚ clearly indicated on the tank itself. A dedicated delivery system‚ typically involving a pump and spray nozzles‚ distributes the solution evenly onto the floor surface ahead of the brush or pad.
The flow rate of the solution is often adjustable‚ allowing operators to control the amount of liquid applied. This is vital for different floor types and soil conditions – more solution for heavily soiled areas‚ less for lighter cleaning. Regularly check the spray nozzles for clogs or obstructions to ensure consistent solution distribution.
Always use recommended cleaning solutions and follow dilution instructions carefully. Incorrect solutions can damage the machine or the floor. Inspect the tank and delivery lines for leaks before each use.
Vacuum System & Recovery Tank
The Viper floor machine’s vacuum system is crucial for removing dirty water and cleaning solution from the floor after scrubbing. A powerful vacuum motor creates suction‚ drawing the liquid through a squeegee or pickup assembly. This system prevents streaking and leaves floors quickly dry and safe to navigate.
The recovery tank collects the soiled water. Regularly emptying this tank is essential for maintaining optimal vacuum performance and preventing overflow. The tank’s fill level is often indicated by a sight tube or float switch. Ensure the recovery tank is securely latched before operation.
Inspect the vacuum hose‚ squeegee blades‚ and filters frequently for wear or damage. Replace worn components promptly to maintain effective suction and prevent debris from recirculating. A clogged filter significantly reduces vacuum power.
Assembly Instructions
Before initial use‚ some assembly of your Viper floor machine may be required. Carefully unpack all components and verify against the parts list included in this manual. Attach the handle to the machine body‚ ensuring it’s securely fastened with the provided bolts and washers – do not overtighten.
Next‚ install the brush or pad driver according to the floor type you intend to clean. Confirm it clicks firmly into place. Connect the solution tank‚ aligning the hose connections and ensuring a watertight seal. Attach the vacuum hose to both the recovery tank and the machine’s vacuum inlet.
Finally‚ inspect all connections for tightness and proper alignment. Ensure all safety guards and shields are correctly installed before proceeding. Refer to the diagrams provided for visual guidance. Improper assembly can affect performance and safety.
Operating Instructions ⎼ Basic Operation
To begin operation‚ ensure the machine is connected to a grounded power outlet with the correct voltage. Fill the solution tank with the appropriate cleaning solution (refer to the Solution Mixing section). Adjust the solution flow rate to suit the cleaning task.
Activate the brush/pad driver and vacuum system using the respective switches. Slowly move the machine forward‚ overlapping each pass slightly for complete coverage. Avoid abrupt turns or stops. Monitor the recovery tank level and empty when full to maintain suction.
For optimal results‚ maintain a consistent walking speed. Do not force the machine; let it do the work. After use‚ turn off all switches and disconnect the power cord. Properly store the machine in a dry location.
Operating Instructions ⎼ Specific Floor Types
Different floor surfaces require tailored cleaning approaches. For resilient floors like vinyl or linoleum‚ use a neutral pH cleaner and a soft brush or pad. Avoid abrasive cleaners that can dull the finish.
When cleaning carpets‚ utilize appropriate carpet cleaning solutions and a brush designed for carpet agitation. Multiple passes may be needed for heavily soiled areas. Ensure proper drying to prevent mildew.
For polished concrete‚ employ a low-speed buffer with a polishing pad and a concrete-specific cleaner. High speeds can damage the surface. Always test in an inconspicuous area first. Adjust solution flow and brush pressure based on floor condition.
Hardwood Floors
Hardwood floors demand gentle care. Always use a wood floor cleaner specifically formulated for machine scrubbing. Avoid excessive water‚ as it can warp or damage the wood.
Employ a white or tan pad with a low-speed setting to prevent scratching. High speeds and aggressive brushes are strictly prohibited. Pre-sweep or vacuum thoroughly to remove loose debris before scrubbing.
Apply a minimal amount of cleaning solution and make slow‚ overlapping passes. Immediately dry the floor with a clean‚ dry mop or towel to prevent water spots and swelling. Regularly inspect the pad for debris that could cause scratches. Never use abrasive cleaners or steel wool;
Tile & Grout Cleaning
Tile and grout require a robust cleaning approach. Utilize a neutral pH tile cleaner‚ or a specialized grout cleaning solution‚ diluted according to the manufacturer’s instructions. A stiffer brush or pad – black or red – is generally recommended for effective agitation;
For heavily soiled grout lines‚ consider a grout-specific brush attachment for concentrated cleaning. Ensure the solution tank contains the appropriate dilution to avoid residue buildup. Operate at a medium speed‚ allowing the machine to scrub the grout lines thoroughly.
Pay close attention to corners and edges‚ using the edge cleaning feature if available. After scrubbing‚ rinse the floor thoroughly with clean water to remove all traces of cleaning solution. Inspect grout for remaining discoloration and repeat if necessary.
Concrete Floor Maintenance
Concrete floors‚ often found in industrial and commercial settings‚ demand specialized care. Begin by sweeping or vacuuming to remove loose debris. For general cleaning‚ a mild alkaline detergent diluted in water works effectively. Utilize a pad appropriate for concrete – typically a white or blue pad – to avoid excessive abrasion.
For oil or grease stains‚ a degreasing agent is essential. Apply the degreaser‚ allow dwell time as directed‚ then scrub with a stiffer brush or pad. Heavy-duty concrete floors may benefit from shot blasting or diamond grinding for restoration‚ but this requires professional expertise.
Always ensure adequate ventilation when using cleaning chemicals. After scrubbing‚ thoroughly rinse the floor with clean water and allow it to dry completely. Regular maintenance prevents buildup and extends the floor’s lifespan.
Solution Mixing & Chemical Compatibility
Proper solution mixing is crucial for effective cleaning and machine longevity. Always follow the chemical manufacturer’s dilution instructions precisely. Never mix different cleaning agents‚ as hazardous reactions can occur – particularly avoid combining acids and bleach. Use cool or lukewarm water for mixing; hot water can degrade some chemicals.
Viper floor machines are compatible with a wide range of detergents‚ degreasers‚ and sanitizers. However‚ ensure the chosen chemical is designed for use in automatic scrubbers. Avoid abrasive cleaners that can damage machine components. Always pre-dissolve concentrated chemicals before adding them to the solution tank.
Regularly flush the solution tank after each use to prevent residue buildup and maintain optimal performance. Refer to the chemical’s Safety Data Sheet (SDS) for specific handling and compatibility information.
Routine Maintenance
Consistent maintenance extends the life of your Viper floor machine and ensures peak performance. Regular checks and cleaning prevent costly repairs and downtime. Daily maintenance includes rinsing the solution and recovery tanks with clean water‚ inspecting brushes/pads for wear‚ and wiping down the machine’s exterior.
Weekly maintenance requires a more thorough inspection. Check the vacuum motor and filters for clogs‚ lubricate moving parts as specified in the lubrication guide‚ and inspect the power cord for damage. Examine the brush/pad driver for proper operation and tighten any loose bolts.
Maintain a maintenance log to track completed tasks and identify potential issues early. Always disconnect the power cord before performing any maintenance procedures. Refer to the ‘Parts Replacement Guide’ for component replacement instructions.
Daily Maintenance Procedures
Following these daily steps will significantly contribute to the longevity and efficiency of your Viper floor machine. Immediately after each use‚ completely drain both the solution and recovery tanks. Rinse thoroughly with clean water to prevent buildup and corrosion. Inspect the brush or pad for excessive wear‚ damage‚ or debris accumulation; replace if necessary.
Wipe down the machine’s exterior surfaces with a damp cloth to remove dirt‚ dust‚ and cleaning solution residue. Pay particular attention to the control panel and handle. Check the vacuum squeegee for proper contact with the floor and adjust as needed to ensure effective water pickup. Visually inspect the power cord for any signs of fraying or damage.
A quick daily check prevents minor issues from escalating into major problems‚ saving you time and money. Store the machine in a clean‚ dry environment.

Weekly Maintenance Procedures
To ensure optimal performance and prevent premature wear‚ perform these procedures weekly. Thoroughly clean the solution tank and recovery tank with a mild detergent and warm water‚ rinsing completely. Inspect all hoses and connections for leaks or cracks‚ tightening clamps as needed. Check the brush/pad driver system‚ lubricating moving parts according to the lubrication chart in this manual.
Examine the vacuum motor and fan for dust accumulation; carefully remove any debris using a soft brush or vacuum attachment. Inspect the squeegee blades for wear and tear‚ replacing them if they are damaged or no longer providing effective water pickup. Clean the filters in the vacuum system to maintain strong suction.
A proactive weekly maintenance schedule will extend the life of your Viper floor machine and maintain consistent cleaning results. Document all maintenance performed.
Troubleshooting Common Issues
This section addresses frequent problems encountered with Viper floor machines. Issue: Machine won’t start. Check the power cord‚ circuit breaker‚ and ensure the safety switch is engaged. Issue: Poor suction. Inspect the vacuum hose‚ filter‚ and recovery tank for obstructions. Issue: Uneven cleaning. Verify brush/pad is correctly installed and rotating‚ and solution is dispensing properly.

Issue: Leaking solution. Examine hoses‚ connections‚ and the solution tank for cracks or loose fittings. Issue: Brush/pad not rotating. Check the drive belt for wear or breakage‚ and ensure the motor is functioning. Issue: Excessive noise. Inspect the vacuum motor and brush/pad driver for debris or damaged components.
If these steps don’t resolve the issue‚ consult the Parts Replacement Guide or contact authorized Viper service personnel. Always disconnect power before performing any troubleshooting.
Parts Replacement Guide
This guide details how to replace common Viper floor machine parts. Always disconnect the power cord before any maintenance. Brush/Pad Driver: Loosen retaining screws‚ remove old driver‚ align new driver‚ and tighten screws securely. Vacuum Hose: Detach from machine and recovery tank‚ replace with new hose‚ ensuring a tight seal. Filter: Access filter compartment‚ remove old filter‚ insert new filter‚ and close compartment.
Solution Tank: Drain any remaining solution‚ detach tank‚ install new tank‚ and reconnect solution lines. Drive Belt: Remove brush/pad cover‚ release tension on motor‚ install new belt‚ and restore tension. Wheels: Remove retaining pin‚ pull off old wheel‚ insert new wheel‚ and secure with pin.
Refer to the exploded parts diagram (available separately) for detailed illustrations. Use only genuine Viper replacement parts to ensure optimal performance and safety.
Warranty Information
Viper floor machines are warranted against defects in materials and workmanship for a period of one (1) year from the date of original purchase. This warranty covers parts and labor necessary to repair or replace defective components. The warranty is void if the machine has been subjected to misuse‚ abuse‚ negligence‚ or unauthorized modifications.
To make a warranty claim‚ contact your authorized Viper dealer or our customer service department. You will need to provide proof of purchase (invoice or receipt) and a detailed description of the defect. Shipping costs to and from the repair facility are the responsibility of the purchaser.
This warranty does not cover normal wear items such as brushes‚ pads‚ filters‚ and hoses. Viper is not liable for any consequential damages arising from the use of this machine. This warranty gives you specific legal rights‚ and you may have other rights which vary by location.