bosch dishwasher 800 manual

Bosch 800 Series Dishwasher Manual

This comprehensive manual provides detailed instructions on using and maintaining your Bosch 800 Series dishwasher. From loading the dishwasher to choosing the right cycle and utilizing the Home Connect app‚ it covers all aspects of ownership. Explore safety instructions‚ installation guidelines‚ troubleshooting tips‚ and essential information about Bosch customer support‚ spare parts‚ and accessories.

Introduction

Welcome to the world of Bosch 800 Series dishwashers‚ renowned for their quiet operation‚ innovative features‚ and exceptional cleaning performance. This user manual is your guide to unlocking the full potential of your appliance. Whether you’re a seasoned dishwasher user or a first-time owner‚ this comprehensive resource will provide you with all the information you need to operate‚ maintain‚ and troubleshoot your Bosch 800 Series dishwasher. From understanding the different cycles and settings to learning how to load the racks efficiently and utilize the Home Connect app‚ this manual will empower you to maximize your dishwasher’s performance and enjoy a hassle-free cleaning experience.

We encourage you to take the time to read through this manual thoroughly‚ as it contains valuable information regarding safety precautions‚ installation procedures‚ and best practices for using your dishwasher. By following the guidelines outlined in this manual‚ you can ensure the longevity and optimal performance of your Bosch 800 Series dishwasher.

Safety Instructions

Your safety and the well-being of others are of paramount importance. Please read and understand the following safety instructions carefully before operating your Bosch 800 Series dishwasher. Failure to follow these instructions may result in serious injury or damage to the appliance.

Always unplug the dishwasher before performing any maintenance or cleaning tasks.
Do not operate the dishwasher if the power cord or plug is damaged.
Do not immerse the power cord or plug in water.
Never allow children to play with the dishwasher or its controls.
Keep flammable materials away from the dishwasher.
Do not use harsh chemicals or abrasive cleaners on the dishwasher.
Do not overload the dishwasher racks.
Always ensure the dishwasher door is securely closed before starting a cycle.
Do not open the dishwasher door while the cycle is in progress.
Exercise caution when handling hot water from the dishwasher.
If you smell gas or notice any unusual sounds or vibrations‚ immediately stop using the dishwasher and contact Bosch Customer Support.

By adhering to these safety precautions‚ you can ensure a safe and enjoyable experience with your Bosch 800 Series dishwasher.

Installation

Proper installation is crucial for the safe and efficient operation of your Bosch 800 Series dishwasher. Follow these steps carefully to ensure a successful installation⁚

Choose a suitable location⁚ Select a level and stable area for your dishwasher‚ ensuring adequate clearance for opening the door and accessing the controls. Ensure that the location has access to a standard electrical outlet and a cold water supply.
Connect the water supply⁚ Connect the dishwasher to a cold water supply using the provided hose and fittings. Ensure a tight connection to prevent leaks. Consult the installation manual for specific instructions and recommended water pressure.
Connect the electrical supply⁚ Connect the dishwasher to a dedicated 120-volt electrical outlet. Make sure the outlet is properly grounded and meets the electrical requirements specified in the installation manual.
Level the dishwasher⁚ Use the adjustable feet to level the dishwasher to ensure proper operation and prevent vibrations.
Secure the dishwasher⁚ Secure the dishwasher to the countertop or cabinetry using the provided mounting brackets and screws. Refer to the installation manual for detailed instructions.

Once the installation is complete‚ run a test cycle with no dishes to ensure proper operation and check for any leaks.
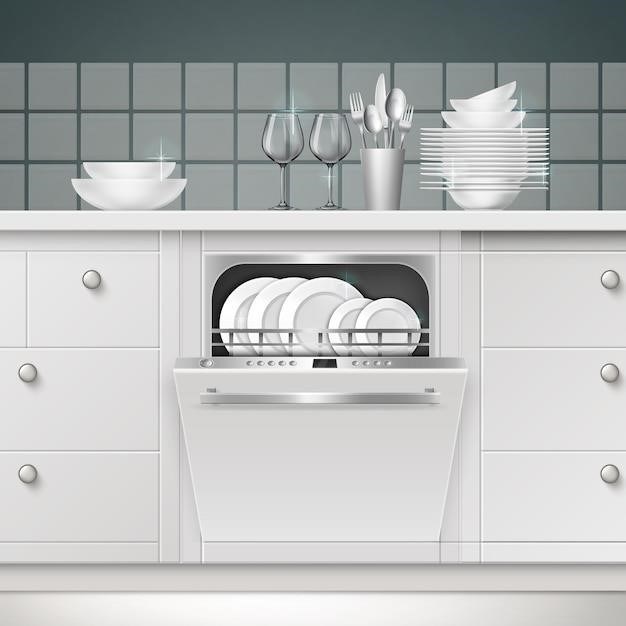
Operation

Operating your Bosch 800 Series dishwasher is straightforward and designed for convenience. Here’s a step-by-step guide to ensure proper use⁚

Pre-wash dishes⁚ Remove large food debris from dishes before loading them into the dishwasher. This will prevent clogging and ensure optimal cleaning.
Load the dishwasher⁚ Arrange dishes strategically to ensure proper water circulation and cleaning. Refer to the dishwasher’s manual for recommended loading patterns.
Select the appropriate cycle⁚ Choose a cycle that suits your dishwashing needs. The Bosch 800 Series offers various cycles like normal‚ intensive‚ quick‚ and eco. Each cycle is designed for specific dish types and soil levels.
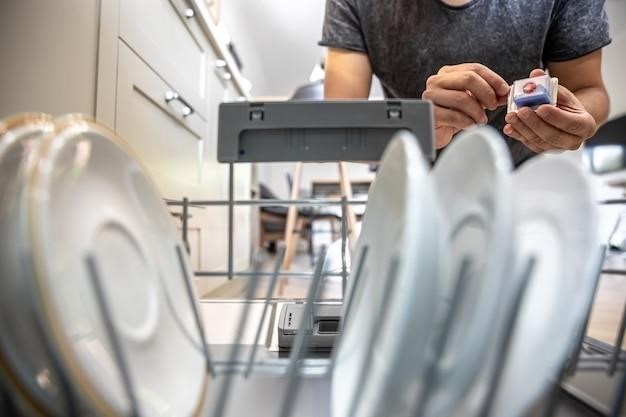
Add detergent and rinse aid⁚ Use a high-quality dishwasher detergent and rinse aid as recommended by the manufacturer. Refer to the manual for specific instructions on dispensing these products.
Start the cycle⁚ Close the dishwasher door and press the start button. The dishwasher will begin the selected cycle automatically.
Unload the dishwasher⁚ Once the cycle is complete‚ allow the dishes to air dry or use the drying option for quicker results. Unload the dishwasher and place clean dishes in their designated locations.

Always consult the user manual for detailed instructions and additional tips on operating your Bosch 800 Series dishwasher.

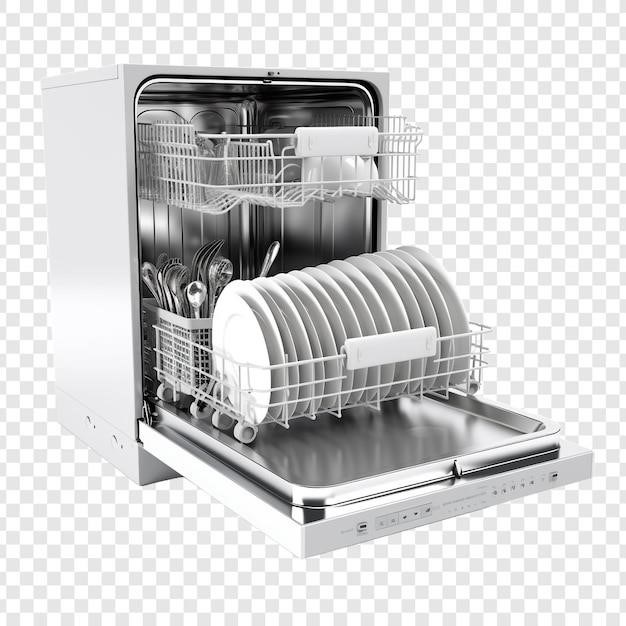
Loading the Dishwasher

Properly loading your Bosch 800 Series dishwasher is crucial for optimal cleaning results and efficient operation. Follow these guidelines for effective loading⁚

  • Lower Rack⁚ Designed for larger items like pots‚ pans‚ plates‚ and baking sheets. Arrange them strategically to ensure water flow and cleaning effectiveness.
  • Upper Rack⁚ Ideal for delicate items such as glasses‚ cups‚ and bowls. Adjust the height of the upper rack to accommodate different dish sizes.
  • Third Rack (if available)⁚ Offers additional space for cutlery and small utensils. Place them in an organized manner to facilitate thorough cleaning.
  • Angle Items⁚ Angle plates and bowls to ensure that water reaches all surfaces.
  • Avoid Overloading⁚ Do not overcrowd the dishwasher racks. Leave space between items to allow for proper water circulation.
  • Secure Items⁚ Use the dishwasher’s built-in features like tines and holders to secure items like glasses and cups.

Remember to consult your dishwasher’s user manual for specific loading instructions and recommendations for optimal performance.

Choosing the Right Cycle

Your Bosch 800 Series dishwasher offers a variety of cycles designed to cater to different cleaning needs. Selecting the appropriate cycle ensures optimal cleaning performance while minimizing water and energy consumption.

  • Auto⁚ This cycle automatically adjusts the wash time and water temperature based on the level of soiling detected.
  • Normal⁚ Suitable for everyday dishes with moderate soiling.
  • Intensive⁚ Ideal for heavily soiled pots‚ pans‚ and baked-on food. It uses a longer wash time and higher water temperature for thorough cleaning.
  • Quick⁚ Perfect for lightly soiled dishes when you need a quick wash. It uses a shorter cycle time and lower water temperature.
  • Eco⁚ Designed for energy efficiency. It uses a lower water temperature and longer wash cycle for optimal cleaning results.
  • Glass⁚ Gently cleans delicate glassware‚ minimizing the risk of breakage.
  • Sanitize⁚ Offers a high-temperature wash for eliminating bacteria and germs.

Refer to your dishwasher’s user manual for detailed descriptions of each cycle and their recommended applications. Choosing the right cycle ensures that your dishes are thoroughly cleaned while preserving energy and resources.

Using the Home Connect App

The Bosch Home Connect app enhances your dishwasher experience by providing convenient control and monitoring features. Download the app to your smartphone or tablet and connect it to your Bosch 800 Series dishwasher for a seamless experience.

  • Remote Start and Stop⁚ Initiate or pause your dishwasher cycle from anywhere with an internet connection.
  • Cycle Selection⁚ Choose the desired wash cycle and adjust settings like temperature and wash intensity directly from the app.
  • Real-Time Monitoring⁚ Track the progress of your wash cycle and receive notifications when it’s complete.
  • Program and Delay Start⁚ Schedule your dishwasher to run at a specific time or set a delay start for optimal convenience.
  • Troubleshooting Assistance⁚ Access troubleshooting tips and guides within the app to address any issues you might encounter.

The Home Connect app transforms your Bosch dishwasher into a smart appliance‚ allowing you to manage and optimize its operation with ease. Explore the app’s features to discover its full potential and enhance your daily routine.

Maintenance

Regular maintenance is essential for keeping your Bosch 800 Series dishwasher operating efficiently and extending its lifespan. Follow these simple guidelines to ensure optimal performance and prevent potential issues⁚

  • Clean the Filter⁚ Remove and clean the filter regularly to prevent food debris from accumulating and obstructing water flow. Refer to your user manual for specific instructions on filter removal and cleaning.
  • Check the Spray Arms⁚ Ensure the spray arms rotate freely and are not clogged with food particles. Remove and clean them if necessary.
  • Wipe Down the Interior⁚ After each cycle‚ wipe down the interior surfaces of the dishwasher with a damp cloth to remove any spills or residue.
  • Clean the Door Seal⁚ Wipe the door seal with a damp cloth to remove any food debris or moisture that may accumulate. This helps prevent mold and mildew growth.
  • Run a Cleaning Cycle⁚ Periodically run a cleaning cycle using a dishwasher cleaner to remove any built-up grease or mineral deposits. Consult your user manual for the recommended frequency and cleaning cycle.

By implementing these simple maintenance practices‚ you can keep your Bosch 800 Series dishwasher in top condition and enjoy its reliable performance for years to come.

Troubleshooting

While Bosch 800 Series dishwashers are designed for reliable performance‚ occasional issues may arise. Here are some common troubleshooting tips to address potential problems⁚

  • Check the Water Supply⁚ Ensure the water supply valve is fully open and there is sufficient water pressure. A low water pressure can affect the dishwasher’s operation.
  • Inspect the Drain Hose⁚ Make sure the drain hose is properly connected and not kinked or blocked. A clogged drain hose can prevent water from draining properly.
  • Clean the Filter⁚ A clogged filter can restrict water flow and affect cleaning performance. Remove and clean the filter regularly.
  • Check the Spray Arms⁚ Ensure the spray arms are rotating freely and not obstructed. Remove and clean them if necessary.
  • Reset the Dishwasher⁚ If your dishwasher is displaying an error code or malfunctioning‚ try resetting it by disconnecting it from the power source for a few minutes and then plugging it back in.

If you are unable to resolve the issue after trying these troubleshooting steps‚ contact Bosch Customer Support for further assistance. They can provide expert guidance and potentially schedule a repair if necessary;

Bosch Customer Support

Bosch is committed to providing exceptional customer support for its products‚ including the 800 Series dishwasher. If you encounter any issues or have questions about your dishwasher‚ you can reach out to Bosch Customer Support for assistance.

You can contact Bosch Customer Support through various channels⁚

  • Phone⁚ Call 1-800-944-2904 to speak with a customer service representative. They are available to address your inquiries and provide guidance on troubleshooting‚ repair‚ or other matters.
  • Website⁚ Visit the Bosch website to access a comprehensive range of support resources‚ including frequently asked questions (FAQs)‚ user manuals‚ and troubleshooting guides.
  • Online Chat⁚ Many websites offer live chat options to connect with customer service representatives in real-time.

Bosch Customer Support is dedicated to providing prompt and helpful assistance to ensure your satisfaction with your 800 Series dishwasher.

Spare Parts and Accessories

Bosch offers a wide range of spare parts and accessories for its 800 Series dishwashers‚ designed to enhance functionality‚ performance‚ and convenience. Whether you need to replace a worn-out part or add a useful accessory‚ Bosch has you covered.

Here are some common spare parts and accessories available for the 800 Series dishwasher⁚

  • Filters⁚ Regular filter replacement ensures optimal cleaning performance and prevents food debris from clogging the system.
  • Spray Arms⁚ Replace damaged or worn-out spray arms to maintain proper water distribution and cleaning efficiency.
  • Door Seals⁚ A damaged door seal can lead to leaks. Replacing it ensures a tight seal and prevents water damage.
  • Racks⁚ Bosch offers various rack configurations and accessories‚ such as cutlery baskets and adjustable shelves‚ to accommodate different dish sizes and loads.
  • Detergent Dispensers⁚ If your detergent dispenser malfunctions‚ replacing it ensures proper detergent distribution for optimal cleaning.

You can order spare parts and accessories directly from Bosch‚ authorized retailers‚ or online marketplaces. Remember to always use genuine Bosch parts to ensure compatibility and maintain the quality of your dishwasher.

The Bosch 800 Series dishwasher is a powerful and efficient appliance designed to simplify your dishwashing routine. By following the instructions outlined in this manual‚ you can ensure safe and proper operation‚ optimize cleaning performance‚ and extend the lifespan of your dishwasher.

Remember to consult the manual for specific details regarding your model‚ as features and functionalities may vary slightly. If you encounter any issues‚ refer to the troubleshooting section or contact Bosch customer support for assistance.

By understanding the features and capabilities of your Bosch 800 Series dishwasher‚ you can enjoy the benefits of a clean and convenient dishwashing experience. With proper care and maintenance‚ your dishwasher will continue to provide reliable performance for years to come.

le peep menu pdf

Le Peep Menu⁚ A Culinary Journey

Le Peep’s menu is a testament to its commitment to fresh, flavorful, and satisfying breakfast, brunch, and lunch options․ From classic favorites to innovative dishes, Le Peep offers a diverse selection that caters to various tastes and dietary needs․ Explore the wide range of breakfast beginnings, including the Hen House, The Griddle Goods, and the Pancake of the Month․ Indulge in Le Peep’s signature dishes, such as Le Omelets, Le Crepes, and Le Cafe, each crafted with meticulous attention to detail and quality ingredients․ To experience the full culinary journey, download the Le Peep menu PDF from their website, where you can discover the complete selection of dishes, prices, and nutritional information․

Introduction

Le Peep, a beloved breakfast and brunch restaurant chain, has gained a reputation for its delectable dishes and welcoming atmosphere․ Their menu, a culinary journey through breakfast classics and innovative creations, is a testament to their dedication to quality and customer satisfaction․ The Le Peep menu PDF provides a comprehensive overview of their offerings, allowing patrons to explore the diverse selection of breakfast beginnings, signature dishes, and tempting treats․ Whether you’re seeking a hearty breakfast to fuel your day or a leisurely brunch with friends and family, Le Peep’s menu is sure to satisfy your cravings․ The PDF format offers a convenient way to browse the menu at your leisure, making it easy to plan your next visit to this culinary gem․

Locations and Contact Information

Le Peep boasts a network of locations across various states, ensuring that breakfast enthusiasts can enjoy their signature dishes wherever they may be․ To find the Le Peep restaurant nearest to you, simply visit their website․ The Le Peep website features a convenient location finder that allows you to input your zip code or city and state to locate the closest restaurant․ Once you’ve found your desired location, you can easily access their contact information, including their phone number and address, directly on their website․ This information is readily available on the Le Peep menu PDF as well, making it effortless to plan your next visit and indulge in their delectable breakfast and brunch offerings․

Menu Highlights

Le Peep’s menu is a culinary adventure, packed with tempting breakfast and brunch options․ The menu PDF is your guide to this delicious journey, showcasing a variety of dishes that cater to diverse tastes․ Le Peep’s signature dishes are a must-try, including their omelets, crepes, and cafe offerings․ Each dish is prepared with meticulous attention to detail, using fresh and high-quality ingredients․ For a truly indulgent experience, consider their Pancake of the Month, a unique and seasonal creation that will satisfy your sweet tooth․ Le Peep also offers a selection of classic breakfast favorites, like the Hen House, featuring a choice of bacon, sausage, or ham, and The Griddle Goods, featuring a variety of pancakes, waffles, and French toast․ Whether you’re craving a hearty breakfast or a light and refreshing brunch, Le Peep’s menu PDF is your ultimate guide to a delightful culinary experience;

Breakfast Beginnings

Le Peep’s menu PDF is your go-to guide for a delightful start to your day․ The “Breakfast Beginnings” section is a treasure trove of classic and innovative dishes designed to satisfy your morning cravings․ From the hearty Hen House, featuring a choice of bacon, sausage, or ham, to the indulgent Griddle Goods, offering a variety of pancakes, waffles, and French toast, there’s something for every taste․ The Hen House is a perfect pick for those seeking a filling and satisfying breakfast, while the Griddle Goods are ideal for those with a sweet tooth․ Le Peep also offers a unique Pancake of the Month, a seasonal creation that adds a touch of excitement to your morning routine․ With its wide array of breakfast options, Le Peep’s menu PDF ensures that your day begins on a delicious note, leaving you feeling energized and ready to tackle anything․

The Hen House

The Hen House is a cornerstone of Le Peep’s menu, a testament to their commitment to classic breakfast fare․ This section of the menu PDF showcases a variety of hearty and satisfying options, each designed to provide a fulfilling start to your day․ The Hen House features a selection of classic breakfast favorites, including the Hen Pen, a two-egg breakfast with your choice of bacon, sausage, chicken sausage, or ham, served with an English muffin and Peasant Potatoes․ For those seeking a lighter option, the Rainbow Trout and Eggs is a delightful choice, featuring a seasoned and butterflied, pan-seared Rainbow Trout served with two eggs prepared to your liking․ Whether you prefer a traditional breakfast or a more adventurous option, The Hen House offers a range of delicious choices that cater to various tastes and dietary preferences․

The Griddle Goods

The Griddle Goods section of Le Peep’s menu PDF is a culinary haven for those who crave the comforting flavors of classic breakfast staples․ Here, you’ll find a delectable assortment of griddle-cooked delights, each crafted with care and a focus on quality ingredients․ One of the highlights is the French Toast, a decadent treat made with thick-cut bread, soaked in a rich custard, and grilled to golden perfection․ For a more savory option, the Biscuits and Gravy is a comforting classic, featuring fluffy buttermilk biscuits smothered in a creamy, flavorful gravy․ Le Peep also offers a variety of pancakes, including the signature Le Peep Pancakes, made with their secret recipe and served with a choice of toppings․ The Griddle Goods section is a testament to Le Peep’s dedication to creating dishes that are both familiar and satisfying, ensuring a delightful culinary experience with every bite․

Pancake of the Month

Le Peep’s “Pancake of the Month” is a culinary adventure that tantalizes taste buds with seasonal flavors and creative combinations․ Each month, Le Peep introduces a unique pancake creation, featuring fresh ingredients and innovative toppings․ The Pancake of the Month is a testament to Le Peep’s commitment to culinary creativity and its dedication to providing a constantly evolving dining experience; The menu PDF showcases the latest pancake masterpiece, highlighting its ingredients, presentation, and flavor profile․ This monthly feature is a delightful surprise for regular patrons and a tempting draw for new visitors, ensuring that Le Peep’s pancake offerings remain fresh and exciting․ Whether it’s a seasonal fruit compote, a decadent chocolate ganache, or a savory cheese blend, the Pancake of the Month is a must-try for any pancake enthusiast․

Le Peep Signature Dishes

Le Peep’s signature dishes are culinary masterpieces that embody the restaurant’s dedication to fresh, flavorful, and satisfying breakfast, brunch, and lunch experiences․ These signature creations, meticulously crafted with high-quality ingredients and a touch of culinary artistry, are a testament to Le Peep’s commitment to providing a unique and memorable dining experience․ The Le Peep menu PDF provides a comprehensive overview of these signature dishes, highlighting their unique flavor profiles and presentation․ From the tantalizing Le Omelets, prepared with a variety of fresh fillings and cheeses, to the delicate Le Crepes, filled with sweet or savory delights, each signature dish represents a culinary journey that tantalizes the taste buds․ Le Peep’s signature dishes are a testament to their commitment to providing a dining experience that is both satisfying and unforgettable․

Le Omelets

Le Peep’s Le Omelets are a testament to the restaurant’s commitment to crafting fresh, flavorful, and satisfying breakfast, brunch, and lunch experiences․ These omelets, meticulously prepared with a variety of fresh fillings and cheeses, are a culinary masterpiece that embodies Le Peep’s dedication to providing a unique and memorable dining experience․ The Le Peep menu PDF provides a comprehensive overview of the Le Omelets, highlighting their unique flavor profiles and presentation․ Each omelet is a culinary journey that tantalizes the taste buds, with a selection of fillings that cater to various tastes and dietary needs․ From classic combinations like the Western Omelet, featuring ham, onions, and bell peppers, to more adventurous options like the Mediterranean Omelet, featuring feta cheese, spinach, and tomatoes, Le Peep’s Le Omelets offer a delightful and satisfying way to start the day or enjoy a leisurely brunch․

Le Crepes

Le Peep’s Le Crepes are a culinary highlight, showcasing the restaurant’s commitment to fresh, flavorful, and satisfying breakfast, brunch, and lunch options․ These thin, delicate pancakes, made with a special recipe, are a delightful canvas for a variety of sweet and savory fillings․ The Le Peep menu PDF provides a comprehensive overview of the Le Crepes, highlighting their unique flavor profiles and presentation․ Each crepe is a culinary journey that tantalizes the taste buds, with a selection of fillings that cater to various tastes and dietary needs․ Indulge in classic sweet crepes like the Strawberry Shortcake Crepe, featuring fresh strawberries and whipped cream, or explore the savory options like the Spinach and Feta Crepe, a savory delight with a blend of spinach, feta cheese, and a light cream sauce․ No matter your preference, Le Peep’s Le Crepes are a delicious way to enjoy a unique and memorable dining experience․

Le Cafe

Le Peep’s Le Cafe is a testament to the restaurant’s dedication to providing a complete and satisfying dining experience․ The Le Cafe section of the Le Peep menu PDF is a coffee lover’s paradise, showcasing a range of expertly brewed coffees, espresso-based beverages, and specialty drinks․ Le Peep proudly serves Lavazza coffee, a renowned Italian brand known for its rich aroma, smooth taste, and exceptional quality․ From classic espresso to creamy lattes and refreshing iced coffees, Le Peep offers a variety of options to complement any meal or satisfy your caffeine cravings․ The menu PDF provides detailed descriptions of each coffee, allowing you to explore the nuances of flavor and choose the perfect cup to match your taste preferences․ Whether you’re looking for a morning pick-me-up, an afternoon indulgence, or a cozy evening beverage, Le Peep’s Le Cafe offers a selection that is sure to please․

Le Peep’s Commitment to Quality

Le Peep’s commitment to quality is evident throughout their menu, from the sourcing of fresh ingredients to the preparation of each dish․ The Le Peep menu PDF reflects this dedication, showcasing the restaurant’s commitment to using high-quality, locally sourced ingredients whenever possible․ This commitment is not only reflected in the menu descriptions but also in the restaurant’s overall philosophy, which emphasizes using fresh, seasonal produce and supporting local farmers․ Le Peep’s menu PDF highlights the restaurant’s dedication to providing a fresh and flavorful dining experience, with dishes prepared from scratch using the finest ingredients․ This dedication to quality extends beyond the food itself, encompassing the atmosphere, service, and overall dining experience․ Le Peep’s commitment to quality is a testament to their passion for providing a truly exceptional dining experience, one that is evident in every detail of their menu and overall operation․

Customer Reviews and Testimonials

Le Peep’s commitment to quality and customer satisfaction is evident in the numerous positive reviews and testimonials found online․ Customers rave about the restaurant’s friendly service, generous portions, and delicious food, praising the variety and quality of the menu offerings․ The Le Peep menu PDF often includes a section dedicated to customer reviews and testimonials, showcasing the restaurant’s dedication to exceeding expectations․ These reviews highlight the restaurant’s ability to consistently deliver a memorable dining experience, with customers repeatedly praising the freshness of the ingredients, the flavorful dishes, and the overall value for money․ Le Peep’s customer reviews and testimonials serve as a testament to their ability to consistently deliver a positive dining experience, solidifying their reputation as a beloved breakfast, brunch, and lunch destination․

Le Peep’s History and Legacy

Le Peep’s history is deeply rooted in Colorado, where it was born and bred in 1963․ Over the years, Le Peep has established itself as a beloved breakfast, brunch, and lunch destination, with a loyal following that appreciates its commitment to quality and consistency․ The restaurant’s legacy is built upon a foundation of fresh, flavorful food, friendly service, and a welcoming atmosphere․ The Le Peep menu PDF often features a section dedicated to the restaurant’s history and legacy, showcasing its evolution from a small, local eatery to a popular chain with multiple locations․ Le Peep’s commitment to quality and customer satisfaction has ensured its continued success, allowing it to build a strong reputation as a trusted and reliable dining experience․ The restaurant’s history and legacy are a testament to its ability to adapt to changing trends while staying true to its core values, ensuring its continued relevance and popularity among its loyal patrons․

Le Peep’s Community Involvement

Le Peep’s commitment to its communities extends beyond providing delicious food and exceptional service․ The restaurant actively participates in various local events, fundraisers, and charitable initiatives, demonstrating its dedication to making a positive impact․ Le Peep’s community involvement often includes supporting local schools, charities, and non-profit organizations․ The restaurant may also participate in community events, such as farmers’ markets, festivals, and parades, showcasing its commitment to local businesses and community engagement․ Le Peep’s community involvement is a testament to its values and its desire to contribute to the well-being of the communities it serves․ This dedication is often highlighted on their website and social media platforms, showcasing their ongoing efforts to make a difference․ By supporting local causes and participating in community events, Le Peep fosters a sense of connection and strengthens its ties with the communities it calls home․

Le Peep’s menu PDF is a comprehensive guide to their culinary offerings, showcasing the wide variety of breakfast, brunch, and lunch options available․ The menu PDF allows customers to explore the diverse selection of dishes, from classic favorites to innovative creations, ensuring there’s something for everyone․ It provides detailed information about each dish, including ingredients, prices, and nutritional facts, empowering customers to make informed choices․ The Le Peep menu PDF is more than just a list of items; it’s a testament to their commitment to quality, freshness, and customer satisfaction․ Whether you’re seeking a hearty breakfast, a leisurely brunch, or a satisfying lunch, Le Peep’s menu PDF offers a glimpse into the culinary journey that awaits․ The menu PDF is a valuable resource for both new and returning customers, allowing them to discover the diverse flavors and exceptional quality that Le Peep is known for․

cuisinart ice cream maker ice 21 manual

Cuisinart ICE-21 Ice Cream Maker⁚ A Comprehensive Guide

The Cuisinart ICE-21 ice cream maker is a popular choice for those who want to make their own frozen treats at home․ This comprehensive guide will cover everything you need to know about the ICE-21, from its features and operation to recipes, maintenance, and troubleshooting․

Introduction

The Cuisinart ICE-21 is an automatic frozen yogurt, ice cream, and sorbet maker designed to bring the joy of homemade frozen treats into your kitchen․ This compact and user-friendly appliance allows you to whip up delicious desserts in just minutes․ Whether you’re craving creamy ice cream, refreshing sorbet, or tangy frozen yogurt, the ICE-21 provides the versatility to satisfy your sweet tooth․ This manual serves as your guide to using, maintaining, and troubleshooting your Cuisinart ICE-21, ensuring you get the most out of this fantastic appliance․ From understanding its features and functions to exploring a range of recipes and tips, this comprehensive guide will empower you to create frozen treats that are both delicious and personalized․

The ICE-21’s simplicity and efficiency make it a popular choice for both beginners and experienced cooks․ Its compact size doesn’t take up much counter space, while its powerful motor efficiently churns your ingredients into a smooth and delectable frozen dessert․ Whether you’re a seasoned ice cream enthusiast or just starting your culinary adventures, this manual will equip you with the knowledge to confidently navigate the world of homemade frozen treats using the Cuisinart ICE-21․

Product Overview

The Cuisinart ICE-21 Automatic Frozen Yogurt-Ice Cream & Sorbet Maker is a compact and powerful appliance designed to simplify the process of creating homemade frozen treats․ With a bowl capacity of 1․4 liters (approximately 6 cups), the ICE-21 offers enough space to make a generous batch of ice cream, frozen yogurt, or sorbet, perfect for sharing with friends and family․ The machine features a user-friendly design with a simple on/off switch, making it easy to operate for users of all skill levels․ Its powerful motor ensures efficient churning, transforming your ingredients into a smooth and creamy frozen dessert in a matter of minutes․

The ICE-21 comes equipped with a freezer bowl that utilizes a double-insulated wall containing a cooling liquid․ This design facilitates fast and even freezing, ensuring a consistent texture throughout your frozen treat․ The double-walled construction also helps maintain a cool and consistent temperature within the bowl, contributing to the smooth and creamy consistency of your final product․ The base of the appliance houses a heavy-duty motor capable of handling a variety of ingredients and textures, from traditional ice cream to delicate sorbets and tangy frozen yogurt․

Key Features

The Cuisinart ICE-21 boasts several key features that make it a versatile and user-friendly ice cream maker⁚

  • Automatic Operation⁚ The ICE-21 is fully automatic, meaning you simply add your ingredients, press the on button, and let the machine do the work․ It churns your mixture into a frozen treat without requiring constant supervision or manual stirring․
  • Versatility⁚ The ICE-21 is capable of creating a variety of frozen desserts, including ice cream, frozen yogurt, and sorbet; This versatility allows you to experiment with different flavors and textures, expanding your culinary horizons․
  • Fast Churning⁚ The ICE-21’s powerful motor efficiently churns your ingredients into a smooth and creamy frozen dessert in a relatively short time, typically within 20 minutes․ This quick churning process ensures that your frozen treat maintains its optimal texture and flavor․
  • Easy Cleaning⁚ The ICE-21 is designed for easy cleaning․ Its removable parts, including the freezer bowl and lid, can be easily washed by hand or in the dishwasher․
  • Safety Feature⁚ The ICE-21 incorporates a safety feature that automatically stops the unit if the motor overheats․ This safety mechanism helps prevent potential damage to the appliance and ensures safe operation․

These key features make the Cuisinart ICE-21 a convenient and efficient choice for homemade frozen desserts․

Using the Cuisinart ICE-21

Operating the Cuisinart ICE-21 is a straightforward process․ Here’s a step-by-step guide to help you make delicious frozen treats⁚

  1. Prepare the Freezer Bowl⁚ Before using the ICE-21, ensure the freezer bowl is properly frozen․ Place the bowl in the freezer for at least 12 hours, or until solid․
  2. Prepare the Ingredients⁚ Refer to your chosen recipe for the specific ingredients and quantities․ Ensure the ingredients are combined thoroughly and chilled before adding them to the freezer bowl․
  3. Assemble the Ice Cream Maker⁚ Carefully remove the frozen freezer bowl from the freezer and attach it to the base of the ICE-21․ Securely attach the lid and ensure the ingredient spout is closed․
  4. Pour the Mixture⁚ Pour the chilled mixture into the freezer bowl through the ingredient spout․ Do not overfill the bowl․
  5. Turn on the Machine⁚ Press the ON switch and let the machine churn the mixture until it reaches your desired consistency․ The churning time will vary depending on the recipe and desired texture․
  6. Enjoy Your Frozen Treat⁚ Once the ice cream has thickened, you can enjoy it immediately or transfer it to a container for storage․ For a firmer consistency, freeze the ice cream for an additional period․

By following these simple steps, you can easily create a variety of homemade frozen desserts using the Cuisinart ICE-21․

Recipes and Tips

The Cuisinart ICE-21 opens a world of delicious frozen dessert possibilities․ While the manual provides a few basic recipes, the internet is a treasure trove of inspiration․ Here are some tips to ensure your homemade frozen treats are a success⁚

  • Start with a Quality Recipe⁚ Look for recipes specifically designed for ice cream makers․ These recipes typically include the right ratios of ingredients to ensure a smooth and creamy texture․
  • Chill Your Ingredients⁚ Cold ingredients are crucial for successful ice cream making․ Chill all ingredients, including the milk, cream, and even the freezer bowl, before starting․
  • Don’t Overmix⁚ Overmixing can lead to a grainy texture․ Once the mixture has reached the desired consistency, stop the machine and avoid over-churning․
  • Experiment with Flavors⁚ Feel free to personalize your ice cream by adding your favorite mix-ins․ Chocolate chips, nuts, fruits, and candy pieces are all great additions․
  • Store Properly⁚ Once your ice cream is ready, store it in an airtight container in the freezer․ It’s best to use it within a few days for optimal flavor and texture․

With a little creativity and these tips, you can create a variety of delicious and unique frozen desserts that will impress your family and friends․

Maintenance and Cleaning

Proper maintenance and cleaning are essential for extending the life of your Cuisinart ICE-21 ice cream maker and ensuring it continues to produce delicious results․ Here’s a step-by-step guide⁚

  1. Unplug the Machine⁚ Always unplug the ICE-21 from the power outlet before cleaning to prevent electrical hazards․
  2. Clean the Freezer Bowl⁚ The freezer bowl is the heart of your ice cream maker․ It’s best to clean it immediately after use to avoid hardened ice cream residue․ Wash the bowl with warm, soapy water and a soft sponge․ Avoid using abrasive cleaners or scouring pads․
  3. Wipe Down the Base⁚ Use a damp cloth to wipe down the base of the ice cream maker, removing any spills or splashes․ Ensure it’s completely dry before storing․
  4. Clean the Spout⁚ The ingredient spout can accumulate leftover ice cream․ Use a small brush to clean it thoroughly․ You can also wash it in warm, soapy water․
  5. Storage⁚ Once clean, store the freezer bowl and base separately in a cool, dry place․ Do not store the freezer bowl in the freezer, as this can affect its performance․

By following these simple cleaning and maintenance steps, you can keep your Cuisinart ICE-21 ice cream maker in top condition for many years of enjoyable frozen dessert creations․

Troubleshooting

While the Cuisinart ICE-21 is designed for user-friendliness, occasional issues might arise․ Here’s a guide to help you troubleshoot common problems⁚

  • Ice Cream Not Freezing⁚ If your ice cream isn’t freezing properly, ensure the freezer bowl has been properly frozen for at least 12 hours․ Additionally, check that the ingredients are properly mixed and at the correct temperature․ Overly thick mixtures can also hinder freezing․
  • Motor Overheating⁚ The ICE-21 has a safety feature that automatically stops the unit if the motor overheats․ This might occur if the mixture is too thick, the unit has been running for too long, or if added ingredients are too large․ Allow the unit to cool down for a few minutes before restarting․
  • Noise During Operation⁚ A slight humming noise is normal during operation․ However, if you hear unusual noises or grinding sounds, it could indicate a mechanical issue․ Check for any obstructions or foreign objects in the bowl or base, and consult the manual or contact Cuisinart customer service if the problem persists․
  • Leaking Freezer Bowl⁚ If the freezer bowl leaks, it might indicate damage or improper sealing․ Check for any cracks or damage to the bowl, and ensure the lid is securely fastened․ Contact Cuisinart customer service for assistance if the problem persists․

If you encounter any issues that you can’t resolve yourself, consult the user manual or contact Cuisinart customer service for guidance․

Warranty Information

Cuisinart stands behind the quality of its products and offers a comprehensive warranty for the ICE-21 Automatic Frozen Yogurt-Ice Cream & Sorbet Maker․ This warranty covers defects in materials and workmanship under normal home use for a period of three years from the date of original purchase․

To ensure your warranty is valid, it is essential to register your product with Cuisinart․ This can be done conveniently online at their website, www․cuisinart․com․ Registration not only helps Cuisinart keep track of their products but also allows them to contact you in case of any important product updates or recalls․

The Cuisinart warranty does not cover damages caused by misuse, neglect, accidents, or unauthorized repairs․ It also excludes defects or damages resulting from the use of unauthorized accessories or replacement parts․ For any warranty-related inquiries, you can contact Cuisinart customer service directly․ They are available to assist you with any questions or concerns regarding your ICE-21 and its warranty coverage․

Where to Buy

The Cuisinart ICE-21 is a widely available ice cream maker, making it easy to find and purchase․ You can find it at a variety of retailers both online and in physical stores․ Popular online marketplaces like Amazon and Walmart offer the ICE-21 at competitive prices and provide convenient delivery options․

If you prefer to shop in person, you can check out major appliance stores such as Best Buy, Target, and Home Depot․ These stores often have the ICE-21 in stock and provide in-store assistance if you have any questions before purchasing․

Additionally, you can find the Cuisinart ICE-21 at specialty kitchen stores, department stores, and even some grocery stores․ The availability may vary depending on your location, so it’s always a good idea to check with your local stores or browse online for the most convenient option․

The Cuisinart ICE-21 ice cream maker is a reliable and user-friendly appliance that allows you to create delicious homemade frozen treats․ Its ease of use, compact design, and versatility in making ice cream, frozen yogurt, and sorbet make it a valuable addition to any kitchen․

With a little creativity and experimentation, you can create a wide range of flavors and textures to satisfy your sweet cravings․ The ICE-21’s ability to make frozen desserts in just 20 minutes or less makes it perfect for satisfying those spontaneous cravings․

Whether you’re a seasoned ice cream enthusiast or just starting your culinary journey, the Cuisinart ICE-21 is a great option for adding a touch of homemade sweetness to your life․

homemade metal lathe plans pdf

Homemade metal lathe plans in PDF format offer a fantastic opportunity for individuals to create their own precision machine tools. These plans often provide detailed instructions‚ diagrams‚ and material lists‚ making it easier for even novice machinists to build their own lathe. Whether you’re looking to save money‚ customize a lathe to your specific needs‚ or simply enjoy the satisfaction of building something from scratch‚ homemade metal lathe plans are a valuable resource.

Introduction

The allure of creating your own metal lathe from scratch is a captivating prospect for many enthusiasts. The idea of building a precision machine tool‚ capable of turning and shaping metal with remarkable accuracy‚ is a testament to the ingenuity and resourcefulness of DIYers. This pursuit is not just about saving money; it’s about embarking on a journey of discovery‚ learning‚ and craftsmanship. Homemade metal lathe plans‚ often available in PDF format‚ serve as your guide through this exhilarating adventure.

These plans‚ meticulously crafted by experienced machinists and hobbyists‚ provide a blueprint for constructing a functional and reliable metal lathe. They offer a detailed breakdown of the components‚ dimensions‚ materials‚ and assembly steps‚ enabling you to bring your vision to life. Whether you’re a seasoned metalworker or a curious beginner‚ these plans offer a structured approach to building a valuable tool for your workshop.

The journey of building a homemade metal lathe is not without its challenges. It requires careful planning‚ precision‚ and a willingness to learn. However‚ the rewards are immense. You’ll gain a deep understanding of the mechanics of a lathe‚ develop valuable skills in metalworking‚ and have the satisfaction of creating a tool that reflects your own ingenuity.

Benefits of Building a Homemade Metal Lathe

Embarking on the journey of building a homemade metal lathe from plans offers a plethora of advantages that extend beyond mere cost savings. The process itself is an enriching experience‚ fostering a deeper understanding of machine tools and their intricate workings. This knowledge translates into greater confidence and proficiency when using your custom-built lathe‚ allowing you to tackle more complex projects with precision and assurance.

Furthermore‚ building a homemade lathe grants you the freedom to tailor it to your specific needs and preferences. You can choose the size‚ features‚ and capabilities that align perfectly with your workshop’s requirements. This customization ensures that your lathe is a perfect fit for your projects‚ maximizing its utility and efficiency.

Beyond the practical benefits‚ the sense of accomplishment that comes with building a functional metal lathe is unparalleled. The journey from blueprints to a working machine is a rewarding one‚ instilling a profound sense of pride in your creation. This accomplishment fosters a deeper appreciation for the craftsmanship and ingenuity involved in creating such a sophisticated tool.

Essential Components of a Metal Lathe

A metal lathe‚ whether homemade or commercially manufactured‚ comprises several crucial components that work in unison to achieve precise metalworking tasks. The headstock‚ the heart of the lathe‚ houses the motor and spindle‚ which rotates the workpiece. The tailstock‚ positioned at the opposite end of the bed‚ provides support for the workpiece and allows for drilling and other operations. The bed‚ a rigid foundation‚ supports the headstock‚ tailstock‚ and carriage.

The carriage‚ a movable assembly‚ holds the cutting tools and traverses along the bed‚ enabling precise longitudinal and cross-feeding. The cross-slide‚ a part of the carriage‚ allows for transverse movement of the cutting tool‚ enabling operations such as facing and turning diameters. The compound slide‚ also part of the carriage‚ provides additional angular adjustment of the cutting tool‚ facilitating operations like taper turning and threading.

Finally‚ the chuck‚ a device that securely holds the workpiece‚ is essential for rotating the material during machining. These components‚ working in harmony‚ enable the metal lathe to perform a wide range of operations‚ from simple turning to complex threading and shaping.

Materials and Tools Needed

Building a homemade metal lathe requires a combination of materials and tools‚ some of which you may already have in your workshop. The primary materials typically include steel for the bed‚ headstock‚ tailstock‚ and carriage‚ along with aluminum or cast iron for specific components. You may also need various fasteners‚ such as bolts‚ nuts‚ and screws‚ as well as bearings for smooth rotation.

Essential tools for this project include a welding machine for joining metal components‚ a grinder for shaping and finishing‚ a drill press for creating holes‚ and a cutting torch for preparing metal pieces. Hand tools‚ such as hammers‚ wrenches‚ and screwdrivers‚ are also indispensable. While some plans may call for specialized equipment like a milling machine or lathe for specific tasks‚ many designs can be built using basic workshop tools.

Remember to prioritize safety by wearing appropriate protective gear‚ such as gloves‚ eye protection‚ and a respirator‚ when working with metal and power tools. Carefully read and follow the instructions provided in your chosen plans to ensure a safe and successful build.

Step-by-Step Guide to Building a Metal Lathe

A detailed step-by-step guide is essential for building a homemade metal lathe. These guides‚ often found in PDF format‚ provide clear instructions and diagrams to guide you through the construction process. They typically begin with preparing the materials‚ such as cutting and shaping the steel for the bed‚ headstock‚ tailstock‚ and carriage. Next‚ you’ll assemble the bed‚ ensuring it’s level and rigid‚ and then build the headstock‚ which houses the spindle and motor. The tailstock‚ used to support the workpiece‚ is assembled next‚ and the carriage‚ responsible for moving the cutting tool‚ is attached to the bed.

The guide will also detail the assembly of the cross-slide‚ which moves the cutting tool perpendicular to the workpiece‚ and the compound slide‚ which enables precise adjustments. Once all components are assembled‚ you’ll need to align the headstock and tailstock and install the motor. Finally‚ you’ll test the lathe by running it through its motions and ensuring everything is functioning correctly. It’s important to note that the specific steps involved may vary depending on the design and complexity of the lathe you’re building.

Remember to take your time‚ carefully follow the instructions‚ and don’t hesitate to seek help or clarification if needed. Building a metal lathe is a rewarding project that requires patience and attention to detail. With careful planning and execution‚ you can create a precision machine tool that will serve you well for years to come.

Safety Precautions

Safety should always be paramount when working with metalworking equipment‚ especially when building your own metal lathe. Here are some essential safety precautions to keep in mind⁚

  • Wear appropriate safety gear⁚ Always wear safety glasses‚ a dust mask‚ and hearing protection when working with a metal lathe. Consider wearing gloves for added protection.
  • Use a well-ventilated workspace⁚ Ensure your workspace is well-ventilated to prevent the build-up of dust and fumes.
  • Secure the workpiece⁚ Always securely fasten the workpiece to the lathe to prevent it from spinning out of control.
  • Avoid loose clothing or jewelry⁚ Loose clothing or jewelry can become caught in the lathe’s moving parts.
  • Keep your hands away from the rotating parts⁚ Never reach for the workpiece or tools while the lathe is running.
  • Use sharp‚ properly maintained cutting tools⁚ Dull or damaged tools can lead to accidents.
  • Be aware of the direction of rotation⁚ Understand how the workpiece will rotate to avoid accidents.
  • Take breaks⁚ Working with machinery for extended periods can lead to fatigue and accidents. Take breaks to rest your eyes and mind.
  • Never operate the lathe under the influence of alcohol or drugs⁚ Always be alert and focused when working with machinery.
  • Follow the instructions provided in your homemade metal lathe plans⁚ The plans will outline specific safety procedures and precautions for your particular design.

Common Mistakes to Avoid

Building a metal lathe from scratch requires meticulous attention to detail and careful planning. Here are some common mistakes to avoid⁚

  • Skipping safety precautions⁚ Never underestimate the importance of safety when working with machinery. Always wear appropriate safety gear and follow the instructions in your plans.
  • Using inadequate materials⁚ The materials used for the lathe’s bed‚ headstock‚ and tailstock must be strong and rigid to withstand the forces involved in turning metal. Use quality materials and avoid compromising on their strength.
  • Poor alignment⁚ The lathe’s bed‚ headstock‚ and tailstock must be perfectly aligned for accurate machining. Pay close attention to alignment during the construction process and use precision measuring tools to ensure accuracy.
  • Inadequate lubrication⁚ Proper lubrication is crucial to prevent wear and tear on the lathe’s moving parts. Use the appropriate lubricants for each component and apply them regularly.
  • Overworking the lathe⁚ Avoid pushing the lathe beyond its capacity. Choose the appropriate cutting tools and speeds for the material you are working with to prevent damage to the lathe or your workpieces.
  • Neglecting maintenance⁚ Regularly inspect and maintain your lathe to ensure it is in good working order. Clean‚ lubricate‚ and tighten components as needed.
  • Rushing the process⁚ Building a metal lathe takes time and patience. Don’t rush the process and be sure to double-check your work at each stage.

Resources and Online Communities

The world of metalworking is filled with passionate individuals eager to share their knowledge and expertise. Fortunately‚ there are numerous resources and online communities dedicated to helping you build your homemade metal lathe⁚

  • Online Forums⁚ Forums like “HomemadeTools.net” and “HomeShopMachinist.com” are great places to connect with other hobbyists‚ share your projects‚ ask questions‚ and find helpful advice. You can also find discussions about specific metal lathe designs and building techniques;
  • YouTube Channels⁚ Search for “DIY metal lathe” on YouTube to find numerous videos showcasing building processes‚ tips‚ and tricks from experienced makers. You can also find tutorials for specific lathe designs and components.
  • Blogs and Websites⁚ Many websites and blogs dedicated to metalworking‚ woodworking‚ and DIY projects offer valuable insights into building metal lathes. Look for websites that provide free plans‚ tutorials‚ and articles on lathe construction.
  • Local Maker Spaces⁚ Contact your local maker spaces or community workshops. They may offer classes‚ resources‚ and access to tools that can help you with your project. You may also find fellow makers who can provide guidance and support.
  • Metalworking Books and Magazines⁚ Explore books and magazines dedicated to metalworking for detailed information on lathe design‚ construction‚ and operation. You can find valuable tips‚ tricks‚ and advanced techniques from experienced machinists.

Building a homemade metal lathe can be a rewarding and fulfilling project. It allows you to create a tool that meets your specific needs and gives you a deep understanding of its mechanics. By following detailed plans and engaging with the vibrant online communities‚ you can overcome any challenges and achieve a successful outcome. Remember‚ patience‚ persistence‚ and attention to detail are key to crafting a functional and accurate metal lathe. Enjoy the journey of learning‚ experimenting‚ and realizing your vision for a custom-built precision machine tool.

Where to Find Homemade Metal Lathe Plans PDF

The internet is a treasure trove of resources for those seeking homemade metal lathe plans. Websites dedicated to DIY projects‚ maker communities‚ and even online forums are excellent starting points. Popular Mechanics‚ for instance‚ offers free downloadable plans for a small metal-turning lathe. Websites like Make⁚ Magazine showcase various projects‚ including metal lathe designs. Many individuals share their own plans and experiences through online forums‚ providing invaluable insights and support to aspiring lathe builders. Don’t hesitate to explore these online resources to discover the perfect plan for your homemade metal lathe project.

miro humidifier manual

Miro Humidifier Manual⁚ A Comprehensive Guide

This manual provides a comprehensive guide to using and maintaining your Miro humidifier. From understanding its features and benefits to troubleshooting common issues, this guide will help you get the most out of your humidifier and ensure its longevity. Whether you’re a first-time user or a seasoned owner, this manual is your go-to resource for all things Miro humidifier.

Introduction

Welcome to the world of Miro humidifiers, where innovative design meets exceptional functionality. This manual is your comprehensive guide to understanding and utilizing your Miro humidifier, a revolutionary device designed to enhance your home’s air quality and provide a comfortable, healthy environment. Whether you’re seeking to combat dry air, alleviate allergy symptoms, or simply create a more soothing atmosphere, your Miro humidifier is your trusted companion.

Miro humidifiers are renowned for their user-friendly design, making them easy to assemble, operate, and maintain. Their modular construction allows for thorough cleaning, ensuring a hygienic misting experience. With a commitment to quality and performance, Miro humidifiers are designed to meet the needs of diverse users and environments, from small bedrooms to spacious living areas.

This manual delves into every aspect of your Miro humidifier, guiding you through its features, operation, and maintenance. From setting up your humidifier for the first time to troubleshooting common issues, we’ve covered it all. We encourage you to read through this manual carefully to maximize your understanding and enjoyment of your Miro humidifier.

Understanding Your Miro Humidifier

At the heart of your Miro humidifier lies a revolutionary floating design, a testament to the brand’s commitment to both functionality and ease of use. This unique design principle ensures that all essential components, including the ultrasonic mist-maker and fan, are completely waterproof and washable. This makes cleaning and maintenance a breeze, as you can easily disassemble and wash the humidifier in hot soapy water, ensuring a hygienic misting experience.

The mist-maker itself floats within a spacious water bowl, creating a mesmerizing visual effect while effectively dispersing a fine, cool mist. Connected to an external control knob, the mist-maker allows you to adjust the intensity of the humidification, tailoring it to your specific needs and environment. Whether you prefer a gentle mist for a subtle touch of moisture or a powerful stream for rapid humidification, your Miro humidifier offers complete control.

Miro humidifiers come equipped with an array of accessories, designed to cater to diverse user preferences and needs. These accessories may include a noise muffler for silent operation, a timer for personalized humidification schedules, and additional filters to enhance air purification. This versatility ensures that your Miro humidifier seamlessly integrates into your lifestyle, offering a personalized and comfortable experience;

Model Variations

Miro offers a range of humidifier models to suit different needs and preferences. Some of the popular models include the NR07 Series, the NR08 Series, the NR MAX, and the MH7000. Each model boasts its own unique features and specifications, catering to specific humidification requirements and room sizes.

The NR07 Series, encompassing the NR07SR, NR07BR, and NR07GR models, is known for its compact size and sleek design, making it ideal for smaller spaces like bedrooms or offices. The NR08 Series, featuring the NR08M Black and NR08M Cream White models, is designed for larger rooms and offers enhanced humidification capacity; The NR MAX model is a high-performance option, providing powerful humidification for large spaces and boasting a user-friendly design.

The MH7000 model stands out for its sanitary design, easily disassembled for thorough cleaning. Its spacious 4.8L bowl ensures ample water capacity, allowing for extended periods of humidification without the need for frequent refills. Miro’s commitment to innovation is evident in the diverse range of models, ensuring that there is a perfect fit for every home and lifestyle.

Key Features and Benefits

Miro humidifiers are renowned for their innovative design, user-friendly features, and impressive performance. At the heart of their appeal lies the revolutionary floating design, a hallmark of Miro’s commitment to ease of use and maintenance. The ultrasonic mist-maker, a key component of the humidification process, is housed within a floating unit, allowing for effortless removal and cleaning. This modular design ensures that every part of the humidifier, including the mist-maker and fan, can be thoroughly washed in hot soapy water, eliminating the need for specialized cleaning tools or complex procedures; This simple yet effective design makes Miro humidifiers a breeze to maintain, ensuring optimal performance and hygiene.

Beyond their ease of cleaning, Miro humidifiers offer a range of features that enhance user experience. The NR07G model, for instance, boasts customizable settings, allowing users to adjust the intensity of the mist output to suit their specific needs. This feature ensures that the level of humidity in the air can be precisely controlled, creating a comfortable and healthy environment. Miro humidifiers are also designed to be whisper-quiet, minimizing disruption to sleep or daily activities. This quiet operation makes them ideal for bedrooms, offices, or any space where serenity is paramount. The combination of ease of use, efficient operation, and user-friendly features makes Miro humidifiers a popular choice for those seeking a comfortable and healthy indoor environment.

Setting Up Your Miro Humidifier

Setting up your Miro humidifier is a straightforward process that can be completed in a few simple steps. First, carefully unpack the humidifier and its accessories. Ensure that all components, including the base, the water tank, the mist-maker, the control knob, and any additional accessories, are present. Next, locate a flat and stable surface to place the humidifier. Avoid placing it near heat sources, such as radiators or fireplaces, as this can affect its performance and potentially lead to damage. Once you’ve chosen a suitable location, connect the power cord to the humidifier and plug it into a standard electrical outlet. To fill the water tank, remove the lid and gently pour in the desired amount of water. Avoid overfilling the tank, as this can cause spills or malfunctions.

With the water tank filled, carefully insert the mist-maker into the base. Ensure that it is properly seated and aligned. Then, attach the control knob to the mist-maker, allowing you to adjust the intensity of the mist output. Finally, turn on the humidifier using the power button located on the base or the control knob. You can now customize the settings to your liking, such as adjusting the mist intensity and selecting any additional features, such as a timer or a night light, depending on your model. Now that your Miro humidifier is set up and ready to go, you can enjoy its benefits, creating a more comfortable and healthy indoor environment.

Using Your Miro Humidifier

Using your Miro humidifier is as simple as it gets. Once set up, you can begin enjoying its benefits right away. The humidifier features a user-friendly design that makes it easy to operate. The control knob allows you to adjust the mist intensity to your preference, providing a range of options for different needs and environments. The humidifier also features a timer function, allowing you to set it to automatically turn off after a specific duration, conserving energy and ensuring optimal performance.

For optimal performance, it is recommended to use distilled water in your Miro humidifier. Distilled water is free of minerals and impurities that can build up inside the humidifier, affecting its performance and potentially leading to damage. Additionally, regular cleaning and maintenance are crucial to ensure the longevity of your humidifier and maintain its effectiveness.

The Miro humidifier is designed to run quietly, creating a comfortable and relaxing environment without disturbing your sleep or work. Its whisper-quiet operation makes it ideal for use in bedrooms, living rooms, offices, and other areas where noise levels need to be kept low. Enjoy the benefits of a well-humidified environment, promoting better sleep, reducing dryness, and creating a more comfortable atmosphere.

Cleaning and Maintenance

Maintaining your Miro humidifier is essential for its optimal performance and longevity. Regular cleaning prevents mineral buildup, ensures efficient operation, and promotes a healthy environment. To clean your humidifier, start by unplugging it from the power outlet.

Empty the water tank and rinse it thoroughly with clean water. You can use a mild detergent if needed, but ensure it’s rinsed completely. The water floater, atomizer, and base should also be cleaned regularly with a soft cloth or brush.

For deeper cleaning, you can use a solution of distilled white vinegar and water. Fill the water tank half full with distilled water and add 1 teaspoon of undiluted distilled white vinegar. Attach the tank cap and shake the tank for 15 seconds. Place the tank onto the base. The vinegar solution will enter the water reservoir to loosen mineral buildup on the atomizer, water floater, and the bottom of the water tank.

After cleaning, rinse all parts thoroughly with clean water and allow them to air dry completely before reassembling the humidifier. It’s recommended to clean your Miro humidifier every 1-2 weeks to prevent mineral buildup and maintain its optimal performance.

Troubleshooting Common Issues

While Miro humidifiers are designed for reliability, you may encounter occasional issues. This section addresses common problems and their solutions.

If your humidifier is not producing mist, check the water level in the tank. Ensure it’s filled to the recommended level. Inspect the atomizer for mineral buildup, which can hinder mist production. Clean the atomizer using the vinegar solution described in the Cleaning and Maintenance section.

If the humidifier is making unusual noises, check if the water floater is properly positioned. If it’s stuck, gently dislodge it. Also, ensure the water tank is securely attached to the base. If the noise persists, inspect the fan for any obstructions.

If the humidifier is leaking, ensure the water tank is securely attached to the base and that the sealing ring is in place. Inspect the water tank for cracks or damage. If you find any, replace the tank.

If the humidifier is not turning on, check if it’s plugged into a working power outlet. Ensure the power switch is in the “on” position. If the humidifier still doesn’t turn on, consult the warranty information for further assistance.

Warranty Information

Miro humidifiers are backed by a comprehensive warranty that protects you against defects in materials and workmanship. This warranty ensures that your humidifier performs as expected and provides peace of mind during your ownership. Here’s what you need to know about your Miro humidifier warranty⁚

The warranty period typically covers 12 months from the date of the original purchase. This warranty covers defects in materials and workmanship, ensuring that your humidifier functions properly;

To activate your warranty, you need to register your humidifier on the Miro website. This registration process ensures that your purchase is recorded and provides you with access to warranty support.

In the event of a defect, you should contact Miro customer service for assistance. They will guide you through the warranty process and help resolve the issue.

It’s important to retain your original purchase receipt as proof of purchase when making a warranty claim. Keep this manual handy as it provides details about the warranty terms and conditions.

Safety Precautions

Your safety is our top priority. Please read and understand these safety precautions before using your Miro humidifier. Following these guidelines will ensure a safe and enjoyable experience.

General Safety⁚

  • Keep the humidifier away from heat sources, direct sunlight, and flammable materials.
  • Never leave the humidifier unattended while it’s operating.
  • Always unplug the humidifier before cleaning or performing maintenance.
  • Do not use the humidifier if the power cord or plug is damaged.
  • Do not use the humidifier outdoors or in humid environments.

Water Safety⁚

  • Always use clean, fresh water in the humidifier tank.
  • Do not add essential oils or other substances to the water without consulting the manufacturer’s instructions.
  • Never fill the tank beyond the maximum fill line.
  • Empty and dry the tank regularly to prevent mold and bacteria growth.

Child and Pet Safety⁚

  • Keep the humidifier out of reach of children and pets.
  • Never allow children to play with the humidifier.
  • Always supervise children when the humidifier is in use.

By following these safety precautions, you can ensure a safe and enjoyable experience with your Miro humidifier.

Your Miro humidifier is a valuable investment in your health and well-being. By following the instructions in this manual, you can ensure that your humidifier operates efficiently and safely, providing you with optimal humidity levels for years to come. Remember that regular cleaning and maintenance are crucial for prolonging the life of your humidifier and preventing any potential issues.

In addition to this manual, Miro offers a wealth of resources online, including frequently asked questions, troubleshooting guides, and product videos. These resources can provide further assistance if you have any questions or concerns.

We hope this manual has been helpful in understanding and using your Miro humidifier. If you have any further questions, please do not hesitate to contact our customer support team. We are here to help you enjoy the benefits of a healthy and comfortable living environment.

fortinac ordering guide

This ordering guide is a quick reference to the most commonly selected support services for enterprise customers⁚ Premium⁚ dedicated 24x7x365 support for each product and service. Elite⁚ premium plus higher SLA and extended end of engineering support (E-EoES). Includes automated monitoring under the FortiCare Elite Monitoring Portal.

Introduction

This document provides a comprehensive guide to ordering FortiNAC, Fortinet’s network access control solution. FortiNAC enhances the Fortinet Security Fabric by providing visibility, control, and automated response for all devices connecting to the network. This guide will walk you through the key stages of FortiNAC deployment, from defining network environment size to configuring remediation and enforcement policies.

FortiNAC Overview

FortiNAC is Fortinet’s network access control solution that enhances the Security Fabric with visibility, control, and automated response for all devices connecting to the network. It provides protection against IoT threats, extends control to third-party devices, and orchestrates automatic responses to a wide range of networking events. FortiNAC allows you to implement microsegmentation policies and change configurations on switches and wireless products from 95 vendors.

Ordering Guide

Ordering Guides for Fortinet Products and Solutions. Products. Delivering unprecedented performance and unrivaled security. Secure Access for the hybrid workforce with superior user experience. Proactive threat disruption across the entire attack lifecycle. Seamlessly enable security for converged IT/OT ecosystems.

Support Services

This ordering guide is a quick reference to the most commonly selected support services for enterprise customers⁚ Premium⁚ dedicated 24x7x365 support for each product and service. Elite⁚ premium plus higher SLA and extended end of engineering support (E-EoES). Includes automated monitoring under the FortiCare Elite Monitoring Portal.

FortiNAC Deployment Stages

FortiNAC deployment can be seen as a configuration in 6 stages⁚ Define network environment size and choose the correct licensing; Define network requirements/Configuration Wizard; Establish Visibility; Define Registration Methods; Define Remediation and Enforcement; Monitoring and Reporting.

Stage 1⁚ Define Network Environment Size and License Type

FortiNAC supports 2 license types⁚ PLUS, and PRO. The customer should be aware of which features are desired and understand which license level supports them. Page 10 of the FortiNAC datasheet will provide the necessary information.

License Types

FortiNAC supports 2 license types⁚ PLUS, and PRO. The customer should be aware of which features are desired and understand which license level supports them. Page 10 of the FortiNAC datasheet will provide the necessary information.

License Verification

In FortiNAC running CentOS, it is possible to check the license level from the CLI⁚ show license . In FortiNAC-F, the license level and license status can be checked with⁚ show system license. It is also important for administrators to understand how Endpoint Licenses are consumed because if licenses run out, new Hosts (rogues) connecting to the network will not be able to register and gain access.

Endpoint License Consumption

FortiNAC supports 2 license types⁚ PLUS, and PRO. The customer should be aware of which features are desired and understand which license level supports them. Page 10 of the FortiNAC datasheet will provide the necessary information. It is also important for administrators to understand how Endpoint Licenses are consumed because if licenses run out, new Hosts (rogues) connecting to the network will not be able to register and gain access.

Network Environment Size

FortiNAC defines the size of the environment based on the total switch port count, not the total number of devices.  Ports in the network total number of switch ports maximum number of concurrent wireless connections. Depending on the network environment size, the customer should increase VM resources (CPU, Memory, Storage) based on the number of ports in the network. Failing to respect the necessary sizing will result in FortiNAC having performance issues, such as being slow to enforce control (changing VLAN), having slow GUI operation, or not being able to access the GUI at all.

VM Server Resource Sizing

The VM Server Resource Sizing section on Page 14 of the FortiNAC data sheet provides the necessary information. In FortiNAC running CentOS , it is possible to collect sizing information from the CLI⁚ Technical Tip⁚ Performance issue and some general recommendations provide further details and recommendations related to performance. Stage 2. Define Network requirements/Configuration Wizard.

Stage 2⁚ Define Network Requirements/Configuration Wizard

At this point, access the configuration wizard to apply the full configuration , including the network type and isolation subnets. Any further changes in terms of routing or system configuration are all performed through the Configuration Wizard. Do not make routing or Interface IP address changes through CLI or shell. Everything is done automatically by reapplying the Configuration Wizard each time a change is required.

Configuration Wizard

The Configuration Wizard will allow you to apply the full configuration of the FortiNAC appliance, including the network type and isolation subnets. It is the primary tool for configuring FortiNAC. Any further changes in terms of routing or system configuration should be made through the Configuration Wizard. Do not make routing or Interface IP address changes through CLI or shell. Everything is done automatically by reapplying the Configuration Wizard each time a change is required.

Isolation Network

As isolation network DHCP scopes are configured, static routes are automatically created for those networks, specifying the gateway for the corresponding port2 interface or sub-interface. It is recommended to use an L3 Network -> Layer 3 network⁚ Routed Network with multiple scopes for each isolation network. This way, it will be possible to scale and add Branch office networks when the network expands. FortiNAC is not an Inline solution but can sit on the edge and manage all sites.

Network Configuration Example

The L3 Isolation Network is a shared state that includes all other separate states (registration, remediation …). So for a simple deployment, only an isolation network will be required with defined scopes, which FortiNAC can provide with DHCP, DNS, and captive services, depending on the host state. This is known as state-based control. See the diagram on page 73 of the deployment guide for an example of the necessary configuration.

Stage 3⁚ Establish Visibility

The Visibility stage is when FortiNAC collects information for all endpoints in the network such as connected Switch ports, SSID, AP, VLAN, etc. To establish visibility, the customer should initially perform the following⁚ Adding Network Devices, Endpoint Learning Methods, FortiGate Integration, Polling Network Devices, Directory Integration.

Adding Network Devices

To add network devices, the customer needs to have an SNMP account with R/W privileges and CLI credentials. FortiNAC uses SNMP, CLI, and a REST API (in some supported models) to model devices and read information from them to learn connected endpoints. Example with FortiGate integration⁚ Right-click the container and select Add Device.

Endpoint Learning Methods

FortiNAC can learn endpoints in the following ways⁚ Link up/link down traps sent by the switch. Configuring link up/link down in scenarios with FortiGate-FortiSwitch (FortiLink Mode) requires that the link traps appear to be sourced from the managing FortiGate, not the FortiSwitch directly. This is accomplished by enabling NAT in the applicable firewall policy on the FortiGate. See pages 25-27 of the FortiSwitch integration guide for details.

FortiGate Integration

FortiGate-FortiNAC integrations provide the ability to improve and optimize polling by using a REST API. The API key allows FortiNAC to bypass the need to authenticate every time it connects, improving performance. For this, it is necessary to create a REST API admin in FortiGate and then include the API key in the respective model configuration in FortiNAC.

Polling Network Devices

Manual/scheduled polling can be checked for the respective network device under Network -> Inventory -> Select device -> Polling; FortiGate-FortiNAC integrations provide the ability to improve and optimize polling by using a REST API. The API key allows FortiNAC to bypass the need to authenticate every time it connects, improving performance. For this, it is necessary to create a REST API admin in FortiGate and then include the API key in the respective model configuration in FortiNAC.

Directory Integration

Integration with the directory can be used to authenticate remote users. See the following documents for the steps⁚ FortiManager 6.4.4 Administrator Guide Active Directory Integration LDAP Integration RADIUS Integration TACACS Integration

Stage 4⁚ Define Registration Methods

Once a host is learned from FortiNAC, it will be marked with the Rogue(?) host state. This means that FortiNAC has not yet categorized or profiled this device as a known device type and will keep it in the isolation subnet/registration VLAN. This way, FortiNAC will not allow access without first acknowledging what kind of device it is dealing with. There are multiple methods to register devices depending on the scenario and customer requirements.

Registration Methods

The most commonly used methods are provided below⁚ This method is beneficial in OT environments and for registering IoT headless devices that have no user associated with them. FortiNAC will then use the MAC address as the primary identifier for this device. During the registration process, the user will need to specify the device type and its associated policy.

Device Registration via DHCP

The DHCP option 43 can be used to register endpoints. When a device requests an IP address via DHCP, FortiNAC can leverage option 43 to send a registration request. The host will then be registered and moved from the Rogue state into the defined state. The user will need to configure option 43 in the DHCP server and define the appropriate state in FortiNAC.

Device Registration via MAC Address

This method is commonly used when registering devices with a known MAC address. The user will need to define the MAC address in FortiNAC, and the corresponding state to which it will be moved. When a device with a matching MAC address connects to the network, FortiNAC will identify it and move it from the Rogue state into the defined state.

Device Registration via Certificate

This method is primarily used when registering devices with a digital certificate. FortiNAC will verify the certificate presented by the device and move it to the appropriate state based on the certificate’s validity. It is a secure method as it relies on digital signatures and certificates issued by a trusted Certificate Authority.

Device Registration via User Authentication

This method requires users to authenticate themselves before gaining access to the network. FortiNAC will authenticate the user credentials against a configured directory service. If the authentication is successful, the device will be moved to its assigned state, enabling network access. This method is particularly useful for BYOD scenarios and in environments where strong user authentication is required.

Device Registration via FortiToken

FortiToken is a two-factor authentication method that utilizes a physical token to verify user identity. In this registration method, users are required to enter a unique code generated by the FortiToken device, along with their username and password. This additional layer of security ensures that only authorized users can access the network, enhancing overall security posture.

Stage 5⁚ Define Remediation and Enforcement

FortiNAC provides a comprehensive set of remediation and enforcement methods to address security risks and vulnerabilities. These methods include policy-based actions like VLAN changes, firewall rules, and access control lists. FortiNAC also enables quarantine zones for isolating compromised devices, preventing further network spread of threats. By implementing these strategies, administrators can effectively mitigate risks, improve network security, and ensure ongoing protection.

Remediation and Enforcement Methods

FortiNAC offers a range of remediation and enforcement methods to address security risks and vulnerabilities. These methods include policy-based actions like VLAN changes, firewall rules, and access control lists. FortiNAC also enables quarantine zones for isolating compromised devices, preventing further network spread of threats. These strategies help administrators effectively mitigate risks, improve network security, and ensure ongoing protection.

FortiNAC Remediation Policies

FortiNAC remediation policies are a crucial component of its security strategy, enabling administrators to define actions taken against non-compliant or risky devices. These policies can be configured to automatically remediate security issues, such as changing VLANs, blocking access, or quarantining devices. By establishing these policies, organizations can proactively address potential threats and maintain a secure network environment.

FortiNAC Enforcement Actions

FortiNAC enforcement actions are the automated responses triggered by remediation policies. These actions can range from simple actions like changing VLANs to more complex actions like quarantining devices or blocking network access. By implementing these enforcement actions, FortiNAC ensures that security policies are consistently enforced, minimizing the risk of unauthorized access and malicious activity within the network.

FortiNAC Quarantine Zones

FortiNAC quarantine zones serve as isolated network segments where compromised or suspicious devices are placed to prevent them from spreading malware or accessing critical resources. These zones are configurable, allowing administrators to define specific network access restrictions for quarantined devices based on their risk level and security posture. FortiNAC’s quarantine zones provide a robust mechanism for containing threats and mitigating potential security risks within the network.

Stage 6⁚ Monitoring and Reporting

FortiNAC’s robust monitoring and reporting capabilities provide valuable insights into the network’s security posture. Administrators can leverage real-time dashboards and customizable reports to track endpoint compliance, identify potential threats, analyze security trends, and generate audit trails. The platform’s comprehensive reporting features enable informed decision-making, proactive threat mitigation, and compliance with industry regulations.

FortiNAC Monitoring Features

FortiNAC provides real-time visibility into network activity, allowing administrators to monitor endpoint compliance, detect anomalies, and track user behavior. The platform offers a comprehensive suite of monitoring features, including device health checks, security posture assessments, and detailed activity logs. These features empower administrators to proactively identify and address potential security risks, ensuring a robust and secure network environment.

FortiNAC Reporting Capabilities

FortiNAC offers comprehensive reporting capabilities that provide valuable insights into network security posture. These reports cover various aspects, including endpoint compliance, vulnerability assessments, user activity, and security events. Administrators can leverage these reports to identify trends, assess risk levels, and make data-driven decisions to enhance network security and compliance.

FortiNAC Dashboards

FortiNAC provides a set of interactive dashboards that offer real-time visibility into network security status. These dashboards present key performance indicators (KPIs) and visualizations that allow administrators to quickly identify potential security threats, assess endpoint compliance, and monitor network activity. The dashboards are customizable, enabling users to tailor them to their specific needs and security priorities.

FortiNAC Alerts

FortiNAC offers a comprehensive alerting system that notifies administrators of critical security events and network anomalies. These alerts can be configured based on specific conditions, such as endpoint non-compliance, unauthorized device access, or suspicious network traffic patterns. Alerts are delivered through various channels, including email, SMS, and system logs, ensuring prompt notification and rapid response to potential security threats.

rachmaninoff piano concerto no 2 pdf

Rachmaninoff Piano Concerto No. 2⁚ A Masterpiece of Romantic Era

Sergei Rachmaninoff’s Piano Concerto No. 2 in C minor, Op. 18, is a cornerstone of the Romantic era repertoire. This iconic concerto, known for its sweeping melodies, virtuosic piano writing, and emotional depth, has captivated audiences and musicians alike for over a century. The work is readily available for study and performance, with numerous free PDF sheet music versions available online, including arrangements for solo piano, two pianos, and even MIDI files.

Overview of the Concerto

Rachmaninoff’s Piano Concerto No. 2 is a monumental work that showcases the composer’s mastery of orchestral writing and his profound understanding of the piano’s expressive capabilities. The concerto is structured in the traditional three-movement form, with each movement exploring different facets of the work’s emotional landscape. The first movement, “Moderato,” is a brooding and intense exploration of the C minor key, while the second movement, “Adagio Sostenuto,” offers a poignant and lyrical respite in E major. The final movement, “Allegro Scherzando,” returns to C minor, culminating in a triumphant and exhilarating C major coda.

The concerto demands a virtuoso pianist, with its challenging passages requiring exceptional technical skill and musical sensitivity. The piano part is highly idiomatic, taking full advantage of the instrument’s range, color, and dynamic possibilities. Rachmaninoff himself was a renowned pianist, and his concerto reflects his intimate knowledge of the instrument. The orchestral accompaniment is equally impressive, providing a lush and evocative backdrop for the piano’s solo voice. The concerto’s rich orchestration, with its prominent use of strings, woodwinds, and brass, creates a captivating and immersive sonic experience.

Historical Context and Composition

Rachmaninoff composed his Piano Concerto No. 2 in 1901, a pivotal period in his life. He had recently emerged from a deep creative slump, spurred by the success of his first symphony. The concerto’s composition coincided with a time of personal and artistic renewal for the composer. The work was dedicated to his friend and fellow composer, Alexander Glazunov. It was premiered in Moscow in 1901 by the composer himself, with the renowned conductor, Alexander Siloti, leading the orchestra. The concerto’s immediate success cemented Rachmaninoff’s position as a leading figure in the world of classical music.

The concerto’s composition reflects the musical trends of the late Romantic era. The work is imbued with a sense of drama, emotional intensity, and virtuosity, characteristics that were typical of the period. Rachmaninoff’s own personal experiences, including his struggle with depression and his eventual recovery, are also evident in the concerto’s music. The work’s sweeping melodies, its moments of introspection, and its ultimate triumph over adversity reflect the composer’s own journey.

Analysis of the Three Movements

Rachmaninoff’s Piano Concerto No. 2 is structured in three distinct movements, each offering a unique sonic journey⁚

Moderato (C Minor)⁚ The first movement begins with a dramatic and brooding theme, introduced by the orchestra. The piano enters with a series of cascading arpeggios, setting the stage for a powerful and virtuosic dialogue between soloist and orchestra. This movement is characterized by its dramatic contrasts, shifting between lyrical passages and powerful outbursts, culminating in a triumphant and virtuosic coda.

Adagio Sostenuto (E Major)⁚ The second movement is a poignant and introspective interlude, marked by its lyrical melody and expressive harmonies. The piano takes center stage, creating a sense of intimate reflection. This movement is a testament to Rachmaninoff’s ability to evoke a wide range of emotions, from tender longing to profound sadness.

Allegro Scherzando (C Minor ౼ C Major)⁚ The finale is a whirlwind of energy and virtuosity, a brilliant display of Rachmaninoff’s mastery of the piano. The movement alternates between playful scherzo passages and dramatic outbursts, finally resolving in a triumphant and exhilarating coda. This movement is a testament to the concerto’s dazzling virtuosity and its ability to leave the listener breathless.

Moderato (C Minor)

The first movement of Rachmaninoff’s Piano Concerto No. 2, marked “Moderato,” is a dramatic and emotionally charged journey that sets the stage for the entire work. It opens with a brooding and powerful orchestral introduction in C minor, establishing a sense of darkness and tension. The piano then enters, not with a fanfare, but with a series of cascading arpeggios, a signature Rachmaninoff device that creates a sense of both grandeur and intimacy. The interplay between the piano and orchestra is central to this movement, with each taking turns leading the dialogue.

The first theme, introduced by the piano, is a lyrical and soaring melody, full of both longing and hope. This theme is contrasted with a more dramatic and virtuosic second theme, often played with a sense of urgency and intensity. Throughout the movement, Rachmaninoff masterfully employs a range of musical techniques to create a captivating tapestry of sound. There are dramatic shifts in dynamics, from hushed pianissimos to thunderous fortissimos, and the movement builds to a powerful climax, showcasing the virtuosity of both the pianist and the orchestra.

The first movement ends with a triumphant and virtuosic coda, a final flourish that leaves the listener breathless. The closing theme, based on the first theme of the movement, is played with a sense of joyous affirmation, leaving a lasting impression of both power and beauty.

Adagio Sostenuto (E Major)

The second movement of Rachmaninoff’s Piano Concerto No. 2, marked “Adagio Sostenuto” in E major, is a poignant and deeply moving meditation. It stands in stark contrast to the dramatic first movement, offering a moment of respite and reflection. The movement opens with a solo piano introduction, a haunting and melancholic melody that sets the emotional tone for the entire movement. The orchestra joins in, providing a lush and evocative backdrop for the piano’s lyrical outpourings.

The central theme of the movement is a beautiful and soaring melody that seems to express a sense of longing and yearning. Rachmaninoff’s use of chromaticism and subtle harmonic shifts creates a sense of emotional depth and complexity. The interplay between the piano and orchestra is particularly moving, with each instrument complementing the other in a delicate and intimate dialogue. The movement is characterized by its slow tempo and expressive phrasing, allowing the music to unfold with a sense of gravitas and emotional weight.

The second movement reaches its emotional peak in a powerful and moving climax, where the piano and orchestra combine in a breathtaking display of musical virtuosity. The movement then fades away, leaving a lasting impression of beauty and sorrow. The “Adagio Sostenuto” is a testament to Rachmaninoff’s ability to capture the full range of human emotion in music, creating a deeply moving and unforgettable experience for the listener.

Allegro Scherzando (C Minor ‒ C Major)

The finale of Rachmaninoff’s Piano Concerto No. 2, marked “Allegro Scherzando” in C minor, is a whirlwind of energy and virtuosity. This movement is a playful and lighthearted contrast to the preceding two movements, with a sense of joyous exuberance that bursts forth from the opening measures. The music is characterized by its rapid tempo, intricate rhythms, and witty melodic turns, showcasing Rachmaninoff’s mastery of orchestration and his ability to create a sense of dazzling brilliance.

The movement is structured in sonata form, with a clear exposition, development, and recapitulation. The first theme is presented by the orchestra, a lively and energetic motif that is immediately picked up by the piano. The second theme is introduced by the piano, a more lyrical and melodic theme that contrasts with the first theme’s vivacious character. The development section is a masterclass in thematic transformation, with the main themes being fragmented, expanded, and juxtaposed in a dazzling display of musical ingenuity.

The recapitulation brings back the main themes in a triumphant fashion, culminating in a brilliant coda that brings the concerto to a resounding close. Throughout the movement, Rachmaninoff’s use of contrasting textures, dynamic shifts, and unexpected harmonies creates a sense of constant movement and excitement. The “Allegro Scherzando” is a testament to Rachmaninoff’s ability to weave together elements of virtuosity, wit, and sheer musical joy, leaving the listener breathless and exhilarated.

Notable Performances and Recordings

Rachmaninoff’s Piano Concerto No. 2 has been performed and recorded by countless renowned pianists and orchestras throughout history, resulting in a rich tapestry of interpretations that reflect the enduring appeal of this masterpiece. Among the most celebrated recordings of the concerto are those by the composer himself, whose performances capture a unique combination of intimacy and virtuosity. Other notable recordings include those by Vladimir Horowitz, Arthur Rubinstein, and Van Cliburn, each bringing their own distinct style and approach to the work.

The concerto has also been featured in countless films and television programs, further solidifying its place in popular culture. The iconic performance by Van Cliburn at the 1958 Tchaikovsky Competition, which launched his international career, is a testament to the concerto’s power to captivate audiences and inspire generations of musicians. The availability of free sheet music PDFs online has made it easier than ever for aspiring pianists to explore this remarkable work and join the long tradition of musicians who have been inspired by its beauty and brilliance.

The Influence of Rachmaninoff’s Concerto No. 2

Rachmaninoff’s Piano Concerto No. 2 has exerted a profound influence on the world of classical music, inspiring generations of composers, pianists, and audiences. The concerto’s romanticism, virtuosity, and emotional depth have become hallmarks of the genre, shaping the sound and style of countless subsequent works. The concerto’s influence can be seen in the works of composers like Prokofiev, Shostakovich, and even contemporary composers who have drawn upon its melodic and harmonic language.

The concerto’s popularity and accessibility have also had a significant impact on the development of piano pedagogy. The work’s technical challenges have provided countless pianists with opportunities to develop their skills and artistry, while its emotional depth has fostered a deeper understanding of musical expression. The availability of free sheet music PDFs online has made it possible for aspiring pianists around the world to learn and perform this iconic concerto, ensuring its legacy continues to inspire and captivate audiences for years to come.

Availability of Sheet Music and Resources

Thanks to the digital age, accessing sheet music for Rachmaninoff’s Piano Concerto No. 2 has never been easier. Numerous online platforms offer free PDF downloads of the complete score, including arrangements for solo piano, two pianos, and even MIDI files. Websites like IMSLP (International Music Score Library Project) provide readily accessible versions of the concerto, allowing aspiring pianists and seasoned professionals alike to explore and perform this masterpiece.

Beyond sheet music, a wealth of resources is available to further enhance your understanding and appreciation of the concerto. Online forums, blogs, and articles offer insightful analysis, performance tips, and historical context. YouTube channels feature countless recordings by renowned pianists, providing a diverse range of interpretations. Whether you’re a seasoned musician or a curious beginner, the digital landscape offers a wealth of tools to unlock the beauty and complexity of Rachmaninoff’s Piano Concerto No. 2.

Exploring the Concerto’s Legacy

Rachmaninoff’s Piano Concerto No. 2 has left an indelible mark on the musical landscape, transcending generations and inspiring countless artists. Its influence is evident in the countless performances, recordings, and adaptations that continue to emerge. The concerto’s iconic melodies have been incorporated into film scores, popular music, and even video game soundtracks, demonstrating its enduring appeal across diverse genres.

Beyond its musical impact, the concerto has also inspired countless aspiring pianists, serving as a testament to the power of music to connect and inspire. Its technical demands and emotional depth have challenged and rewarded musicians for over a century, fostering a legacy of virtuosity and artistry. The availability of sheet music and resources online ensures that this legacy will continue to flourish, allowing new generations to discover and experience the magic of Rachmaninoff’s masterpiece.

round honeywell thermostat manual

Honeywell Round Thermostat Manual

This manual provides comprehensive information on Honeywell Round Thermostats, covering popular models, setting the temperature, troubleshooting, and where to find additional resources. Whether you’re looking for instructions on the Honeywell Round Heat/Cool Manual Thermostat, the Honeywell Round Wireless Modulation Y87RF Thermostat, or any other Honeywell Round model, this guide will provide the necessary information.

Introduction

Honeywell Round thermostats are renowned for their simplicity, reliability, and widespread use in homes and buildings worldwide. These thermostats offer straightforward temperature control, making them a popular choice for those seeking an easy-to-use and dependable solution for adjusting their indoor comfort. The Honeywell Round thermostat’s design has remained largely unchanged over the years, with its signature circular face and intuitive controls making it instantly recognizable.

This manual serves as a comprehensive guide to understanding and operating Honeywell Round thermostats. It covers a range of popular models, from the classic Round Heat/Cool Manual Thermostat to more advanced options like the Round Wireless Modulation Y87RF Thermostat. Whether you’re a homeowner seeking to adjust your home’s temperature or an installer seeking installation guidance, this manual provides the necessary information.

Throughout this guide, we’ll delve into the features, settings, troubleshooting tips, and additional resources for Honeywell Round thermostats. Our aim is to equip you with the knowledge to confidently operate and maintain your thermostat, ensuring optimal comfort and efficiency in your home or building.

Popular Honeywell Round Thermostats

Honeywell offers a diverse range of Round thermostats, each designed to cater to specific needs and preferences. Here’s a glimpse into some of the most popular models⁚

  • Honeywell Round Heat/Cool Manual Thermostat⁚ This classic model is a staple in millions of homes, renowned for its simplicity and reliability. It features a straightforward design with manual controls for adjusting temperature and switching between heating and cooling modes.
  • Honeywell Round Wireless Modulation Y87RF Thermostat⁚ This advanced model offers wireless control, allowing you to adjust your home’s temperature remotely using a compatible app. It features a digital display and modulation capabilities for precise temperature control.
  • Honeywell T8775A Digital Round Non-Programmable Thermostat⁚ This digital thermostat provides single-stage, non-programmable temperature control for 24 Vac systems. Its simple interface makes it easy to set and adjust the temperature manually.
  • Honeywell T87F Non-Programmable Thermostat⁚ This non-programmable thermostat is designed for straightforward temperature control. It features a simple design and easy-to-use controls for setting the desired temperature.

These are just a few examples of the popular Honeywell Round thermostats available. Each model offers unique features and functionalities to suit various needs. When choosing a Honeywell Round thermostat, consider your desired level of control, budget, and compatibility with your heating and cooling system.

Honeywell Round Heat/Cool Manual Thermostat

The Honeywell Round Heat/Cool Manual Thermostat, often referred to as the CT87N1001, is a timeless classic in the world of home comfort control. This thermostat has earned its place in over 70 million homes and buildings, proving its reliability and ease of use. Its simple, round design seamlessly blends into any décor, making it a popular choice for homeowners seeking a straightforward approach to temperature regulation.

The Honeywell Round Heat/Cool Manual Thermostat provides precise temperature control for both heating and cooling systems. Its manual controls allow users to easily adjust the temperature by simply turning a knob. This thermostat features a mercury-free design, ensuring safe and environmentally friendly operation. Its installation is straightforward, with clear instructions and wiring labels for a hassle-free setup.

While the Honeywell Round Heat/Cool Manual Thermostat lacks advanced features like programmability or remote control, it excels in its simplicity and reliability. It’s a perfect choice for homeowners who value ease of use and prefer a hands-on approach to managing their home’s temperature. Its long-standing popularity speaks volumes about its effectiveness and enduring appeal.

Honeywell Round Wireless Modulation Y87RF Thermostat

The Honeywell Round Wireless Modulation Y87RF Thermostat brings a touch of modern convenience to the classic round design. This thermostat combines the familiar look of the traditional round thermostat with the added benefit of wireless communication, offering greater flexibility and control. The Y87RF model is a single-zone thermostat, providing temperature regulation for a single area of your home.

One of the key features of the Honeywell Round Wireless Modulation Y87RF Thermostat is its ability to communicate wirelessly with your HVAC system. This eliminates the need for complex wiring, simplifying installation and allowing you to place the thermostat in a location that is convenient for you. The thermostat also includes a battery backup system, ensuring continued operation even during power outages.

The Y87RF model boasts a user-friendly LCD display that provides clear and concise information about the current temperature, set point, and system status. Its intuitive controls make it easy to adjust the temperature and select the desired heating or cooling mode. While it doesn’t offer advanced features like programmability or remote control via smartphone, the Honeywell Round Wireless Modulation Y87RF Thermostat provides a reliable and convenient solution for those seeking a wireless upgrade to their traditional round thermostat.

Honeywell T8775A Digital Round Non-Programmable Thermostat

The Honeywell T8775A Digital Round Non-Programmable Thermostat provides a simple and reliable solution for controlling the temperature in your home. This thermostat is designed for single-stage, non-programmable temperature control, making it an excellent choice for those who prefer a straightforward approach to managing their HVAC system. The T8775A is compatible with 24 Vac systems and offers manual changeover from heat to cool, allowing you to easily switch between modes as needed.

One of the key advantages of the Honeywell T8775A is its ease of installation. The thermostat is designed to be user-friendly, with a straightforward wiring process that can be completed quickly and efficiently. Its compact and classic round design blends seamlessly with most home décor styles, adding a touch of elegance to your space. The thermostat also features a clear and legible display, ensuring that you can easily read the temperature settings and system status.

While the T8775A doesn’t offer advanced features such as programmability or remote control, it provides a reliable and cost-effective option for controlling your HVAC system. Its simple operation and user-friendly interface make it a suitable choice for those looking for a basic and reliable thermostat to manage their home’s temperature.

Honeywell T87F Non-Programmable Thermostat

The Honeywell T87F Non-Programmable Thermostat is a reliable and straightforward solution for controlling your heating system. This thermostat is designed for simple, non-programmable temperature control, making it a practical choice for those who prefer a basic and user-friendly approach to managing their home’s temperature. The T87F is compatible with a range of heating systems, including forced air, hydronic, and electric baseboard, providing versatility for various home setups.

Installation of the Honeywell T87F is relatively simple, with clear instructions and straightforward wiring connections. The thermostat features a classic round design that seamlessly integrates with most home décor styles, adding a touch of elegance to your living space. The T87F’s display is clear and legible, allowing you to easily read the temperature settings and system status. Its simple operation and user-friendly interface ensure a straightforward experience for managing your home’s heating system.

While the T87F lacks advanced features such as programmability or remote control, it excels in its simplicity and reliability. It’s a cost-effective option for those who prioritize a basic and easy-to-use thermostat for controlling their home’s heating system. The T87F offers a straightforward and reliable solution for maintaining a comfortable temperature in your home.

Setting the Temperature on a Honeywell Round Thermostat

Adjusting the temperature on a Honeywell Round Thermostat is a simple process, even for those unfamiliar with thermostats. The user-friendly design makes it easy to control your home’s temperature with minimal effort. To adjust the temperature, locate the up and down buttons on the thermostat. Pressing the up button will increase the temperature, while pressing the down button will decrease it. The current temperature will be displayed on the thermostat, allowing you to monitor the changes you make.

The temperature you set will remain active until you change it again. This straightforward approach ensures that you can easily maintain your desired temperature without the need for complex programming or settings. Once you’ve set the desired temperature, the thermostat will automatically regulate your heating or cooling system to maintain that temperature. The thermostat will switch on the heating or cooling system as needed to keep your home comfortable, allowing you to relax and enjoy a consistent temperature.

In addition to adjusting the temperature, some Honeywell Round Thermostats may also include a fan setting. This allows you to manually control the fan to circulate air throughout your home even when the heating or cooling system is not active. This can be useful for improving air circulation and reducing humidity. Consult the manual for your specific thermostat model for detailed instructions on using the fan setting.

Troubleshooting

While Honeywell Round Thermostats are generally reliable, occasional issues may arise. Here are some common problems and troubleshooting steps⁚

Thermostat Not Turning On⁚ Check the power supply to the thermostat. Ensure the circuit breaker is not tripped and that the thermostat is receiving power. If the power is on, check for loose wires or a faulty thermostat.

Thermostat Not Responding⁚ Try replacing the batteries if the thermostat is battery-powered. Ensure the batteries are properly inserted and have sufficient charge. If the thermostat is wired, check for loose connections or a faulty wiring system.

Thermostat Not Reaching Desired Temperature⁚ Verify that the heating or cooling system is functioning correctly. Ensure that the furnace or air conditioner is running and that the air filters are clean. Check for any obstructions in the air vents or ductwork.

Thermostat Display Is Blank or Faded⁚ Check the thermostat’s power supply. If the display is blank, it might indicate a power issue. If the display is faded, the backlight might need replacement.

Thermostat Showing Error Codes⁚ Consult your thermostat’s manual for a list of error codes and their meanings. The manual will provide troubleshooting steps for specific errors.

If you are unable to resolve the issue, it’s recommended to contact a qualified HVAC technician for assistance. They can diagnose and repair any underlying problems with the thermostat or your HVAC system.

Where to Find Honeywell Thermostat Manuals

Finding the right manual for your Honeywell Round Thermostat is crucial for understanding its features, settings, and troubleshooting tips. Fortunately, there are several reliable sources you can access⁚

Honeywell Website⁚ The official Honeywell Home website is an excellent starting point. Navigate to their “Thermostats” section and search for your specific model number. You’ll likely find a downloadable PDF manual containing comprehensive information.

Thermostat.guide⁚ This website offers a vast collection of Honeywell thermostat manuals, including those for various Round models. You can easily search by model number to access the required manual.

Resideo.com⁚ Resideo is the parent company of Honeywell Home. Their website also houses a range of thermostat manuals, including those for Round models.

Amazon Product Pages⁚ If you purchased your Honeywell Round Thermostat from Amazon, the product page often includes a link to the user manual.

Google Search⁚ A simple Google search using your thermostat model number and “manual” will likely yield relevant results, including links to manufacturers’ websites or other online repositories of manuals.

Remember to ensure that the manual you download matches the specific model of your Honeywell Round Thermostat to avoid confusion and ensure you’re getting the correct information.

Honeywell Round Thermostats have earned a reputation for reliability and ease of use, making them popular choices for homeowners seeking simple temperature control. Whether you’re dealing with a manual or a wireless model, understanding the basics of operation and troubleshooting is essential for maximizing comfort and energy efficiency.

This manual has provided a comprehensive overview of popular Honeywell Round Thermostat models, their features, and how to set them up. From adjusting the temperature to addressing common issues, you now have the tools to manage your thermostat effectively.

Remember, if you encounter any problems or require more detailed information, refer to the official Honeywell website or other trusted online resources for specific model manuals. With the right guidance, your Honeywell Round Thermostat can provide years of reliable and comfortable temperature control for your home.

song for a rainy morning pdf

Song for a Rainy Morning⁚ A Guide to the Popular Acoustic Tune

This guide explores the popular acoustic tune “Song for a Rainy Morning” by Tommy Emmanuel, a renowned Australian guitarist. We’ll delve into its musical style, structure, and popularity. You’ll find resources for sheet music and tabs, and discover how to learn to play this beautiful and evocative song. This guide also provides a look at other rainy day songs and resources for finding more sheet music for these songs.

Introduction

There’s a certain magic to rainy mornings. The soft pitter-patter of raindrops, the hushed atmosphere, and the cozy feeling of being indoors create a perfect setting for introspection and relaxation. And what better soundtrack to accompany this mood than a gentle, evocative acoustic tune? Enter Tommy Emmanuel’s “Song for a Rainy Morning,” a piece that has captured the hearts of guitar enthusiasts and music lovers alike. This song, with its simple yet profound melody, has become a staple for rainy day playlists and a cherished piece for guitarists of all skill levels.

This guide serves as a comprehensive exploration of “Song for a Rainy Morning,” guiding you through its musical journey, its structure, and its popularity. We’ll uncover resources for sheet music and tabs, making it easy for you to learn to play this beautiful piece. Additionally, we’ll delve into other rainy day songs and resources for finding more sheet music, expanding your repertoire of music for those cozy, rainy days.

Whether you’re a seasoned guitarist or a beginner looking for a new challenge, “Song for a Rainy Morning” offers a rewarding experience. Join us as we unravel the magic of this popular acoustic tune and embark on a journey of musical discovery.

Tommy Emmanuel’s “Song for a Rainy Morning”

“Song for a Rainy Morning” is a masterpiece crafted by the renowned Australian guitarist Tommy Emmanuel. Known for his virtuosic fingerstyle technique and captivating melodies, Emmanuel has garnered a devoted following worldwide. This particular piece, a testament to his talent, showcases his ability to evoke emotion through simple, yet profound musicality.

The song’s origins lie within Emmanuel’s album “The Best of TommySongs,” released in 2008. It’s a piece that has resonated deeply with listeners, capturing the essence of rainy day serenity. The melody, with its gentle rise and fall, evokes a sense of contemplation and tranquility. Emmanuel’s guitar work is masterful, showcasing his intricate fingerpicking patterns and the soulful resonance of his instrument.

“Song for a Rainy Morning” is not just a song; it’s an experience. It invites listeners to pause, reflect, and savor the beauty of a rainy day. The song’s popularity is a testament to Emmanuel’s musical prowess and his ability to connect with audiences on an emotional level. It’s a piece that has found its place in the hearts of countless music lovers, becoming a beloved staple for rainy day listening.

Musical Style and Structure

“Song for a Rainy Morning” is a testament to Tommy Emmanuel’s signature fingerstyle guitar playing. The song is characterized by its delicate and expressive melody, delivered through a combination of intricate fingerpicking patterns and carefully chosen chord voicings. Emmanuel’s playing is often described as “conversational” – he engages with the instrument as if it were a friend, drawing out its full range of emotional expression. The song is structured in a simple yet effective manner, with a repeating verse and chorus that allows for a sense of familiarity and comfort, while also providing space for subtle variations and improvisational flourishes.

The song’s key is A major, lending itself to a bright and uplifting feel. It’s played in standard tuning, with the use of open strings adding a sense of resonance and depth. The melody is primarily in the higher register of the guitar, creating a sense of airy lightness. The use of dynamics is key to the song’s emotional impact. Emmanuel alternates between delicate passages and more forceful phrases, creating a feeling of ebb and flow that mirrors the unpredictable nature of a rainy morning. The song’s overall tempo is relatively slow, allowing the listener to fully appreciate the beauty and intricacy of Emmanuel’s playing.

“Song for a Rainy Morning” is a prime example of Emmanuel’s ability to create a captivating musical experience through simplicity and artistry. The song’s delicate melody, intricate fingerpicking patterns, and carefully constructed structure all contribute to its lasting appeal.

Sheet Music and Resources

For guitarists looking to learn “Song for a Rainy Morning,” there are a variety of resources available online and in print. One of the most popular sources for sheet music is the website “Your Guitar World,” which offers a detailed tab of the song. This tab includes all the necessary information for playing the song accurately, including the fingerpicking patterns, chord voicings, and rhythmic details. It’s a comprehensive guide for guitarists of all levels, with clear and concise notation. Additionally, “Song for a Rainy Morning” can be found in Tommy Emmanuel’s “Best of TommySongs” album, which is available in both physical and digital formats. This album includes the full score of the song, providing a more traditional sheet music experience.

For those who prefer a more visual learning experience, there are also several YouTube videos available that demonstrate how to play the song. These videos typically include a combination of close-up shots of the guitarist’s hands, as well as diagrams of the fingerpicking patterns and chord voicings. Some videos also feature explanations of the song’s musical structure and history. Many online resources also provide downloadable PDF files of the sheet music for “Song for a Rainy Morning,” making it convenient for guitarists to print out and practice with.

Whether you prefer a traditional sheet music approach or a more interactive learning experience, there are plenty of resources available to help you learn this beautiful and evocative song.

The Popularity of the Song

Tommy Emmanuel’s “Song for a Rainy Morning” has resonated with guitarists and music lovers worldwide, earning its place as a cherished acoustic tune. Its popularity can be attributed to several factors. The song’s evocative title and gentle melody create a soothing atmosphere, ideal for a rainy day. The simple yet effective chord progression and lyrical fingerpicking patterns make it accessible to guitarists of all levels. The song’s structure is both captivating and familiar, with recurring themes and variations that keep listeners engaged.

Emmanuel’s masterful guitar technique adds another layer of appeal to the song; His intricate fingerpicking, precise timing, and expressive phrasing bring the melody to life. The song’s popularity is further enhanced by its emotional depth. The lyrical melody and gentle phrasing evoke a sense of nostalgia and longing, drawing listeners into the song’s intimate world. Many have found solace and connection in the song’s melancholic yet hopeful atmosphere. “Song for a Rainy Morning” has also been widely shared and enjoyed online, with numerous YouTube videos and social media posts dedicated to the song.

Whether through its relatable themes, captivating melody, or Emmanuel’s masterful guitar work, “Song for a Rainy Morning” has captured the hearts of many, making it a timeless and beloved acoustic tune.

Other Rainy Day Songs

While “Song for a Rainy Morning” is a popular choice for a rainy day, numerous other songs capture the essence of a rainy day mood. Some well-known examples include⁚

  • “Here Comes the Sun” by The Beatles⁚ This classic tune is a perfect antidote to a gloomy rainy day. The upbeat melody and optimistic lyrics evoke a sense of hope and warmth.
  • “Rainy Days and Mondays” by The Carpenters⁚ This melancholic yet comforting ballad perfectly captures the feeling of a rainy day blues. Karen Carpenter’s soulful vocals and the song’s gentle melody create a wistful and relatable atmosphere.
  • “I Hear Thunder” by The Garden of Words⁚ This instrumental piece, featured in the 2013 anime film “The Garden of Words,” is a beautiful and evocative composition that perfectly captures the sounds and moods of a rainy day.
  • “Ain’t No Sunshine” by Bill Withers⁚ This soulful ballad is a classic rainy day song. The lyrics express the feeling of loneliness and isolation that can come with a rainy day.
  • “Hallelujah” by Leonard Cohen⁚ This timeless song, with its melancholic melody and poetic lyrics, is a powerful and moving anthem about hope and redemption. It’s a perfect choice for a rainy day when you’re seeking solace and reflection.

These are just a few examples of the many songs that capture the mood of a rainy day. Whether you prefer upbeat melodies or melancholic ballads, there’s a song out there to soundtrack your next rainy day.

Sheet Music Resources for Rainy Day Songs

If you’re looking to expand your rainy day playlist beyond “Song for a Rainy Morning,” there are numerous online resources for finding sheet music for a wide variety of rainy day tunes. Here are a few popular options⁚

  • NinSheetMusic.org⁚ This website specializes in sheet music for video game soundtracks, including the “A Rainy Morning” theme from “The Garden of Words.” You can find sheet music for piano, guitar, flute, and other instruments.
  • MuseScore⁚ This platform offers a vast library of free sheet music, including arrangements for popular rainy day songs. You can search by title, artist, or genre to find the perfect song for your rainy day mood.
  • 8notes.com⁚ This site offers a diverse selection of sheet music, including arrangements for piano, guitar, and other instruments. You can find both classic and contemporary rainy day songs.
  • Sheet Music Plus⁚ This website offers a vast collection of sheet music for a wide range of instruments and genres, including numerous rainy day songs. You can browse by title, artist, or instrument to find the perfect piece.
  • Musicnotes.com⁚ This website offers a wide selection of sheet music for a variety of instruments and genres. You can find both free and paid sheet music, including arrangements for popular rainy day songs.

These resources can help you find the perfect sheet music for your next rainy day listening session. You can either download the sheet music for free or purchase it for a small fee.

The “Song for a Rainy Morning” Tab

For guitarists eager to learn “Song for a Rainy Morning,” finding a reliable tab is essential. A tab is a form of musical notation specifically designed for guitar, showing the fret positions and strumming patterns. Here are some places to find tabs for “Song for a Rainy Morning”⁚

  • Ultimate Guitar⁚ This website is a treasure trove of guitar tabs, including many for Tommy Emmanuel’s songs. You can find tabs for “Song for a Rainy Morning” in various versions and styles.
  • Songsterr⁚ Another popular guitar tab website, Songsterr offers a wide selection of tabs, including for “Song for a Rainy Morning.” It features interactive tabs with audio playback and the ability to adjust the tempo.
  • Tommy Emmanuel’s Website⁚ While Tommy Emmanuel doesn’t provide free tabs directly on his website, you might find links to tabs or resources on his official page.
  • Guitar Pro⁚ This software program is popular among guitarists for its tab editing and playback features. You can find tabs for “Song for a Rainy Morning” in various formats and levels of difficulty.
  • Patreon⁚ Many guitar teachers and musicians offer online lessons and resources through Patreon. You might find a “Song for a Rainy Morning” tab or tutorial within these platforms.

Remember, tabs can vary in accuracy and quality. It’s often helpful to cross-reference tabs from multiple sources to ensure you’re learning the song correctly.

Learning to Play “Song for a Rainy Morning”

Learning to play “Song for a Rainy Morning” on the guitar can be a rewarding experience. The song’s beautiful melody and fingerstyle techniques offer a challenge and a sense of accomplishment. Here are some tips and resources to help you learn this popular tune⁚

  • Start with the Basics⁚ If you’re new to fingerstyle guitar, it’s essential to master the basics. Practice picking patterns, finger exercises, and basic chords.
  • Break Down the Song⁚ Instead of attempting the entire song at once, break it down into sections. Learn individual phrases, chords, and picking patterns before putting them together.
  • Use a Tab and a Video⁚ Combining a tab with a video tutorial can be very effective. The tab shows you the finger positions, while the video demonstrates the picking patterns and timing.
  • Practice Slowly and Gradually Increase Speed⁚ Focus on accuracy and clarity at a slow tempo. Gradually increase the speed as you become more comfortable with the song.
  • Listen to the Recording⁚ Pay close attention to the original recording of “Song for a Rainy Morning” by Tommy Emmanuel. Notice his phrasing, dynamics, and overall feel.
  • Record Yourself⁚ Recording your practice sessions can help you identify areas where you need to improve. You can listen back and spot mistakes in timing, rhythm, or fingerpicking.
  • Find a Teacher⁚ If you’re serious about learning fingerstyle guitar, consider taking lessons from a qualified teacher. They can provide personalized guidance and feedback.

Remember, learning guitar takes time and dedication. Be patient, practice consistently, and enjoy the process of mastering this beautiful song.

“Song for a Rainy Morning” by Tommy Emmanuel is a timeless masterpiece that captures the essence of a rainy day. Its gentle melody, intricate fingerstyle arrangements, and evocative lyrics make it a beloved piece among guitarists and music enthusiasts alike. Whether you’re a seasoned musician or just starting your guitar journey, this song offers a beautiful and challenging learning experience.

By exploring the song’s structure, musical style, and resources for sheet music and tabs, you can gain a deeper appreciation for its artistry. Learning to play “Song for a Rainy Morning” is a rewarding endeavor that will enhance your guitar skills and provide hours of musical enjoyment.

The song’s popularity is a testament to its enduring appeal and the talent of its composer, Tommy Emmanuel. It has become a staple in acoustic guitar repertoire, inspiring countless guitarists to explore the world of fingerstyle guitar.

So, grab your guitar, find a rainy day, and embark on your own journey to master “Song for a Rainy Morning.” You might just discover a new favorite song and a newfound love for the magic of acoustic guitar.