Understanding the Threat Landscape
Roadrunners should prioritize personal safety, increasing awareness to lessen victimization opportunities; vigilance during social events, like December brings, is crucial for crime prevention.
Common Motives for Violent Crime
Understanding the ‘why’ behind violent acts is a cornerstone of prevention. While motives are complex, several frequently emerge. Financial gain often drives crimes like robbery, where perpetrators seek quick access to valuables. Personal disputes, fueled by anger or revenge, can escalate into assault or even homicide. The influence of alcohol and drugs frequently lowers inhibitions and increases impulsivity, contributing to violent encounters.
Furthermore, crimes of passion, stemming from intense emotional turmoil, can lead to unpredictable behavior. Ideological or political extremism, though less common, can motivate targeted violence. Recognizing these underlying motives isn’t about excusing the behavior, but about understanding potential risk factors. Increased awareness during periods of heightened social activity, as noted by the Bermuda Police Service, is particularly important, as opportunities for opportunistic crimes may rise. Ultimately, understanding these drivers empowers individuals to better assess and mitigate potential threats to their safety.
Identifying Potential Predators
While it’s crucial to avoid stereotyping, recognizing behavioral patterns can enhance safety. Predators often exhibit manipulative tendencies, attempting to isolate individuals from their support networks. They may display excessive charm initially, quickly escalating to demands or controlling behavior. Look for inconsistencies in their stories or attempts to quickly gain trust. A disregard for personal boundaries and a history of aggression are significant red flags.
Pay attention to individuals who consistently monitor your movements or appear in places you frequent without a legitimate reason. Online, be wary of those who pressure you for personal information or attempt to move communication offline rapidly. Remember, situational awareness, as emphasized by university police, is key. Trust your instincts; a “gut feeling” that something is off should never be ignored. Reporting suspicious behavior to authorities, even if uncertain, is always a proactive step towards personal safety.
Risk Factors: Who is More Vulnerable?
Certain individuals may face heightened risks, though vulnerability isn’t a defining characteristic. Those who live alone, particularly in isolated areas, can be more susceptible. Students, as highlighted by university police resources, are often targeted due to unfamiliarity with surroundings and potential perceptions of vulnerability. Individuals engaging in risky behaviors, such as substance abuse or walking alone at night, also face increased risk.
Furthermore, those with a history of trauma or mental health challenges may be more easily manipulated. Oversharing personal information online, as warned regarding social media security, can also increase vulnerability. It’s vital to remember that anyone can be a target, and proactive safety measures are essential for everyone. Awareness of these factors isn’t about assigning blame, but about empowering individuals to take appropriate precautions and build strong support networks, as suggested in emergency preparedness guidelines.
Situational Awareness: Your First Line of Defense
Staying alert and aware of surroundings is paramount; the scan, assess, plan cycle, combined with trusting your instincts, significantly reduces risk and enhances personal safety.
The Scan, Assess, Plan Cycle
The Scan, Assess, Plan cycle is a foundational element of situational awareness, crucial for proactively minimizing risk. Scanning involves actively observing your surroundings – people, places, and potential hazards. Don’t be absorbed by your phone; maintain head-up awareness. Assessing means evaluating the potential threats identified during your scan. Consider the likelihood and severity of each risk. Is someone behaving suspiciously? Is the environment poorly lit?
Finally, planning requires formulating a course of action based on your assessment. This could involve altering your route, increasing distance from a potential threat, or preparing to de-escalate a situation. Having a mental plan allows for quicker, more decisive action if needed. Regularly cycling through these three steps – scan, assess, plan – transforms passive observation into proactive safety. Remember, awareness isn’t just about noticing danger; it’s about anticipating and preparing for it, increasing your chances of avoiding a dangerous encounter. This continuous process empowers you to take control of your personal safety.
Recognizing Pre-Attack Indicators
Being able to identify pre-attack indicators can provide crucial seconds – potentially life-saving seconds – to react. These indicators aren’t definitive proof of an impending attack, but they should raise your awareness and prompt you to implement your safety plan. Look for behaviors like staring or prolonged observation, often accompanied by a deliberate approach. Notice individuals who seem to be “casing” the area, repeatedly scanning their surroundings.
Pay attention to verbal cues; aggressive or threatening language, even if not directed at you, can be a warning sign. Physical indicators include clenched fists, rigid body language, and an invasion of personal space. Someone attempting to control your movement or block your escape route is exhibiting a dangerous pre-attack behavior. Trust your intuition; if something feels “off,” it likely is. Don’t dismiss subtle cues. Recognizing these indicators allows you to proactively disengage, seek help, or prepare to defend yourself, significantly increasing your safety.
Trusting Your Intuition: The “Gut Feeling”
Often dismissed, your intuition – that “gut feeling” – is a powerful survival tool honed through years of subconscious observation. It’s your brain processing subtle cues that your conscious mind hasn’t yet registered. If a situation feels wrong, even if you can’t articulate why, trust that feeling. Don’t rationalize it away or feel embarrassed for being cautious.
Ignoring your intuition can have severe consequences. It’s better to be perceived as overly cautious than to ignore a warning sign and become a victim. This applies to people, places, and situations. If someone makes you uncomfortable, remove yourself from their presence. If a route feels unsafe, choose another. Prioritize your safety above politeness or social norms. Your intuition is a valuable asset; listen to it, and act accordingly. It could very well save your life, offering a critical advantage in potentially dangerous scenarios.

Home Security Measures
Reinforce doors and windows, enhance lighting for visibility, and consider a security system; these precautions lessen the likelihood of becoming a victim at home.
Reinforcing Entry Points: Doors and Windows
Securing your home begins with fortifying potential entry points. Doors should be solid core, not hollow, and equipped with a deadbolt lock offering substantial resistance. Consider reinforcing the door frame itself, as a weak frame compromises even the strongest lock.
Windows are equally vulnerable. Ensure all windows have functioning locks and consider adding window security film, which makes glass more shatter-resistant. For ground-floor windows, or those easily accessible, security bars can provide an additional layer of protection.
Regularly inspect all locks and hinges for signs of wear or damage, promptly repairing or replacing them. Don’t forget the often-overlooked sliding glass doors; a simple dowel rod placed in the track can prevent them from being opened from the outside. Maintaining clear visibility around your property also deters potential intruders, so trim bushes and trees that could provide cover;
Lighting and Visibility: Deterring Intruders
A well-lit property is a significant deterrent to potential intruders. Darkness provides cover, while bright illumination exposes them and reduces their confidence. Install motion-sensor lights around your home, focusing on entry points like doors, windows, and driveways. These lights activate when movement is detected, startling potential criminals and alerting you to their presence.
Beyond motion sensors, consider dusk-to-dawn lighting that automatically turns on at night and off during the day. Trim landscaping to eliminate hiding spots near windows and doors, ensuring clear visibility for both you and neighbors. Remove any obstacles that could obstruct views of your property from the street.
Remember, visibility isn’t just about lighting; it’s about removing opportunities for concealment. A well-maintained and visible property sends a clear message: this home is protected and not an easy target.
Home Security Systems: Options and Effectiveness
Investing in a home security system can significantly enhance your protection. Numerous options exist, ranging from basic alarm systems to comprehensive smart home setups. Traditional systems utilize sensors on doors and windows, triggering an alarm and potentially notifying a monitoring center.
Modern smart systems offer features like remote control via smartphone, live video feeds, and integration with other smart devices. Wireless systems are easier to install, while wired systems generally offer greater reliability. Professional monitoring provides 24/7 surveillance and dispatch of emergency services, while self-monitoring puts the responsibility on you.
Effectiveness depends on the system’s quality, proper installation, and consistent use. Regularly test your system and ensure all sensors are functioning correctly. A visible security system sign can also deter potential intruders, signaling that your home is protected.

Personal Safety While Out and About
Stay vigilant, aware of surroundings, and choose safe routes; public transport requires caution, and parking lots demand heightened awareness to minimize risk and stay safe.
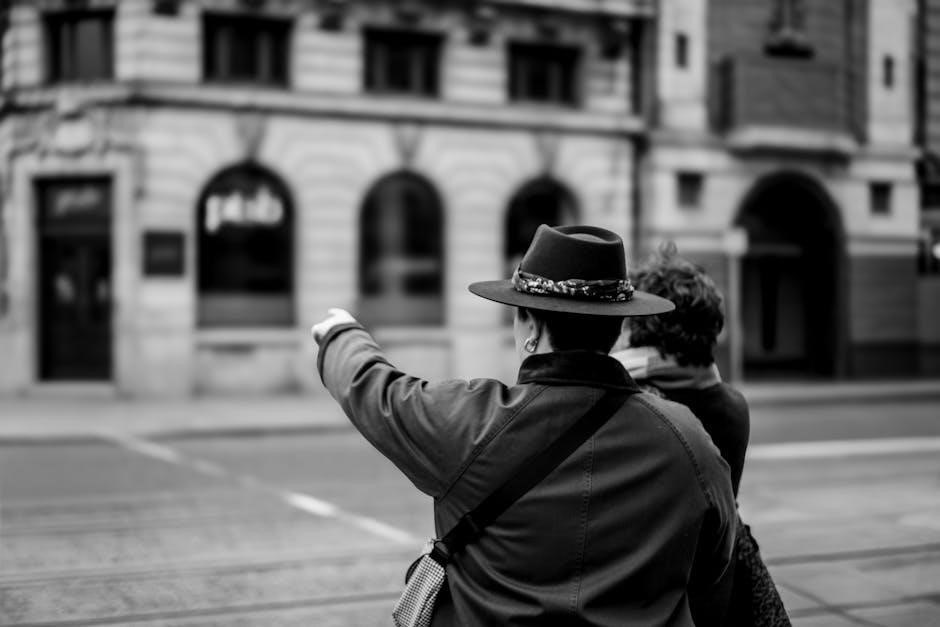
Walking Safely: Routes and Awareness
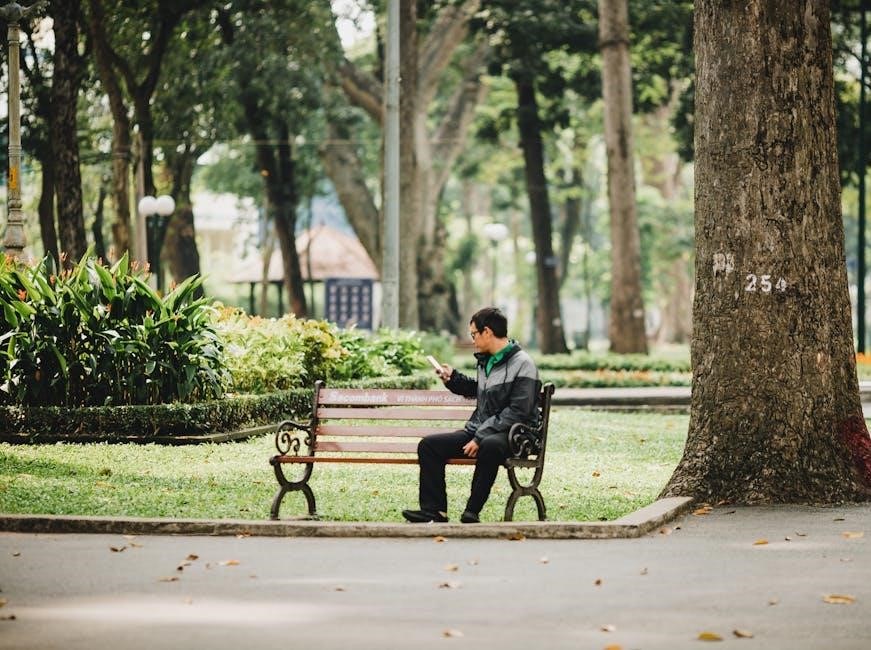
Prioritizing personal safety while walking involves proactive route planning and heightened situational awareness. Opt for well-lit, populated streets, especially during evening or early morning hours. Avoid shortcuts through isolated areas, parks, or alleys, as these can present increased risks. Be mindful of your surroundings – look around, observe people, and notice any unusual activity.
Minimize distractions like cell phone use or listening to music with headphones, as these can impair your ability to perceive potential threats. Walk with confidence, maintaining good posture and making eye contact with others. If you feel uneasy or are being followed, change direction, cross the street, or seek refuge in a well-lit business or public space. Trust your instincts; if a situation feels unsafe, remove yourself from it immediately. Consider walking with a friend or carrying a personal safety device, such as pepper spray, for added protection. Remember, awareness is your greatest asset.
Public Transportation Safety
Utilizing public transportation requires a focused approach to personal safety. When waiting for a bus or train, position yourself in well-lit areas with visible security cameras, and ideally, near other people. Be aware of your surroundings and avoid appearing distracted by your phone or other devices;
Once onboard, choose a seat near the driver or conductor, or in a well-populated area. Avoid empty cars or secluded corners. Keep your belongings secure and within sight, and be cautious of strangers offering unsolicited assistance. If you observe suspicious behavior, report it to a transportation employee or security personnel immediately. Trust your instincts; if a situation feels unsafe, move to a different car or exit at the next stop. Remember, vigilance and proactive awareness are key to a safe journey. Prioritize your safety and report any concerns.
Safe Practices in Parking Lots and Garages
Parking lots and garages present unique safety challenges. Before entering, scan the area for any suspicious individuals or activity. Park as close as possible to your destination, in a well-lit and heavily trafficked area. Always lock your vehicle and activate any alarm systems.
When walking to or from your car, maintain situational awareness. Avoid walking alone, especially at night. Have your keys readily available, and look around before approaching your vehicle. If you notice someone following you, change direction or seek assistance. Once inside your car, lock the doors immediately and check your surroundings before driving away. Be especially cautious during December, when increased commercial activity can attract unwanted attention. Trust your instincts and report anything unusual to security personnel.

Digital Safety and Privacy
Oversharing on social media creates risks; protect personal information online, especially when dating. Manage your “Mi Personal” account and report suspicious activity immediately.
Social Media Security: Oversharing Risks
The digital world presents unique vulnerabilities. Excessive sharing on platforms like Facebook, Instagram, and X (formerly Twitter) can inadvertently reveal crucial information to potential predators. Avoid posting real-time location updates, detailed vacation plans, or specifics about your daily routine. Criminals actively monitor social media for opportunities, and seemingly harmless posts can be pieced together to create a profile of your habits and vulnerabilities.

Consider privacy settings carefully, limiting access to your profile to trusted contacts. Be cautious about accepting friend requests from strangers. Regularly review and remove older posts that may contain sensitive information. Remember that even deleted content may be archived or screenshot. “Mi Personal” and similar account management tools require strong passwords and vigilant monitoring for unauthorized access. Protecting your digital footprint is a vital component of overall personal safety, reducing the risk of becoming a target.
Think before you post – could this information be used against you or someone you care about?
Online Dating Safety Precautions
Online dating, while offering connection, carries inherent risks. Prioritize safety by thoroughly vetting potential dates before meeting in person. Utilize platform features to verify profiles and report suspicious activity. Initial communication should occur within the app or website, avoiding sharing personal contact information prematurely. Be wary of individuals who quickly profess strong feelings or attempt to isolate you from friends and family.

Always meet in a public place for the first few dates, informing a friend or family member of your plans, including the date’s identity and location. Consider using a check-in system with a trusted contact. Trust your intuition; if something feels off, end the date and leave. Avoid accepting rides from your date or inviting them to your home until you’ve established a strong level of trust. “Mi Cuenta Personal”-style security applies here – protect your information and be discerning.
Remember, your safety is paramount. Don’t hesitate to prioritize it.
Protecting Your Personal Information
Safeguarding your personal information is a cornerstone of self-protection. Limit the details you share online, particularly on social media – avoid “oversharing risks”. Be cautious about clicking on suspicious links or downloading attachments from unknown sources. Regularly review and adjust the privacy settings on your online accounts, restricting access to sensitive data. Utilize strong, unique passwords for each account, and consider a password manager for secure storage.
Be mindful of phishing attempts, where individuals try to trick you into revealing personal information. Legitimate organizations will rarely request sensitive data via email or text message. “Mi Personal”-like platforms emphasize secure account management; apply this principle broadly. Regularly monitor your credit report for any unauthorized activity. Shred documents containing personal information before discarding them.
Remember, proactive information protection significantly reduces your vulnerability to identity theft and potential harm. Vigilance is key.

Responding to a Threat
De-escalation techniques and self-defense basics are vital; assess if running is the best option, or if fighting becomes unavoidable for survival and safety.
Verbal De-escalation Techniques
When facing a potential aggressor, your initial response can significantly impact the situation’s outcome. Verbal de-escalation aims to diffuse tension and avoid physical confrontation, prioritizing your safety. Maintain a calm and respectful tone, even if provoked; mirroring the aggressor’s energy can escalate things.
Speak slowly and clearly, using simple language. Avoid accusatory statements or language that implies judgment. Instead, focus on expressing your feelings and needs assertively, but not aggressively. For example, instead of saying “You’re making me feel unsafe,” try “I feel uncomfortable with your proximity.”
Active listening is crucial – truly hear what the other person is saying, and acknowledge their feelings, even if you don’t agree with them. Ask open-ended questions to understand their perspective. Creating space, both physically and emotionally, can help de-escalate the situation. Remember, the goal isn’t to “win” the argument, but to safely navigate a potentially dangerous encounter.
Physical Self-Defense Basics
While verbal de-escalation is the preferred approach, knowing basic physical self-defense can be crucial if you are physically threatened. These techniques aren’t about becoming a fighter, but about creating an opportunity to escape to safety. Focus on vulnerable areas: the eyes, nose, throat, and groin.
A strong, assertive stance can deter an attacker. Keep your hands up in a defensive posture, and maintain eye contact. Simple techniques like palm heel strikes to the nose, elbow strikes to the face, or knee strikes to the groin can create enough space to run.
Remember, the goal isn’t to engage in a prolonged fight, but to disrupt the attack long enough to escape. Practice these techniques with a qualified instructor to build muscle memory and confidence. Consider carrying a personal safety alarm or a whistle to attract attention and potentially deter an attacker. Prioritize escape and calling for help immediately after creating an opening.
When to Run, When to Fight
Assessing the situation is paramount. Generally, running is the best option if a clear escape path exists. Don’t hesitate; move quickly and decisively towards safety, even if it means abandoning belongings. Shout for help as you run to attract attention and potentially deter the attacker.
Fighting should be reserved as a last resort when escape is impossible and your life is in imminent danger. If cornered, use any available object as a weapon – keys, a bag, even a pen – to create distance and disrupt the attack. Focus on vulnerable areas, aiming for a quick escape opportunity.
Remember, a prolonged fight significantly increases your risk of injury. If you choose to fight, commit fully and aggressively, but prioritize getting away as soon as possible. Afterwards, report the incident to the authorities and seek medical attention, even if you don’t appear injured.

Emergency Preparedness
Knowing emergency numbers and creating a personal safety plan are vital. Build a support network and utilize resources like the University Police for increased security.
Knowing Emergency Numbers and Services
Immediate access to help during a crisis can be life-saving. Program emergency numbers – 911 in the US, and local equivalents – into your phone, and ensure they are easily accessible even when your screen is locked. Familiarize yourself with non-emergency police contact information for reporting suspicious activity or past incidents.
Beyond 911, understand the services available in your community. This includes local hospital emergency rooms, urgent care centers, and crisis hotlines. Knowing the location of safe places, like police stations or 24-hour businesses, can provide immediate refuge if needed.
The University Police, as highlighted in safety resources, offer specific support and reporting mechanisms. Utilize their services and familiarize yourself with any campus-specific emergency notification systems. Regularly review and update your emergency contacts, ensuring trusted individuals are aware of your whereabouts and can be reached quickly. Proactive preparation significantly enhances your safety and response capabilities.
Creating a Personal Safety Plan
A proactive safety plan is essential for mitigating risk. Begin by identifying potential vulnerabilities in your daily routines – routes you take, places you frequent, and times you are alone. Develop alternative routes and consider varying your schedule to avoid predictability.
Share your plans with trusted friends or family members, letting them know your expected location and return time. Establish a “check-in” system, especially when traveling or engaging in potentially risky activities. Discuss potential scenarios and pre-determine responses with your support network.
Utilize resources like the University Police for safety assessments of your home or workplace. Consider incorporating self-defense training to build confidence and skills. Regularly review and update your plan, adapting it to changing circumstances. Remember, a well-thought-out plan empowers you to react effectively in a crisis, increasing your chances of a safe outcome.
Building a Support Network
A strong support network is a cornerstone of personal safety. Cultivate relationships with individuals you trust – family, friends, neighbors, or colleagues – who can offer assistance and emotional support. Share your safety concerns and plans with them, fostering open communication.
Identify individuals who can act as emergency contacts, knowing who to reach out to in a crisis. Consider forming a neighborhood watch group to enhance collective security and awareness. Participate in community events to build connections and strengthen local bonds.
Remember, relying on others doesn’t diminish your independence; it enhances your resilience. A supportive network provides a sense of belonging and offers practical assistance when needed. Knowing you have people who care and are willing to help can significantly boost your confidence and overall safety, especially during vulnerable moments.